
Overview
This guide explains how to make a transfer to a non-CBD credit card through the iBusiness Web Portal.
The transfer is initiated as a Single Local Transfer, where the credit card number is entered manually and validated before completing the payment.
Step 1: Navigate to Local Transfers
- Log in to iBusiness.
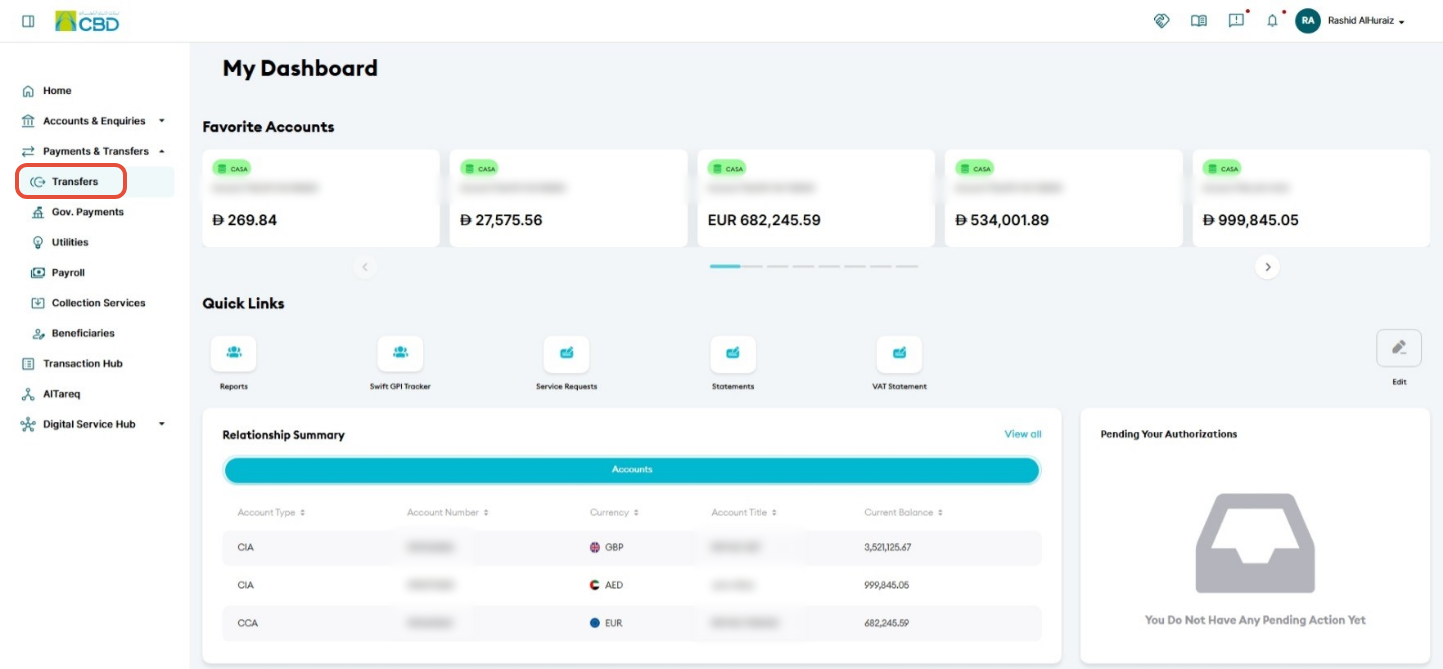
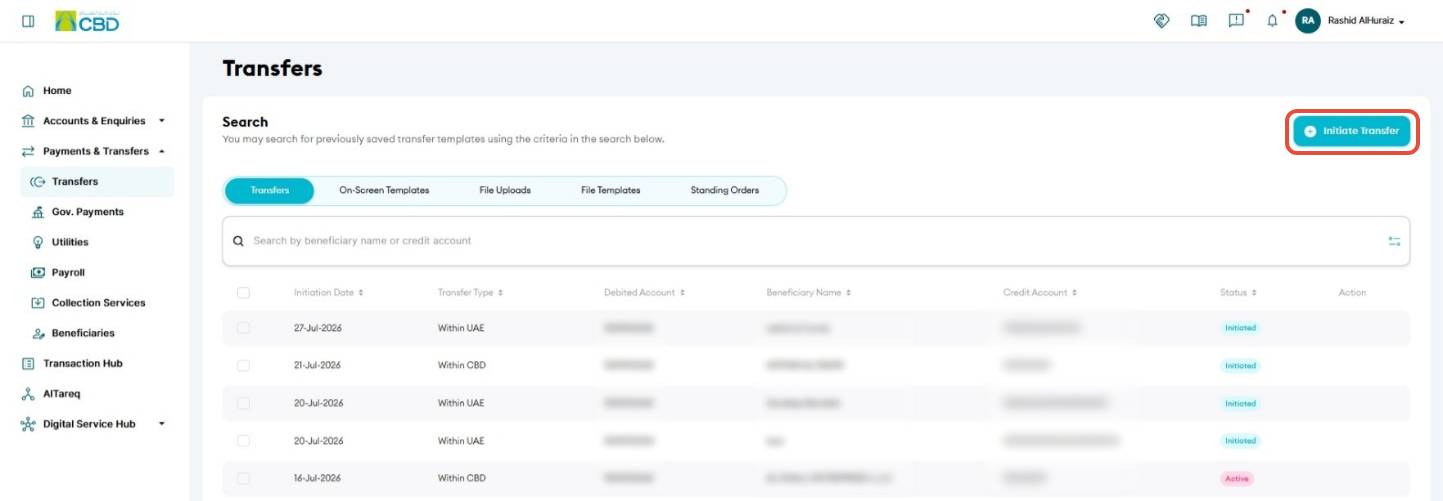
- Navigate to: Payments & Transfers ➜ Transfers ➜ Initiate Transfer
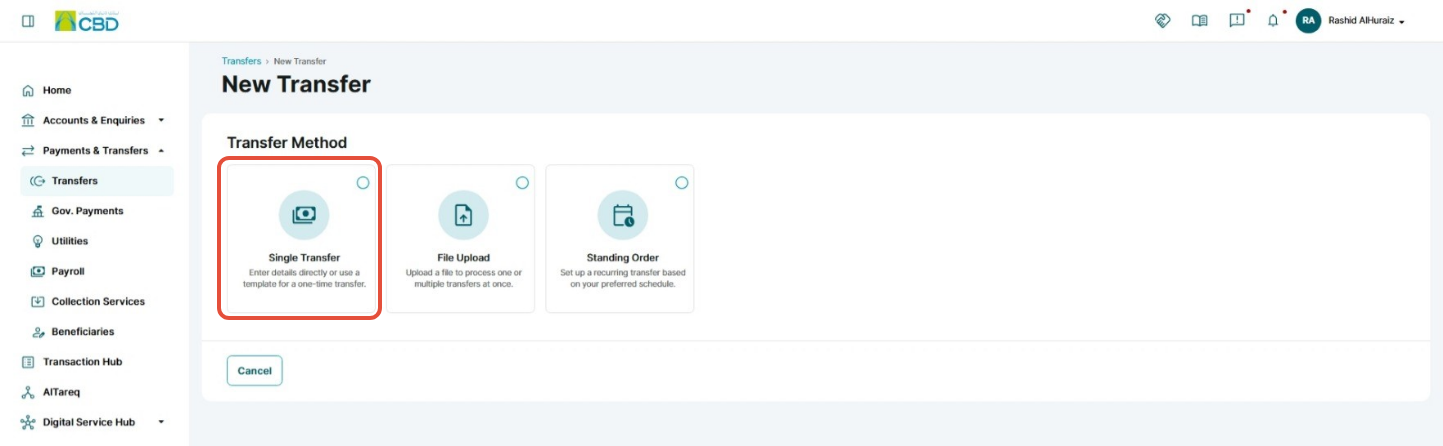
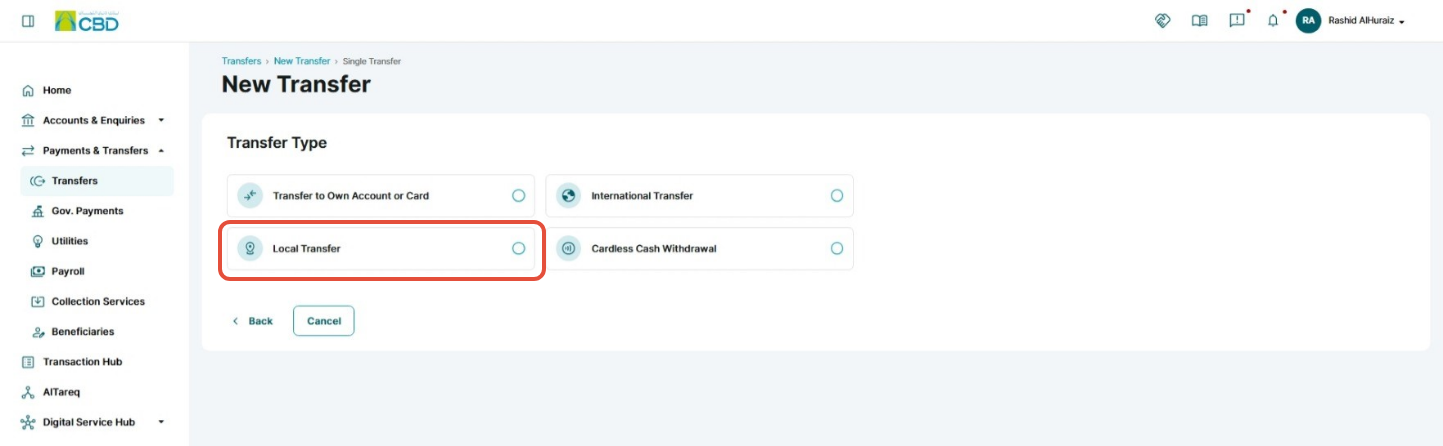
Select: Single Transfer ➜ Local Transfer
Step 2: Enter Beneficiary Details
Since the beneficiary is a non-CBD credit card, the card details must be entered manually.
- Click Enter Details Manually.
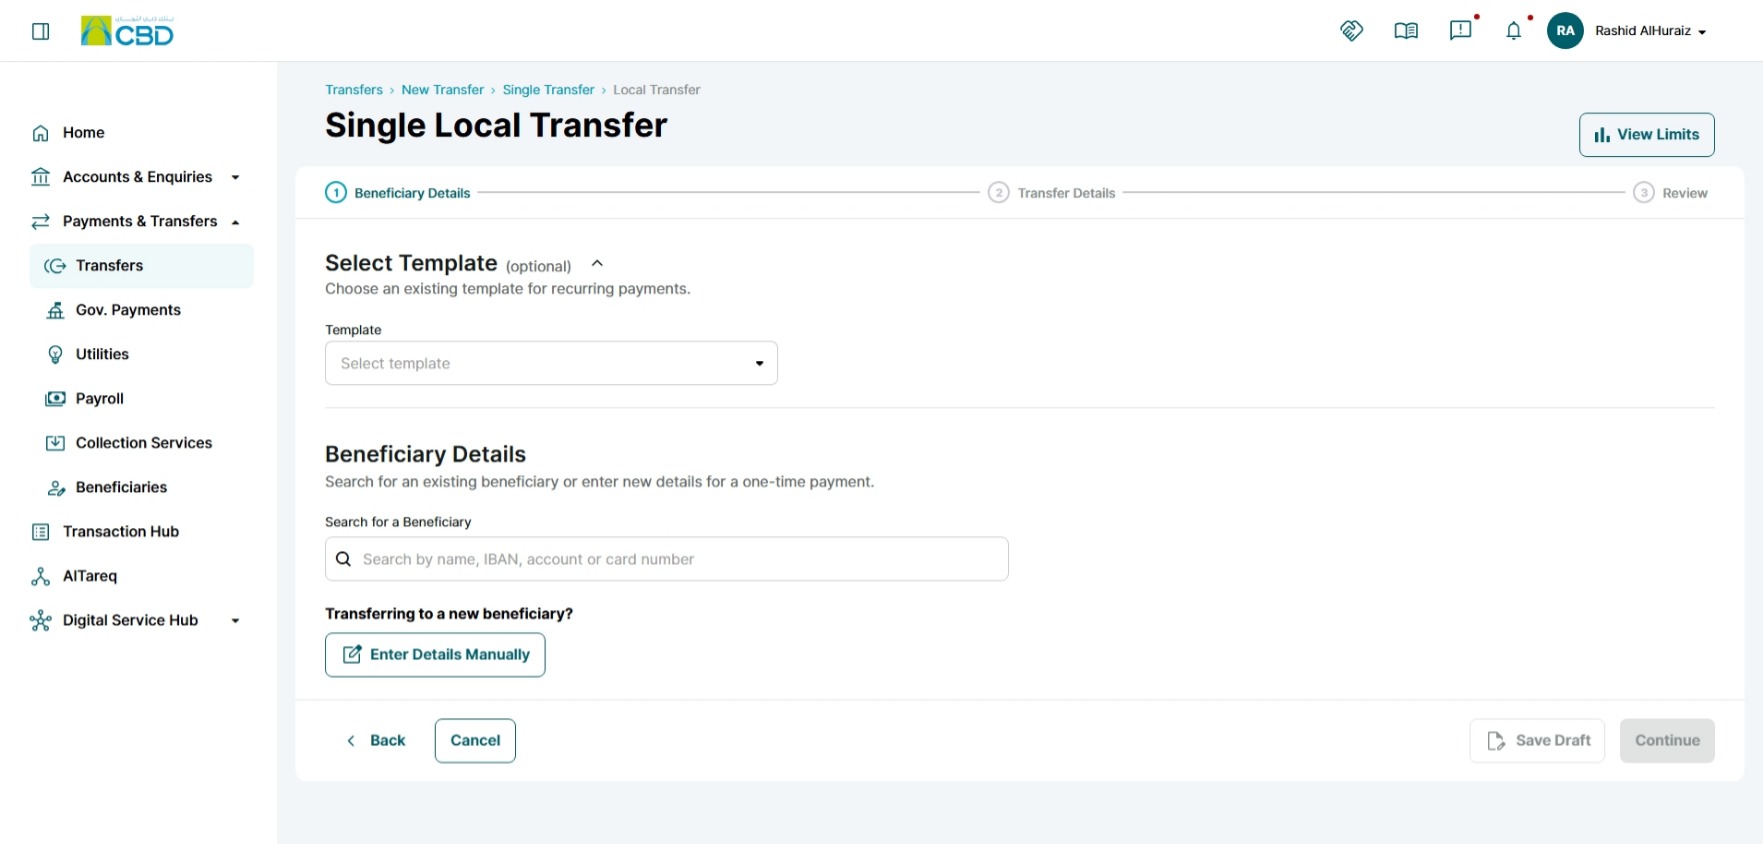
- Enter the beneficiary's Credit Card Number.
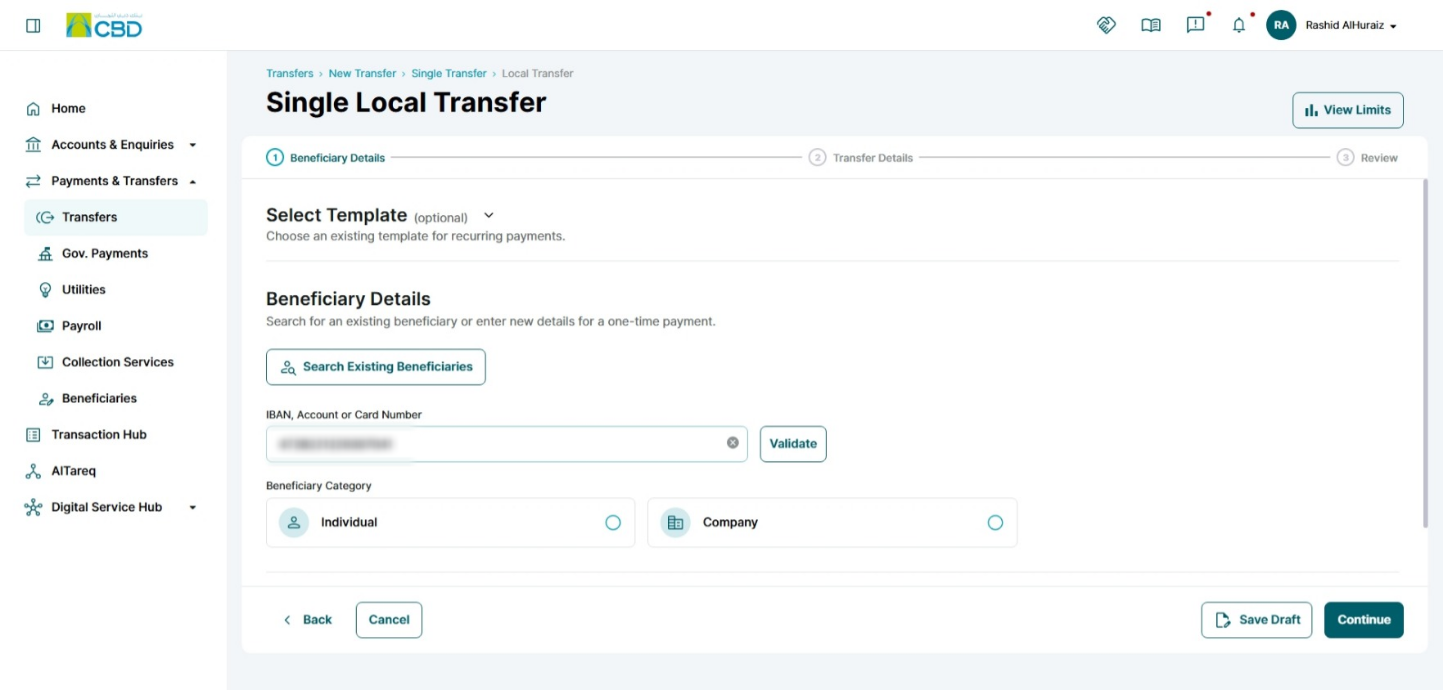
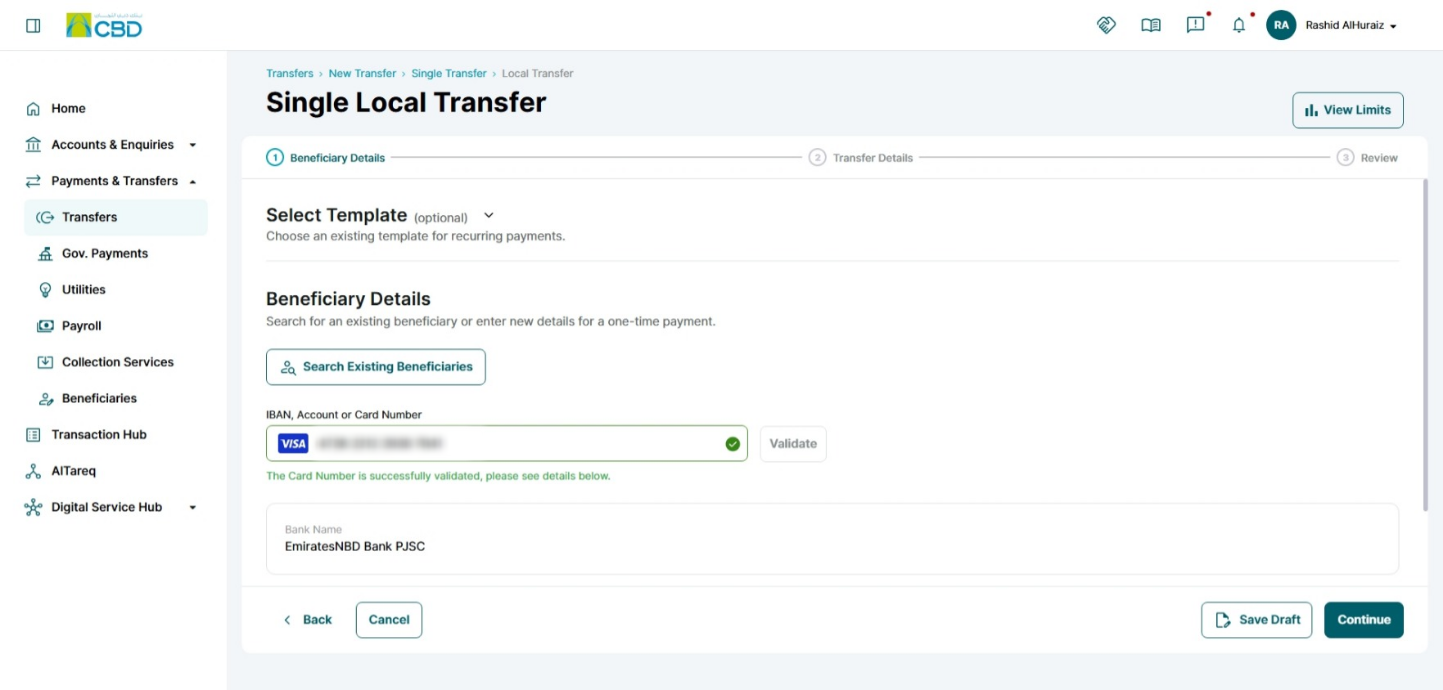
- Click Validate.
- The system will retrieve and display the beneficiary details.
- Review the details carefully and confirm they are correct.
- Enter the Beneficiary Name.
- Click Continue.
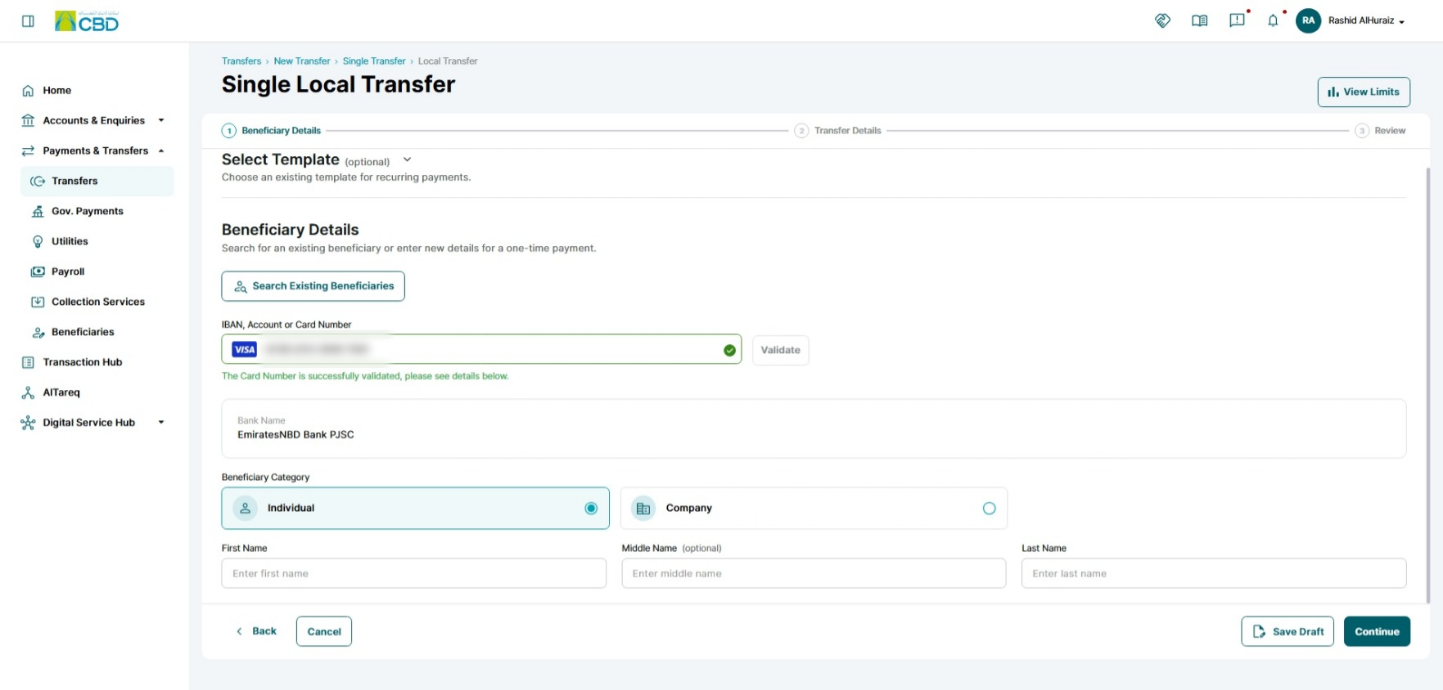
Important: Verify the card number and beneficiary details carefully before proceeding. Incorrect card details may result in delays or unsuccessful processing.
Step 3: Enter Transfer Details
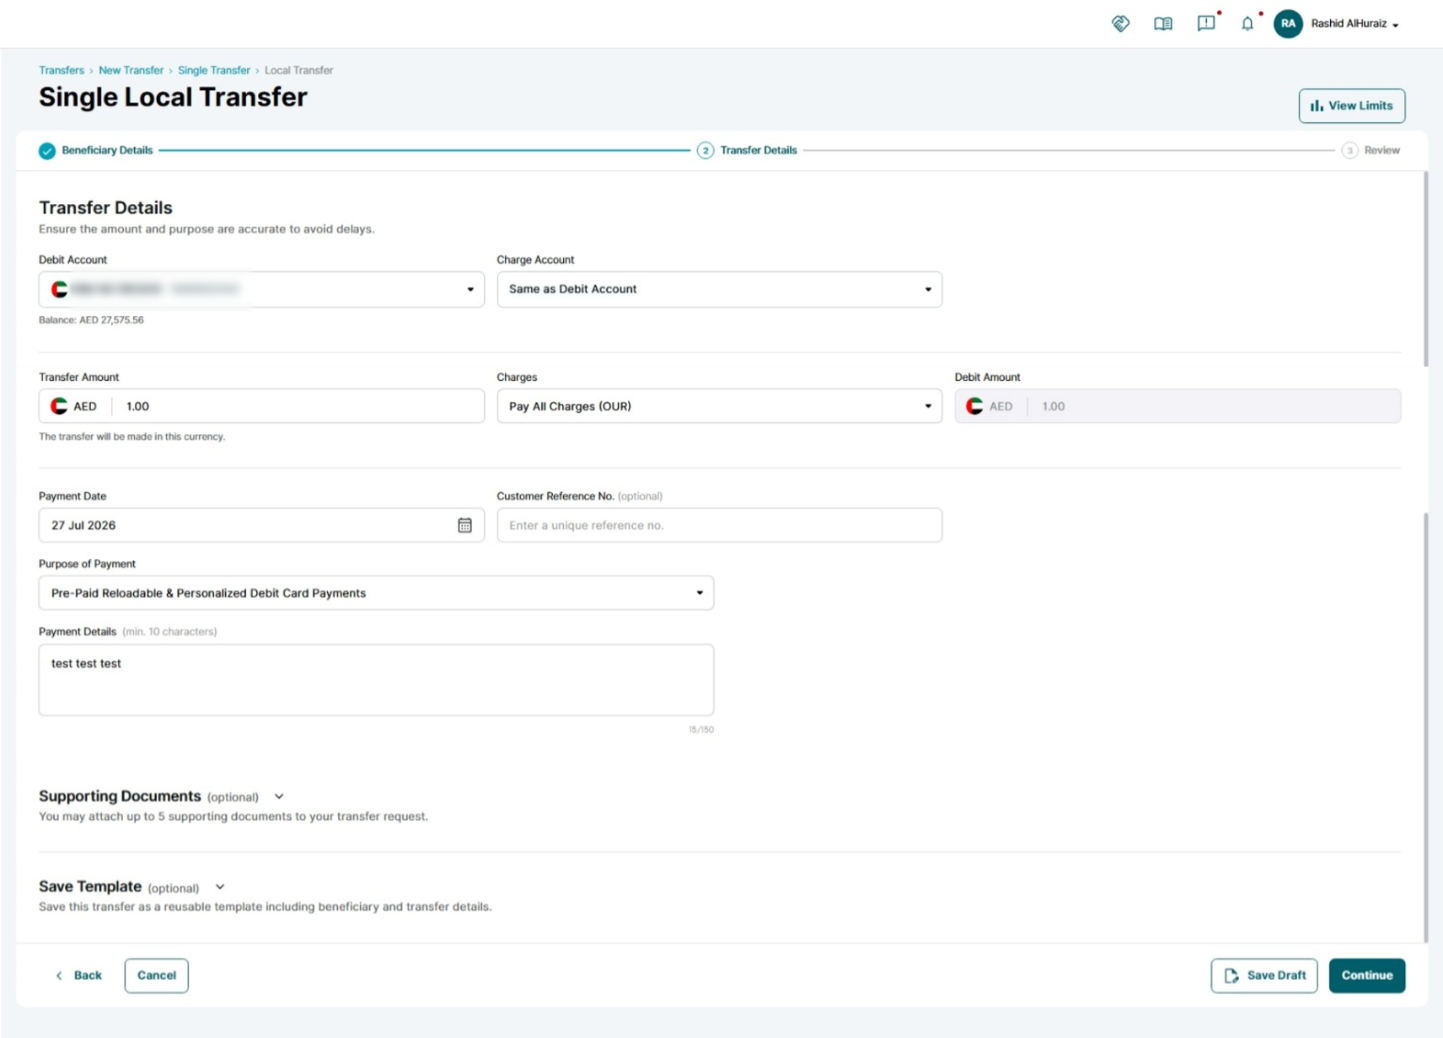
Complete the required payment information.
Account Information
- Debit Account – The account from which the payment amount will be deducted.
- Charges Account – The account that will be used to pay any applicable transaction charges.
Payment Information
- Transfer Amount – The amount to be transferred.
- Charges – Select the applicable charging option.
- Payment Date – Select the date on which the payment should be processed.
- Purpose of Payment – Select the reason for the payment.
- Payment Details – Enter additional information or payment remarks.
Optional Features
- Save Draft – Save the transaction and complete it later. Learn More
- Save as Template – Save the payment details for future use. Learn More
- Customer Reference Number – Internal reference for your records.
Once all mandatory fields have been completed, click Continue.
Future-Dated Transfers
You can schedule the payment for a future date.
If There Are Insufficient Funds
If the selected account does not currently have sufficient funds, the system will display a warning message.

Key Points
- The payment can still be submitted.
- Ensure sufficient funds are available before the payment date.
- If funds are not available on the payment date, the payment may not be processed.
If the Payment Is Scheduled Successfully
The system will display a confirmation message confirming that the payment has been scheduled.

Key Points
- The payment has been scheduled successfully.
- Funds are not reserved when the payment is created.
- Ensure sufficient funds are available on the payment date.
Best Practice: Keep sufficient funds in the debit account before the scheduled payment date to avoid delays or failed payments.
Step 4: Review and Submit
Before submitting the transaction:
- Review all beneficiary details.
- Review all transfer details.
- Verify the payment amount and payment date.
- Confirm that the debit account and credit card details are correct.
- Enter an Internal Note if required (optional).
- Click Submit.
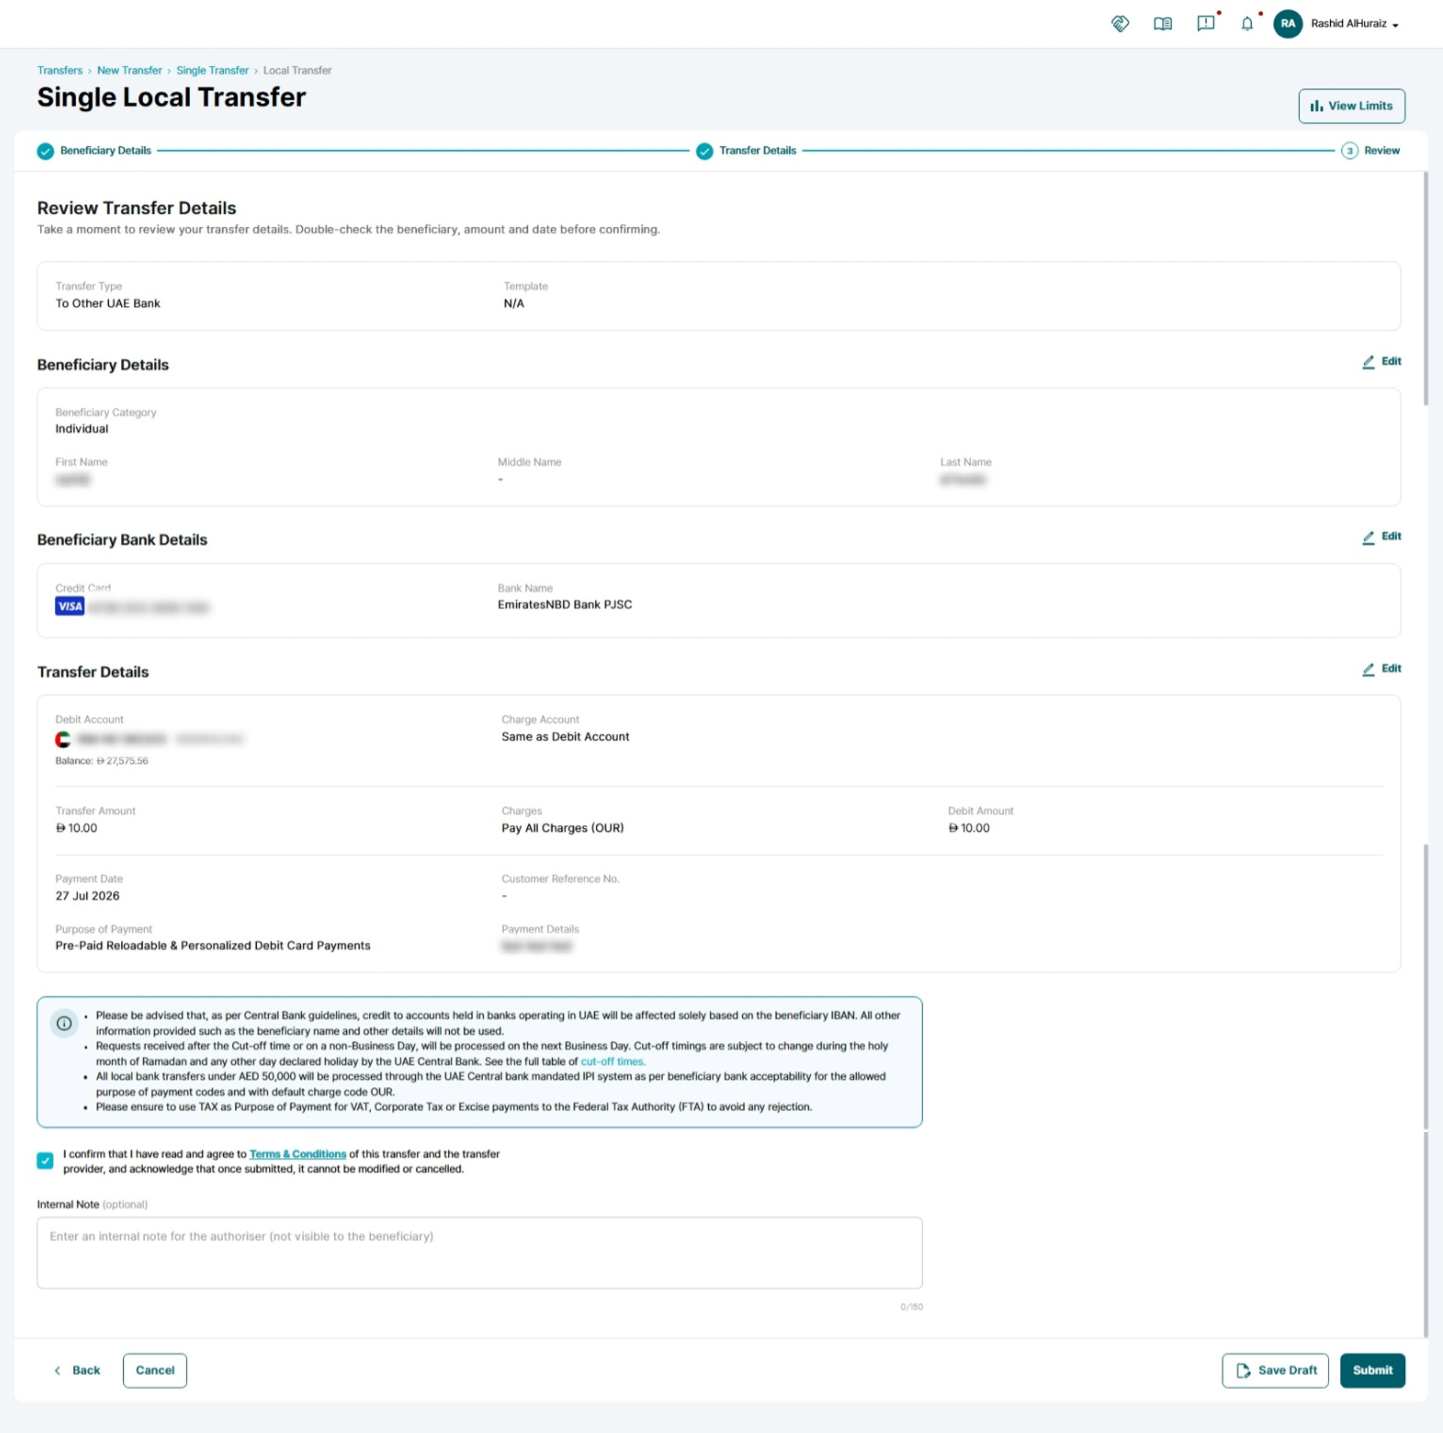
Important: Carefully review all information before submission, especially the card number and transfer amount.
Step 5: Authenticate the Transaction
Complete authentication using one of the following methods:
iBusiness App Authentication
- Approve the request through the CBD iBusiness Mobile App.
- Complete biometric authentication.
Google Authenticator
- Open the Google Authenticator application.
- Enter the generated One-Time Password (OTP).
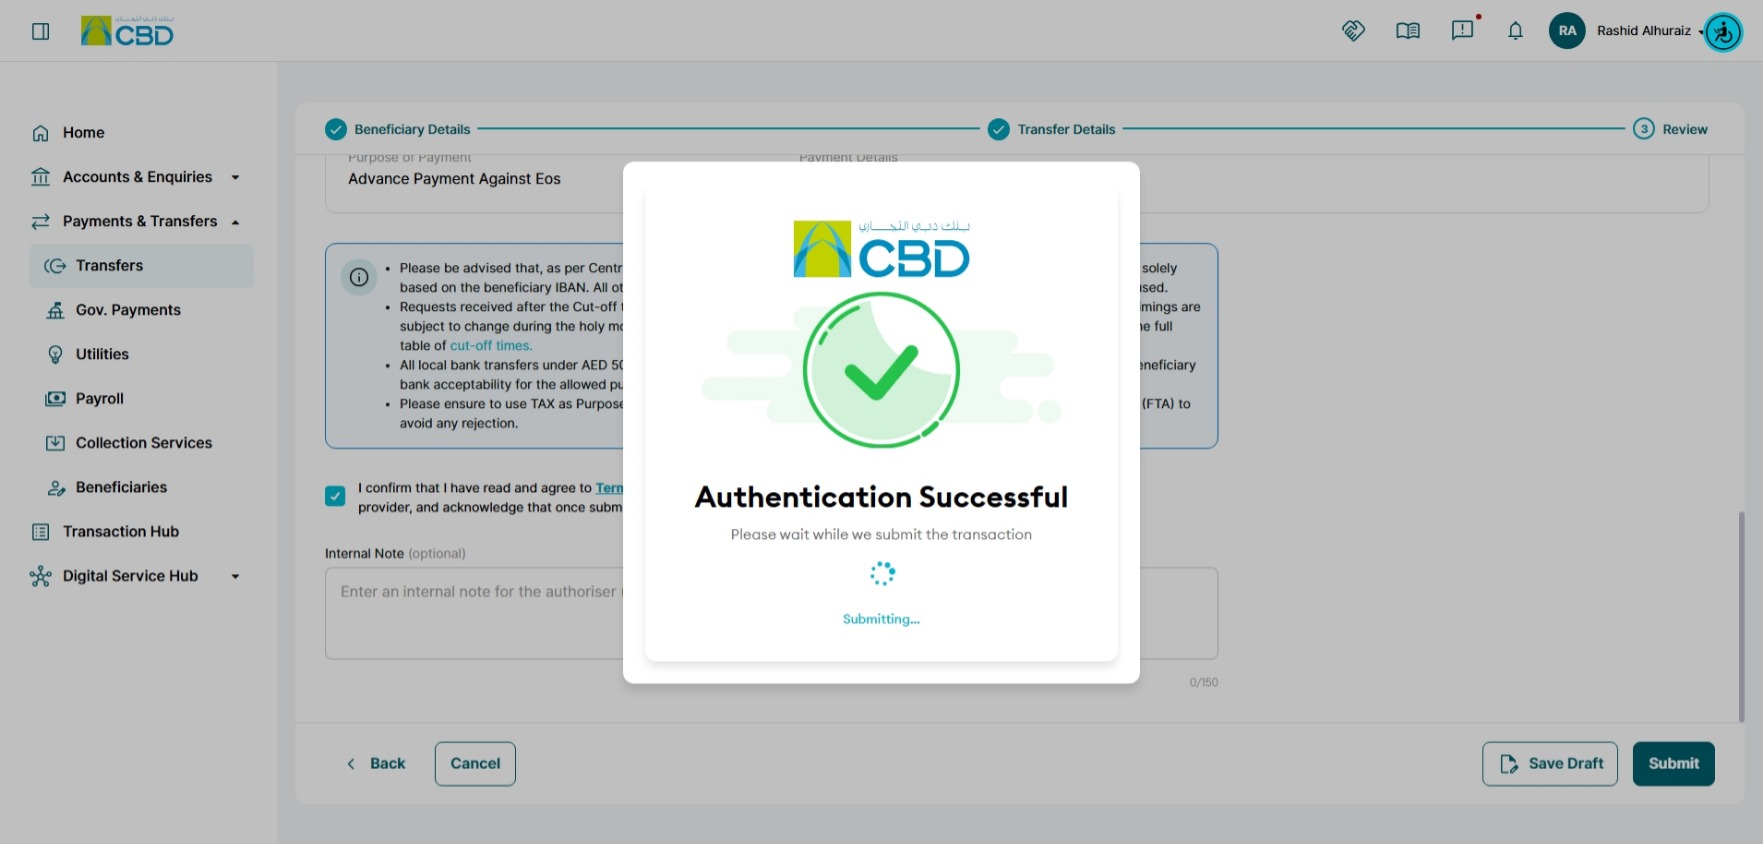
Step 6: Confirmation
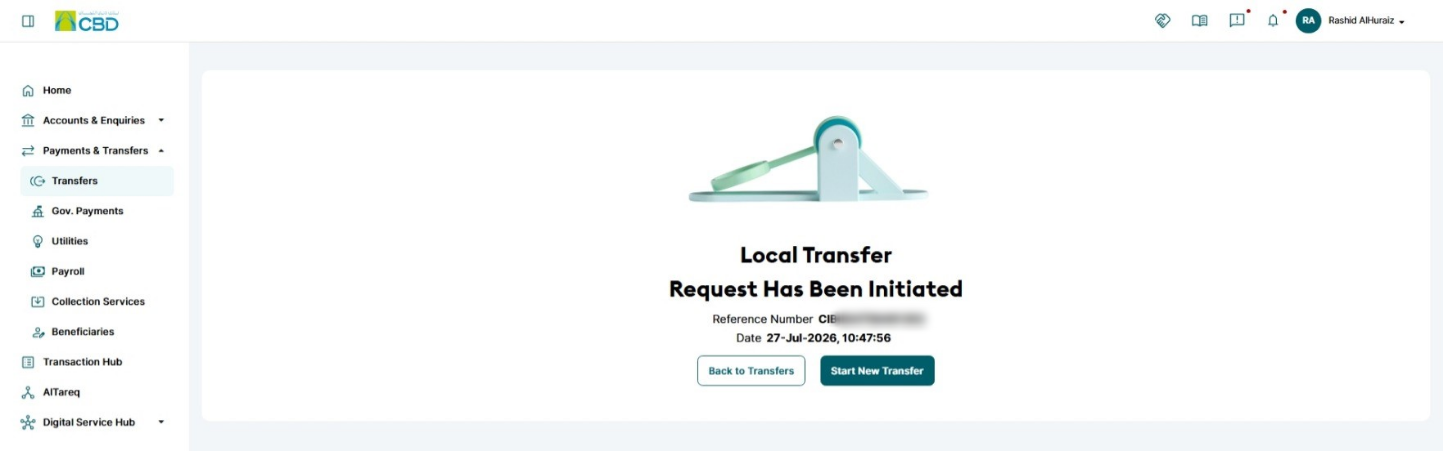
Once authentication is completed successfully:
- The transaction will be submitted for processing.
- A confirmation screen will be displayed.
- A transaction reference number will be generated for tracking purposes.
Support Notes / Best Practices
- Verify the credit card number before validating the beneficiary.
- Ensure the beneficiary details match the intended cardholder.
- Review the payment amount before submitting the transaction.
- Use Save as Template for frequently repeated payments.
- Retain the transaction reference number for future tracking and support enquiries.