
Steps to Initiate a Cardless Cash Withdrawal
Step 1: Log in and Navigate
- Log in to iBusiness using your credentials.
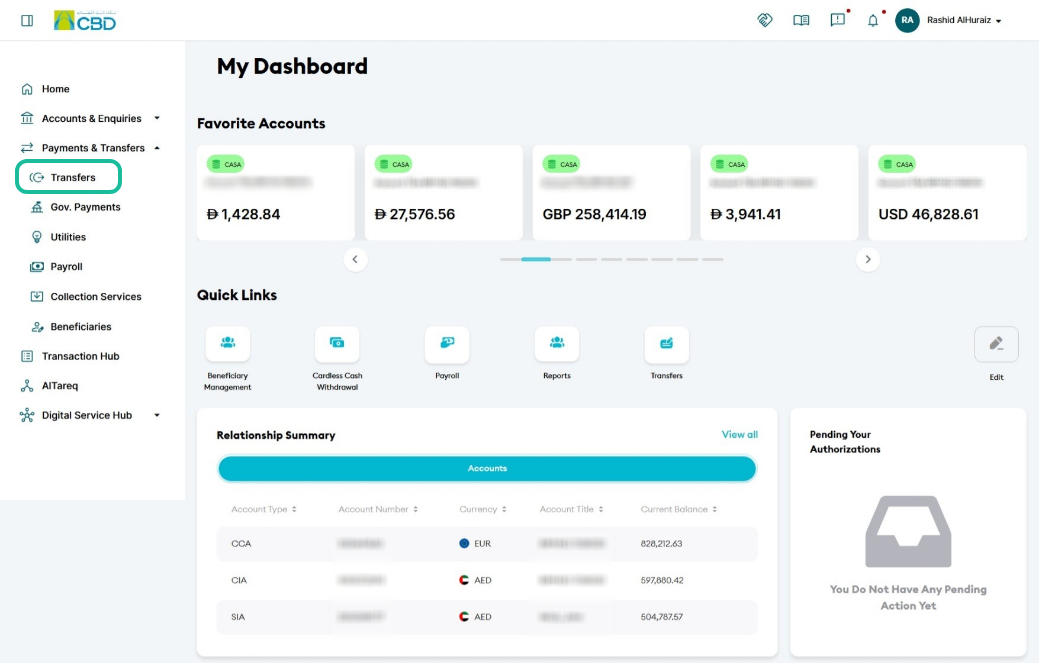
- Navigate to: Payments & Transfers → Transfers
- Click on Initiate Transfer
Step 2: Select Transfer Type
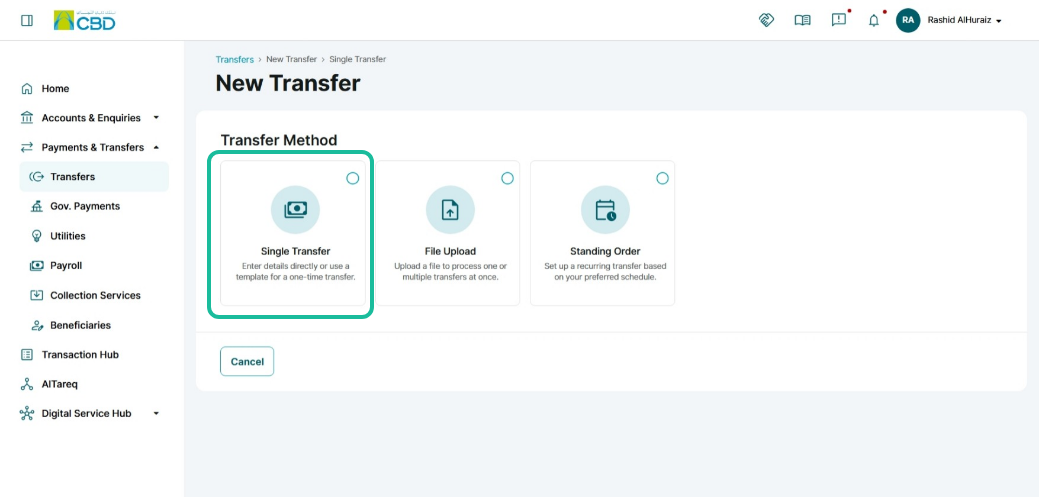
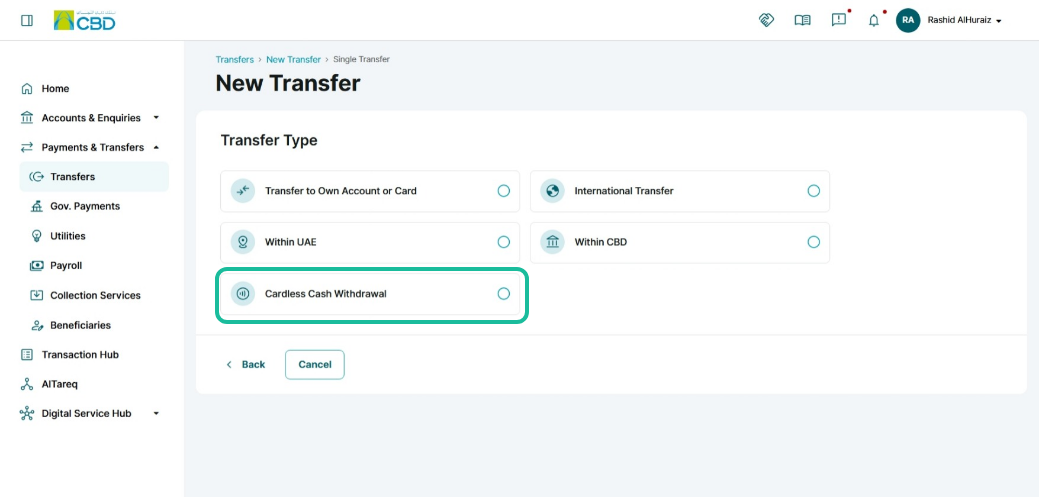
Choose the following options:
- Single Transfer
- Cardless Cash Withdrawal
Step 3: Select Beneficiary Details
Choose one of the following options:
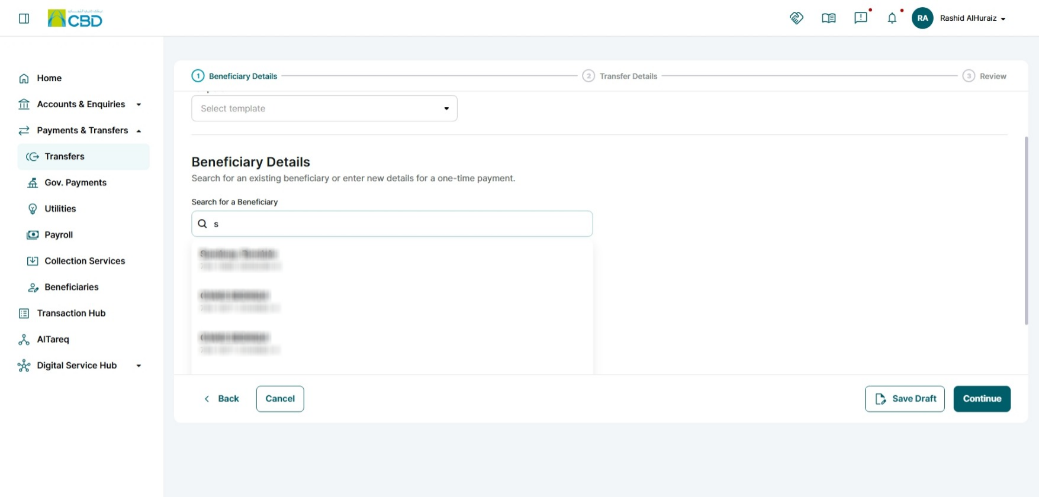
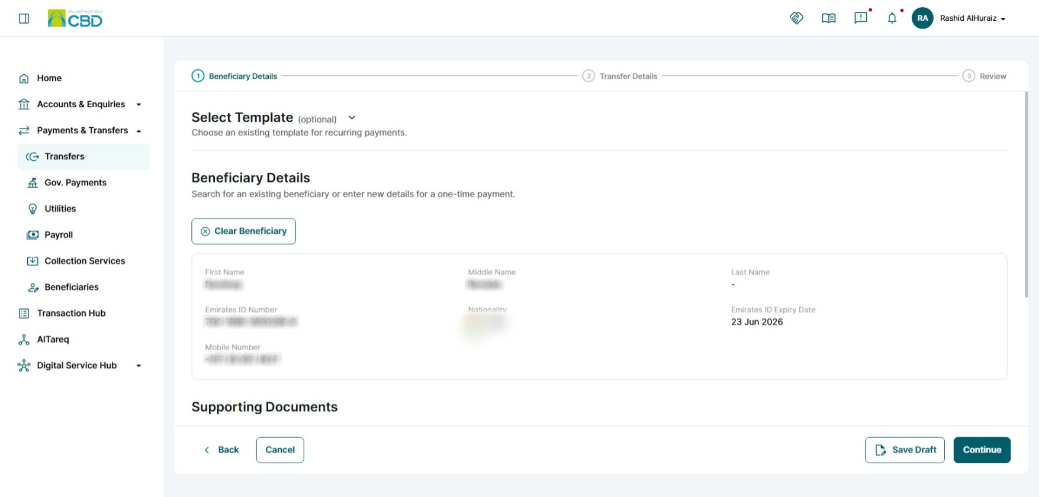
- Select an existing beneficiary
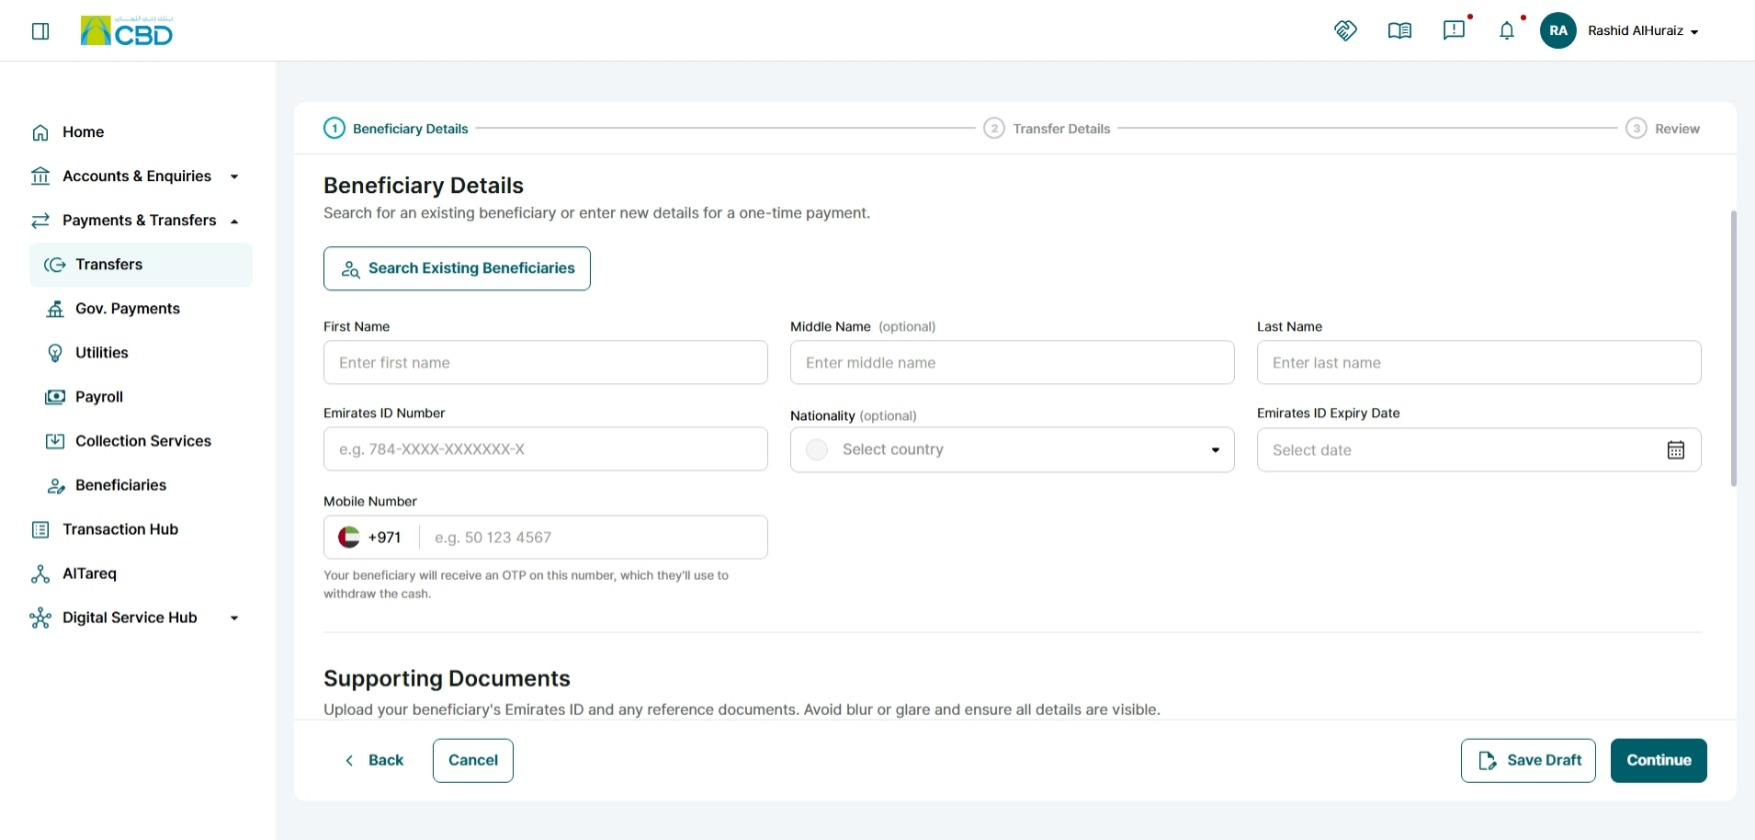
- Enter beneficiary details manually
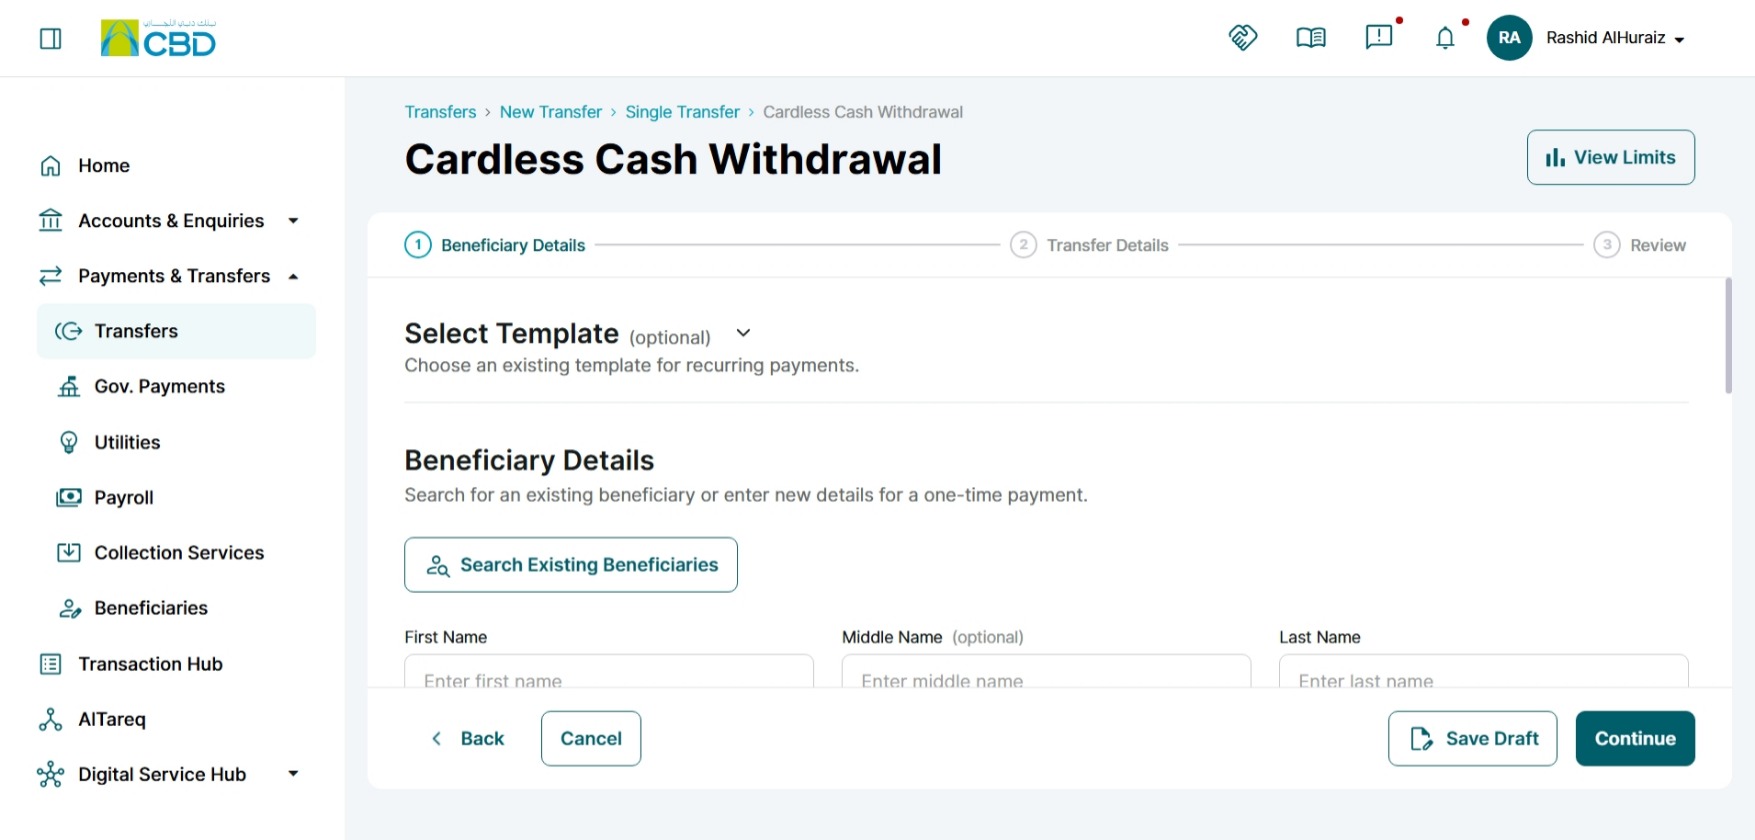
Searching for a beneficiary:
Entering details manually:
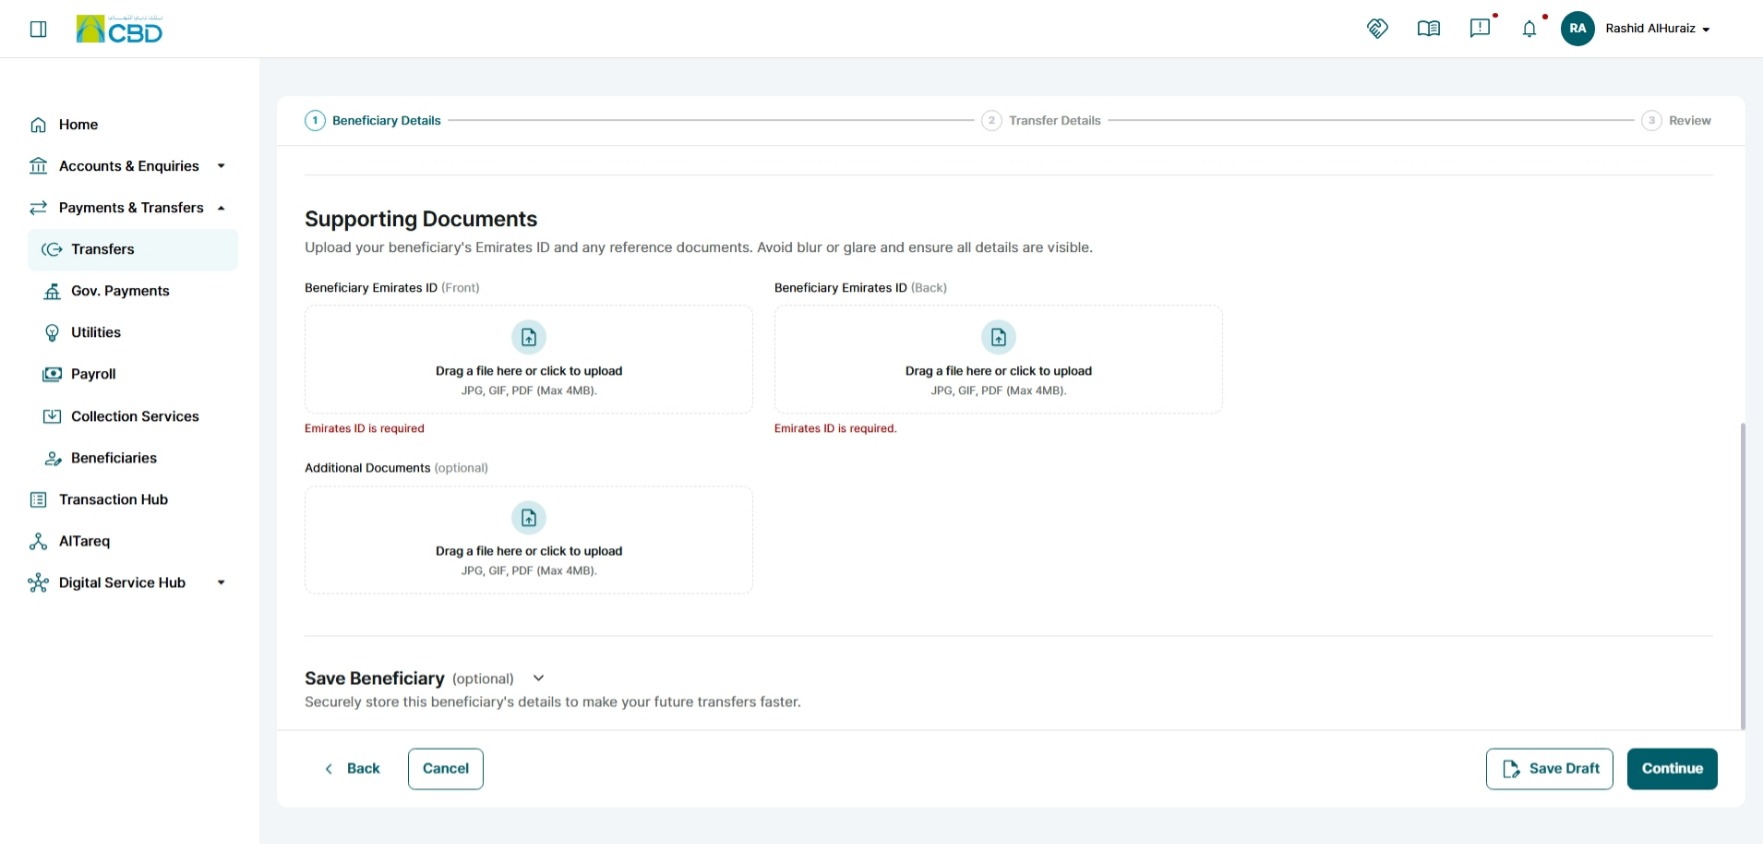
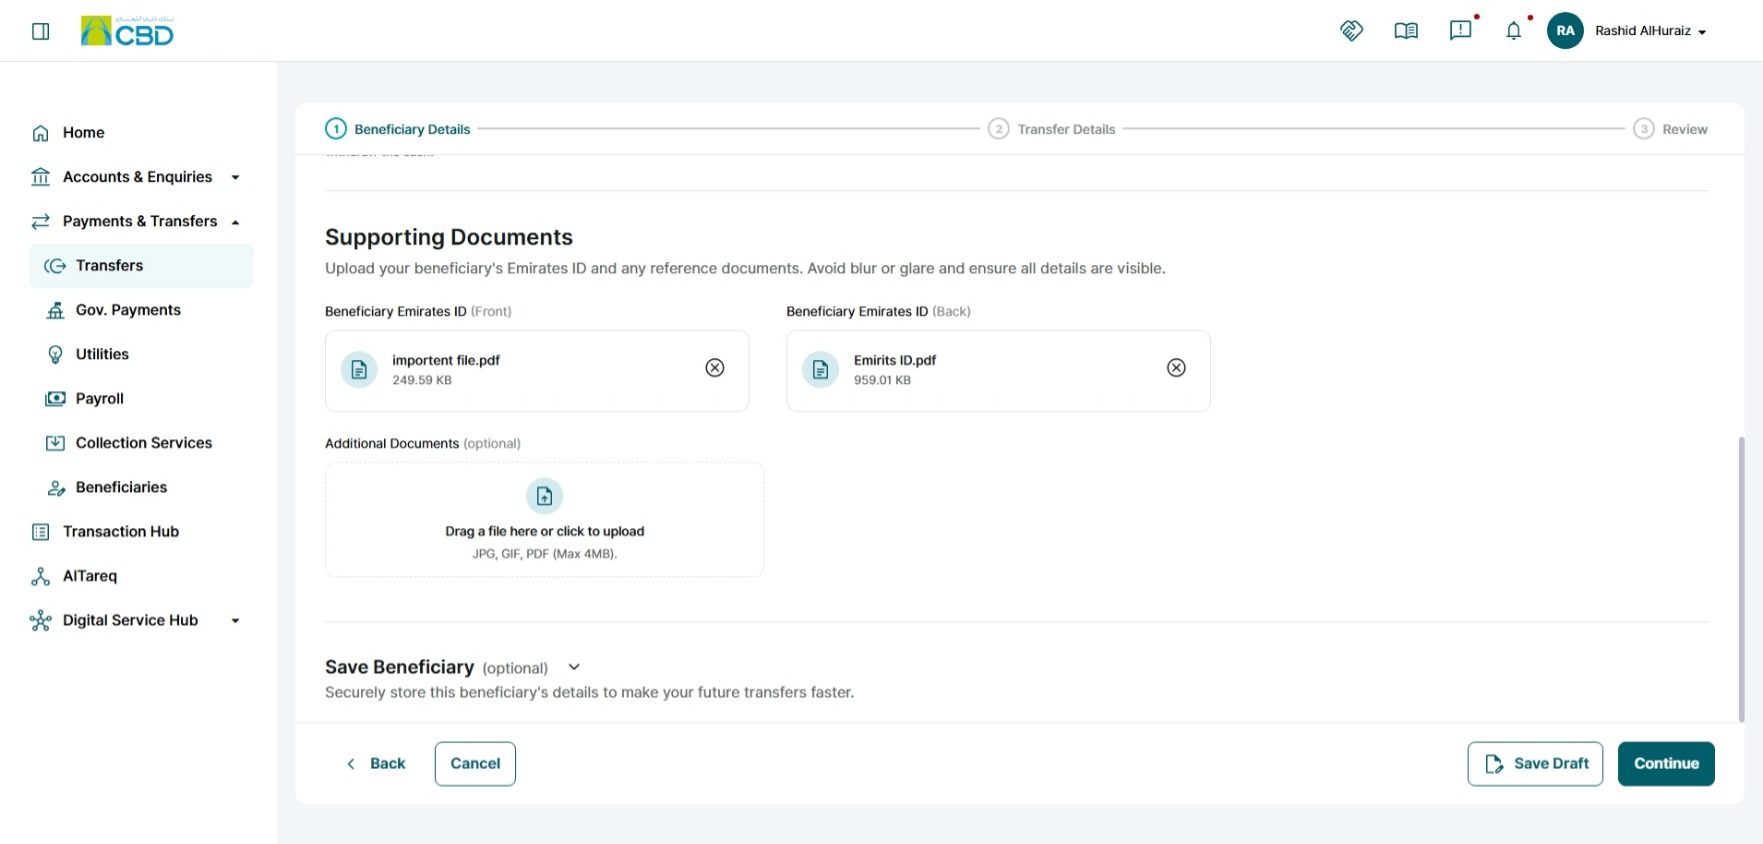
Upload the beneficiary ID
- Drag and drop the ID file in the right field
- Supported file format PDF, JPG, GIF (Max 4MB)
Step 4: Enter Transfer Details
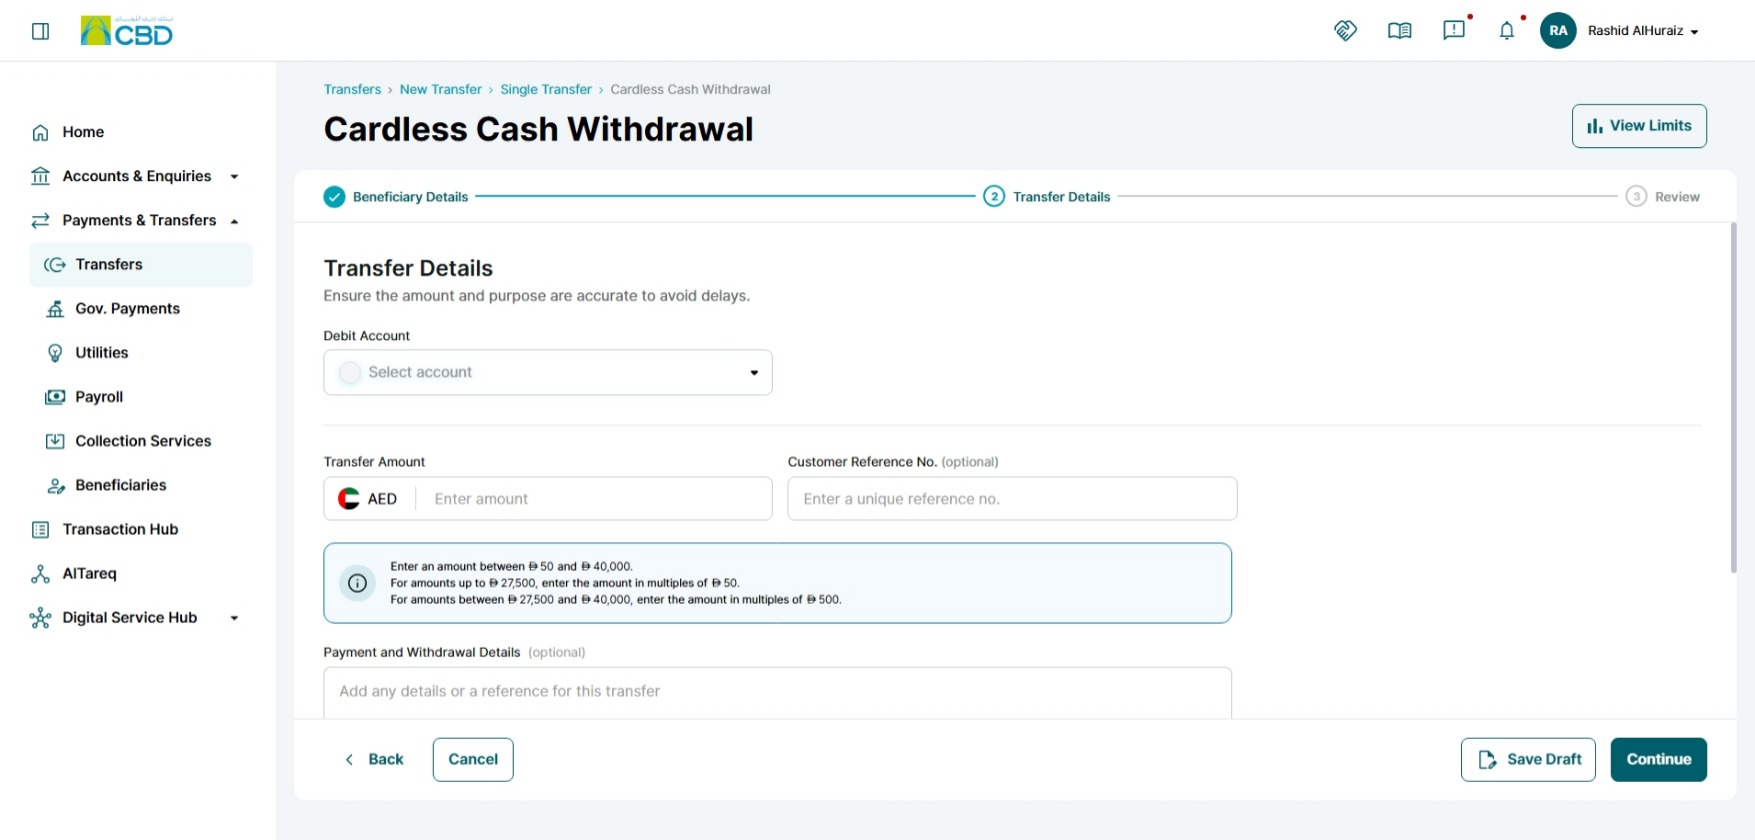
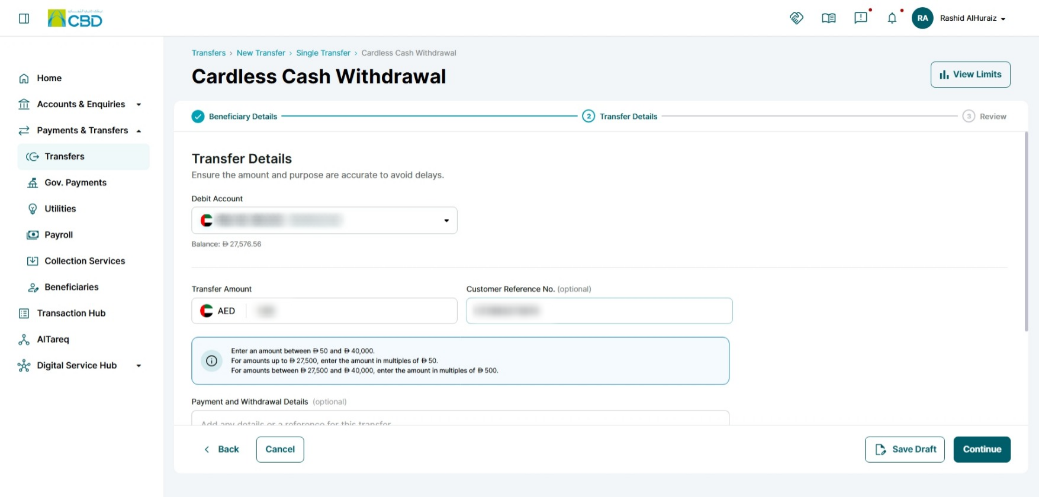
Complete the following fields to proceed with the transfer:
- Debit Account: Select the account from which the funds will be deducted.
- Transfer Amount: Enter the amount you wish to transfer.
- Customer Reference Number (optional): Enter a reference number for your records and future tracking of the transaction.
- Payment Details (optional): Provide additional information related to the payment, such as invoice numbers or payment descriptions.
- Save Draft: Save this transfer to complete later. Learn More
- Save Template: Save this transfer as a template, including the transfer and beneficiary details, for future use. Learn More
- Supporting document: you will be able to attach up to 5 documents to your transfer request
Once all mandatory fields have been completed, review the details carefully and click Continue to proceed with the transfer.
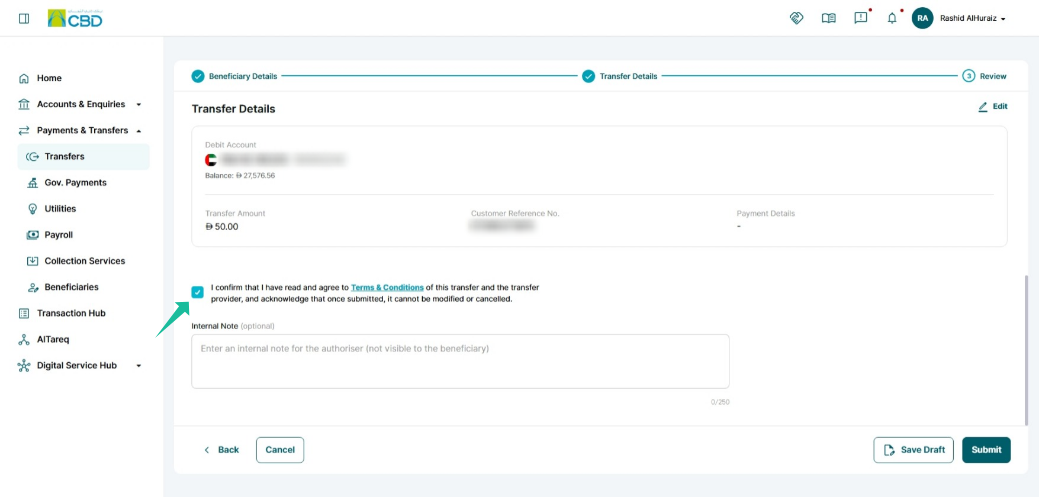
Step 5: Review and Submit
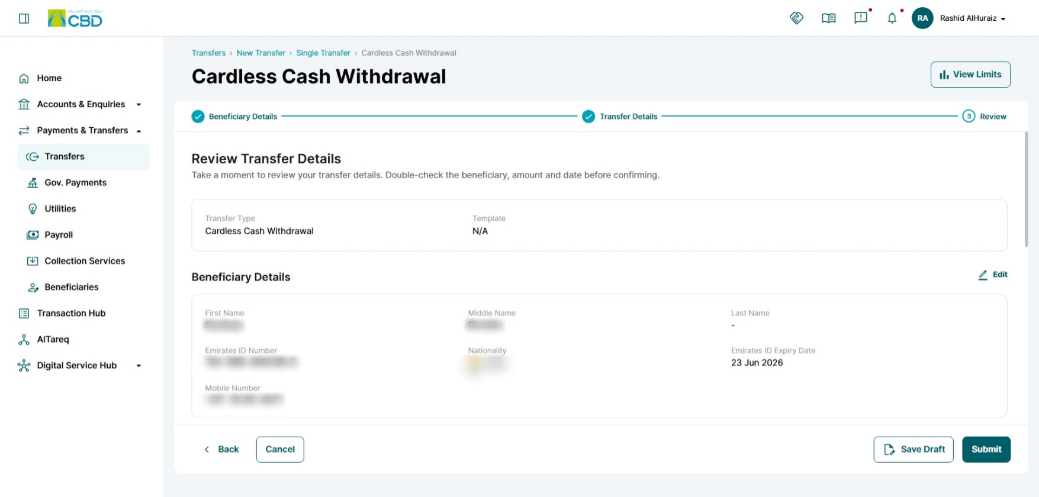
You will be redirected to the Summary Review Screen.
- Verify all entered details
- Accept the Terms & Conditions
- Click Submit
Step 6: Authenticate the Request
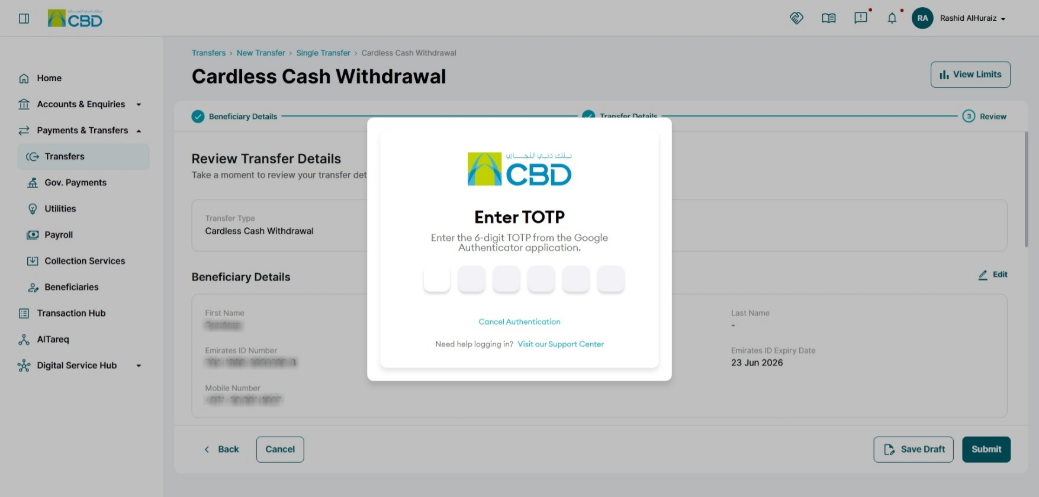
Complete authentication using one of the following methods:
Mobile App Authentication
- Approve the request via the iBusiness mobile app notification
- Use biometric or device verification
Google Authenticator
- Enter the One-Time Password (OTP) generated from the app
Once authenticated successfully, a confirmation screen with a reference number will be generated.
Step 7: Approval Process (Checker/Approver)
Once submitted, the request is routed to the checker/approver queue.
For the Approver:
- Log in to iBusiness
- Navigate to Transactions hub → Pending Your Authorization
- Locate the request under transaction type “Cardless Cash Withdrawal”
- Review the transaction details and any supporting documents
- Select Approve or Reject