
Overview
This guide provides step-by-step instructions for approving payments, transfers, and service requests in the iBusiness Web Portal.
This process is applicable to users with Checker/Approver privileges and is used to review and authorize transactions submitted by a Maker before they are processed.
Step 1: Access Pending Authorizations
Log in to iBusiness using your Checker/Approver credentials.
You can access pending transactions using either of the following methods:
Option 1: Through the Transactions Menu
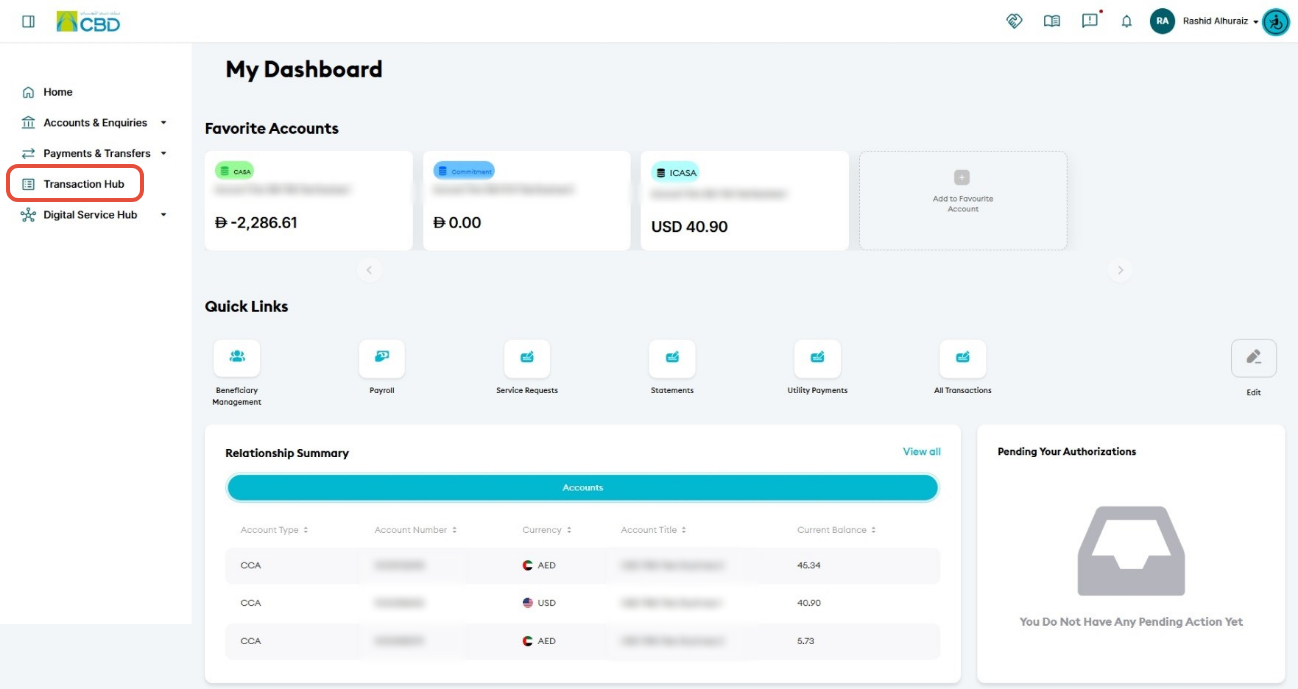
- Navigate to: Transactions ➜ Pending Authorizations
Option 2: From the Dashboard
- Locate the Pending Authorizations tile on the dashboard.
- Click View All.
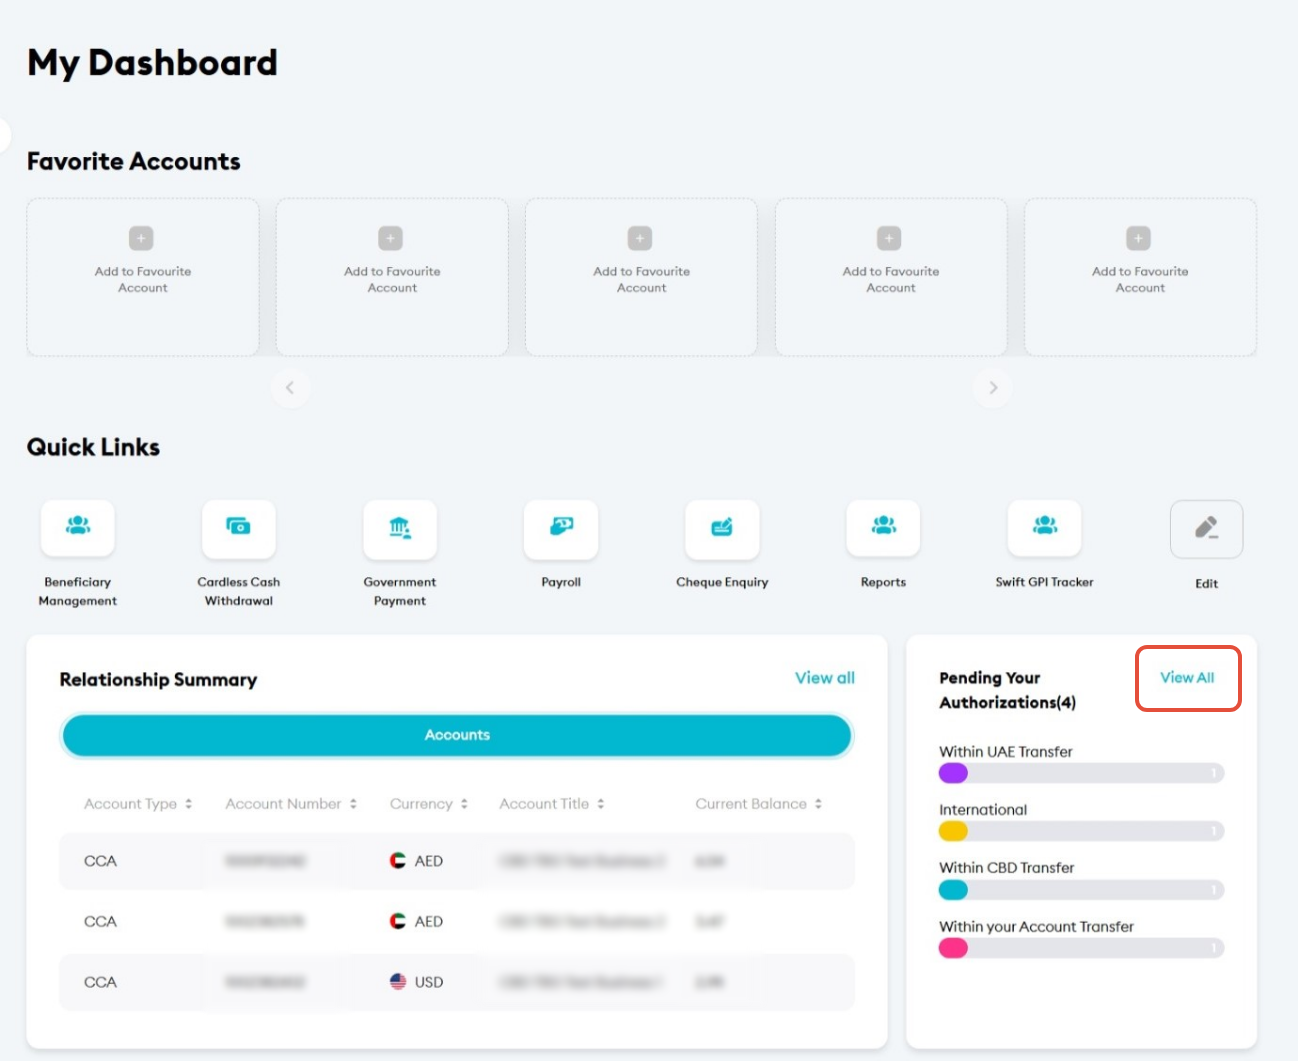
Both options will take you to the list of transactions awaiting approval.
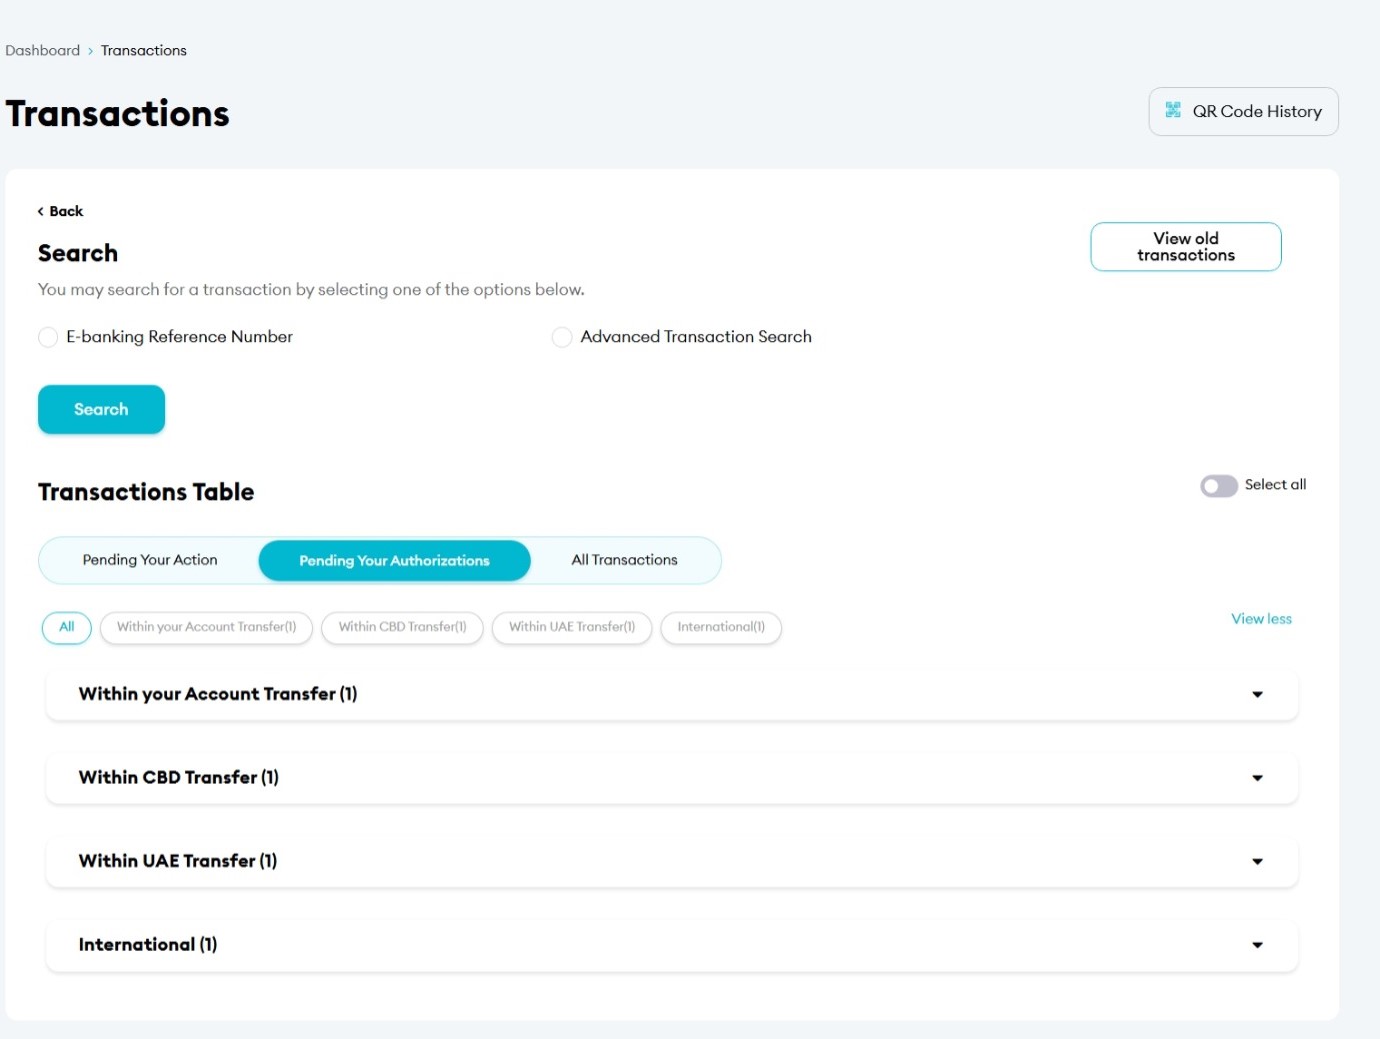
Step 2: Search for the Transaction
Locate the transaction you want to approve.
You can search using:
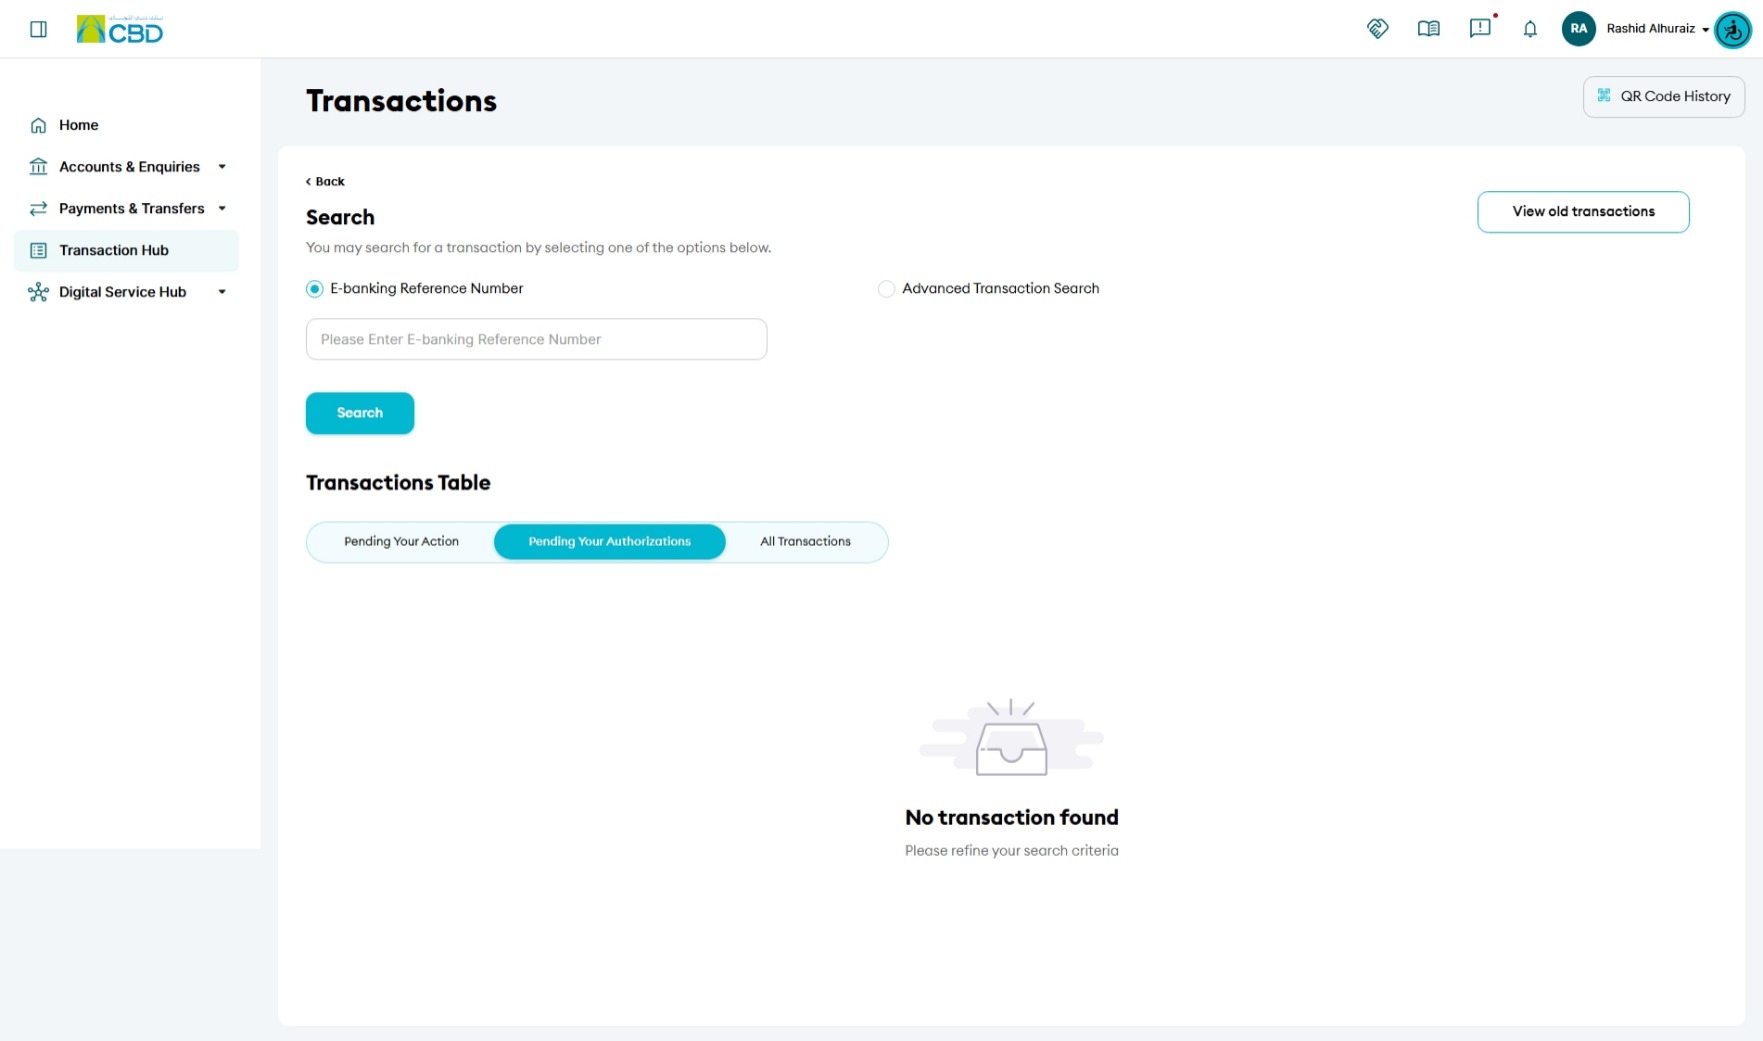
- Transaction Reference Number
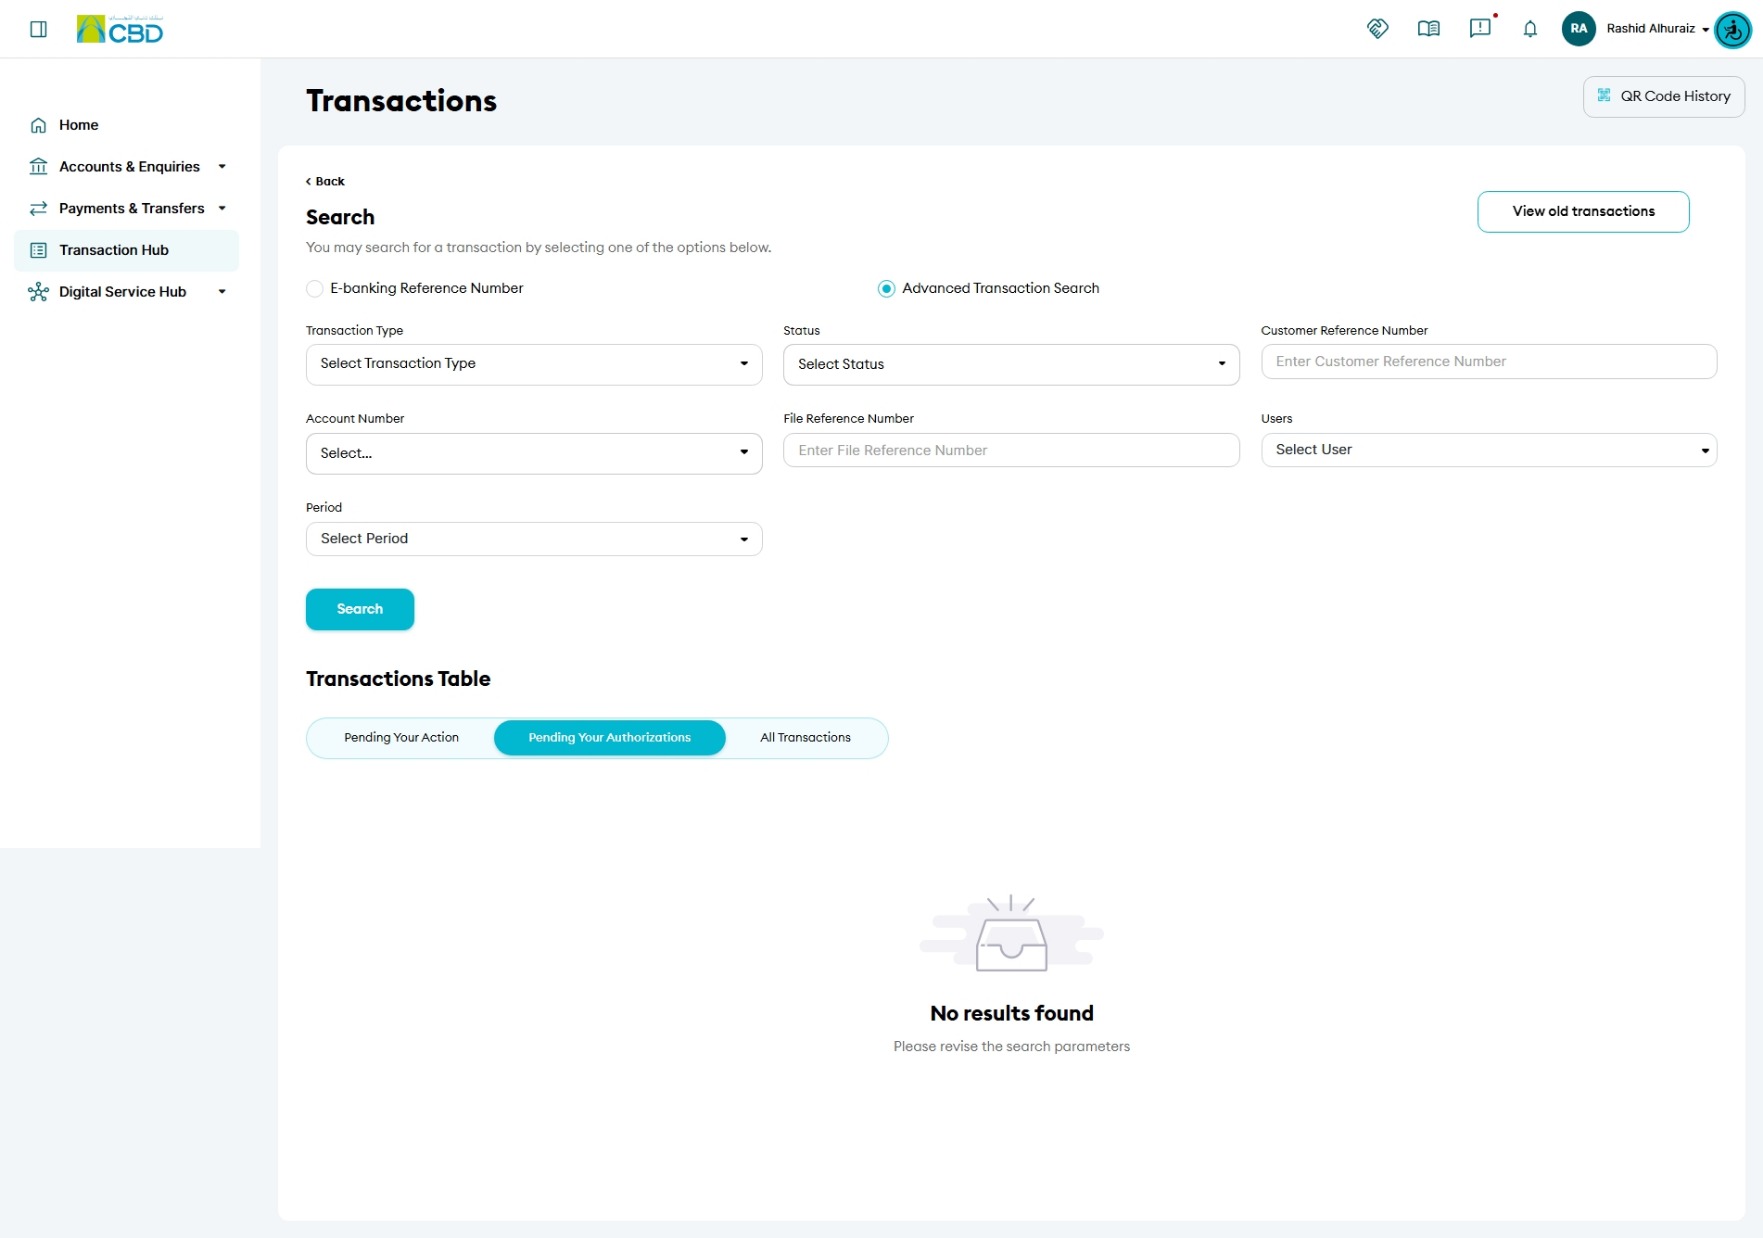
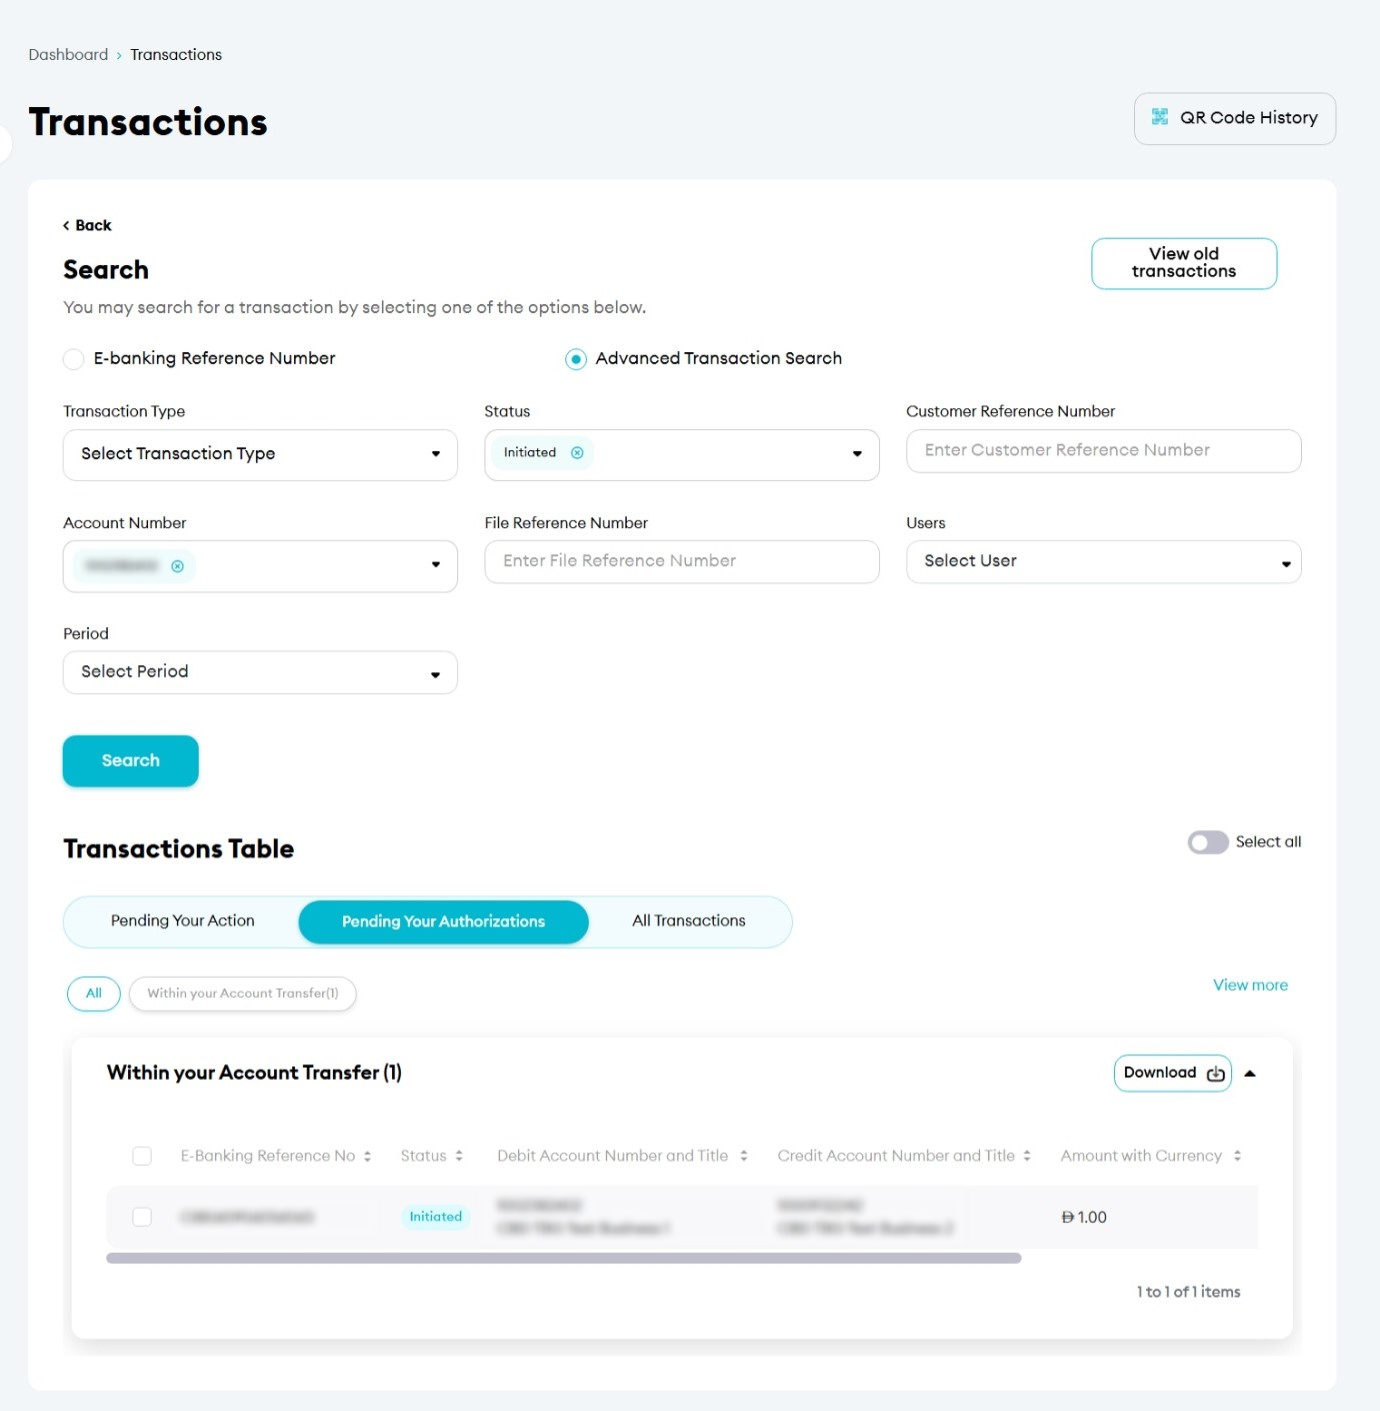
- Advanced Search filters
- Enter the transaction reference number
- Use Advanced Search to narrow down the results.
- Click Search.
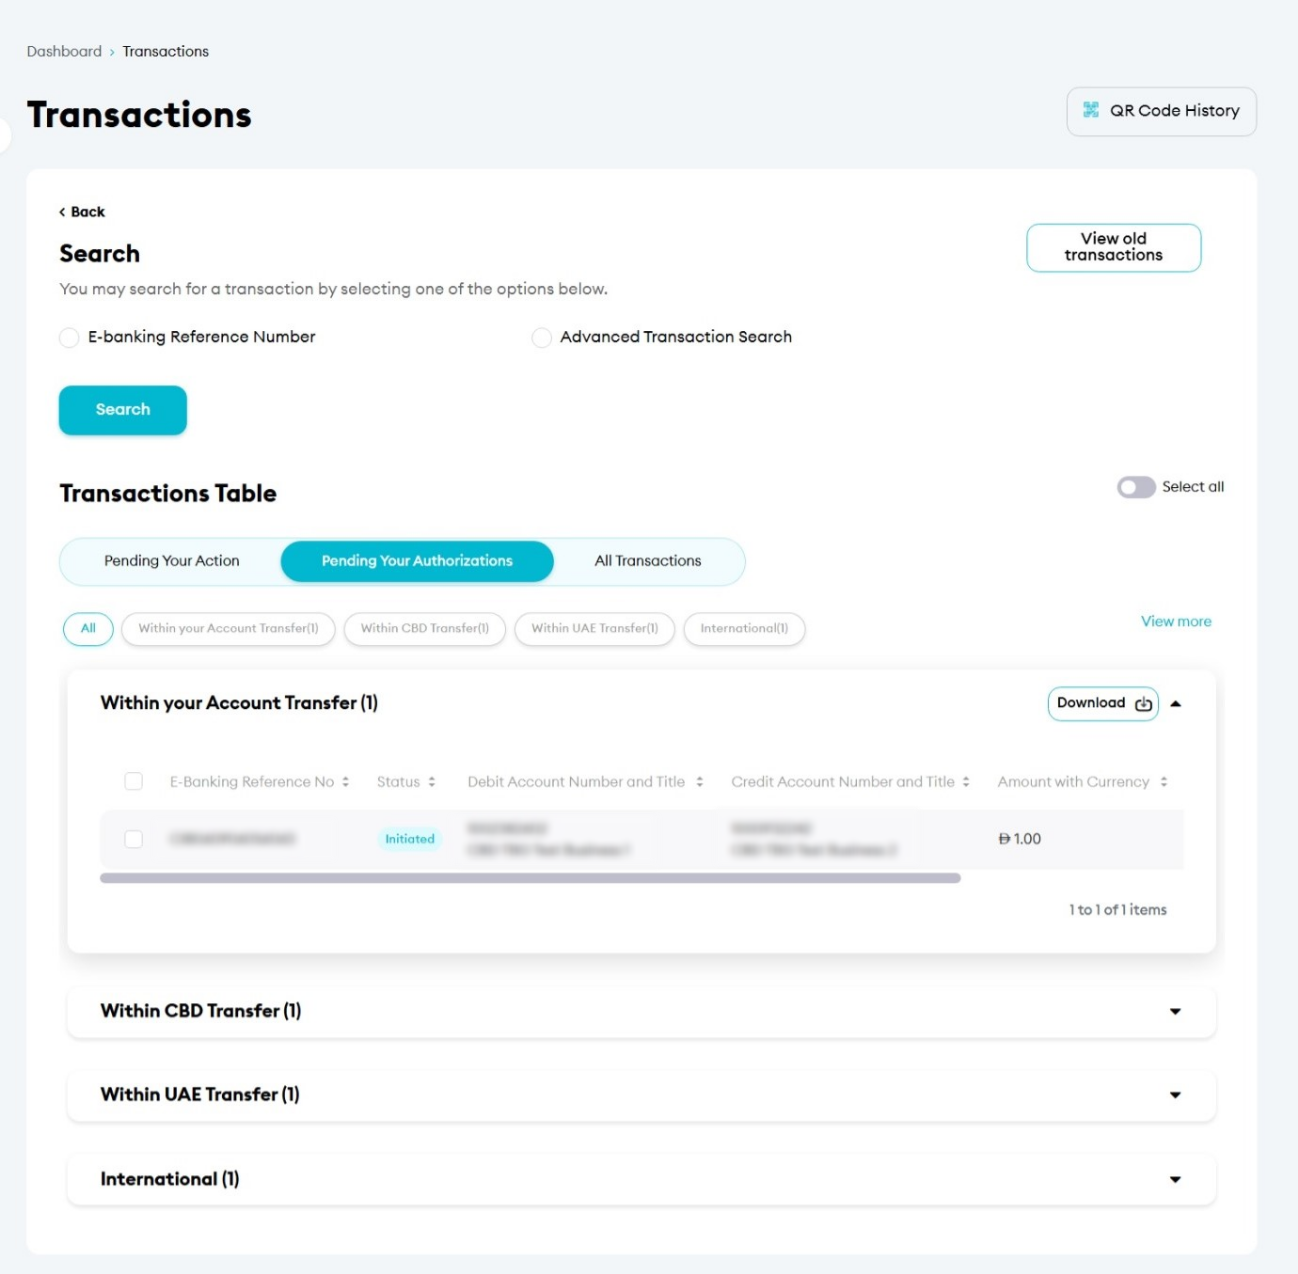
- If required, expand the Transaction Type drop-down list to view the available transactions.
Step 3: Review Transaction Details
- Locate the transaction you want to approve.
- Double-click the transaction to open the transaction details.
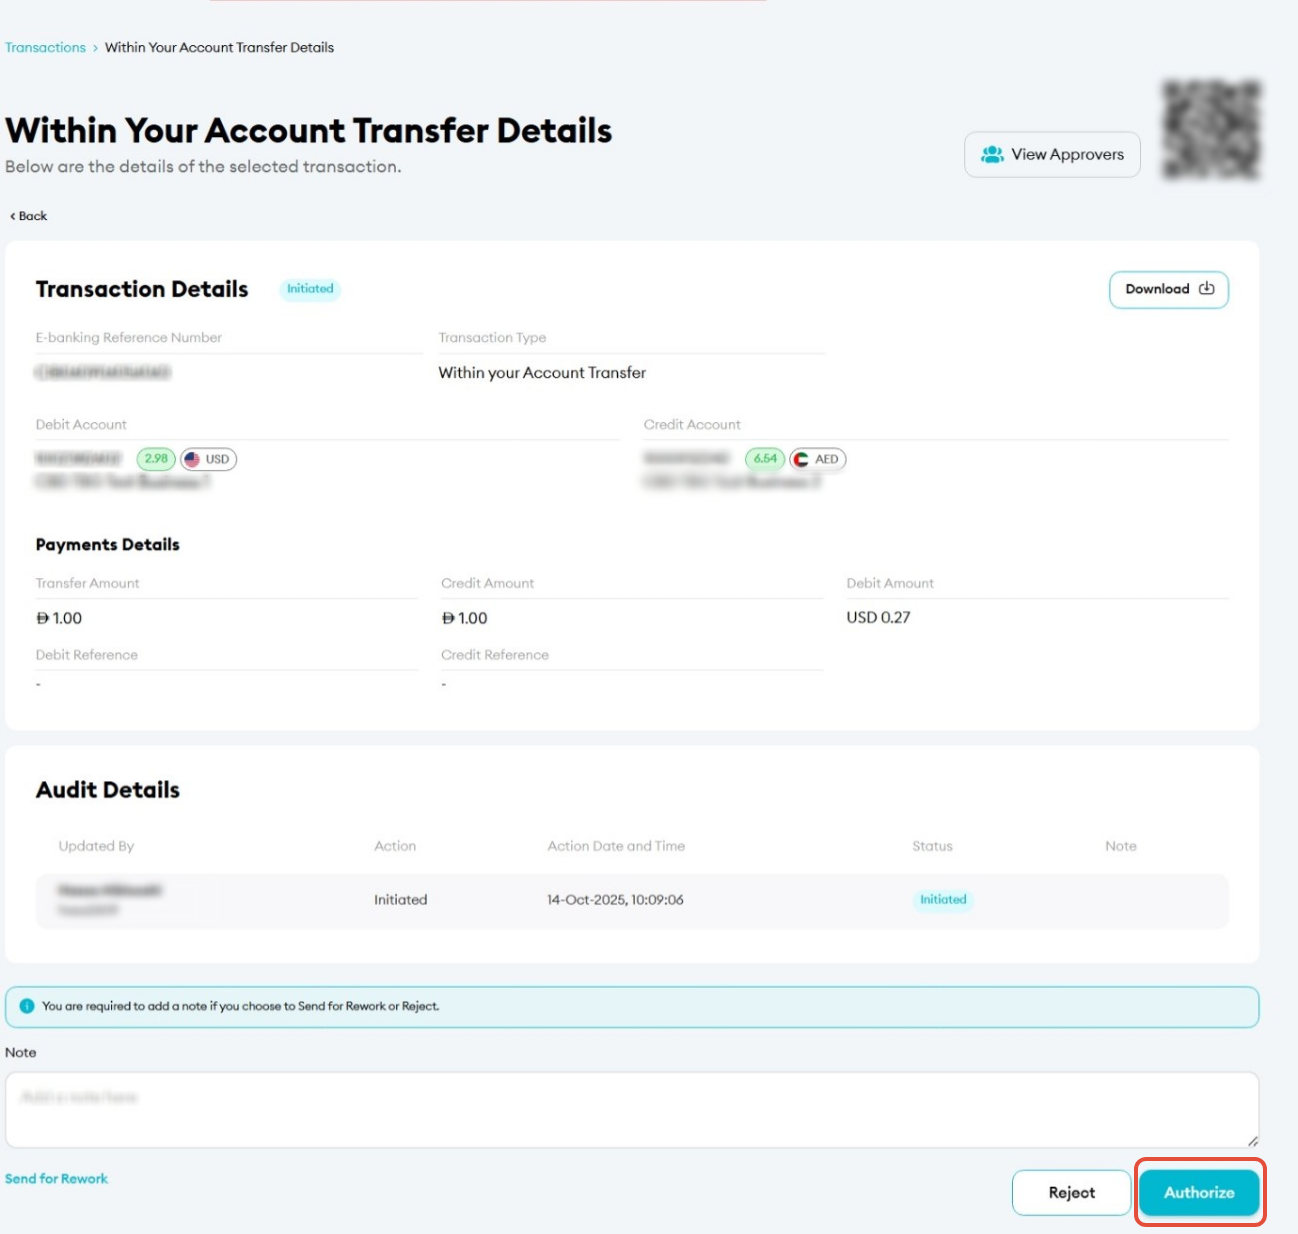
- Review all transaction information carefully, including:
- Transaction type
- Beneficiary details
- Amount
- Account details
- Payment information
- Supporting documents (if applicable)
- Verify that the transaction complies with your organization's policies and approval requirements.
Step 4: Authorize the Transaction
After reviewing and validating the transaction:
- Click Authorize.
- Review the authorization details.
- Click Submit to continue.
Step 5: Authenticate the Authorization
Complete authentication using one of the following methods:
iBusiness App Authentication
- A notification will be sent to the registered iBusiness Mobile App.
- Review the authorization request.
- Approve using biometric or device authentication.
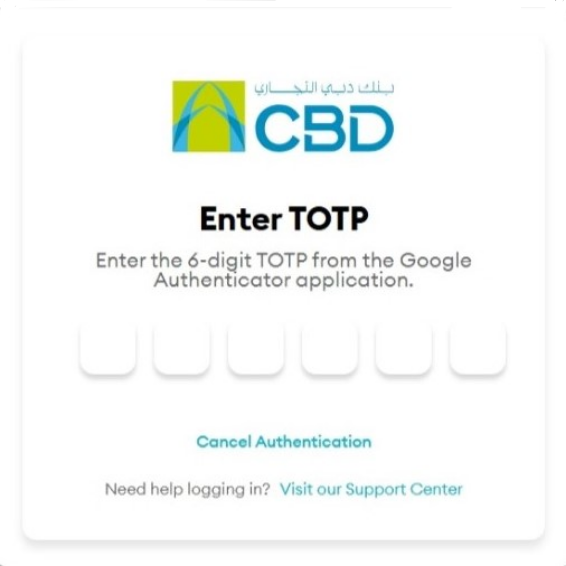
Google Authenticator
- Open the Google Authenticator application.
- Enter the generated One-Time Password (OTP).
Support Notes / Best Practices
- Always review transaction details carefully before authorizing.
- Verify beneficiary details, payment amount, and account information before approval.
- Review any attached supporting documents when applicable.
- Use the Transaction Reference Number for faster transaction searches.
- Ensure authentication is completed promptly to avoid authorization delays.
- If a transaction should not be processed, follow the appropriate rejection procedure instead of approving it.