
Overview
This guide provides step-by-step instructions for initiating a Single Local Transfer through the iBusiness Web Portal.
Use this option to make a one-time transfer to a beneficiary within the UAE.
Step 1: Navigate to Local Transfers
- Log in to iBusiness.
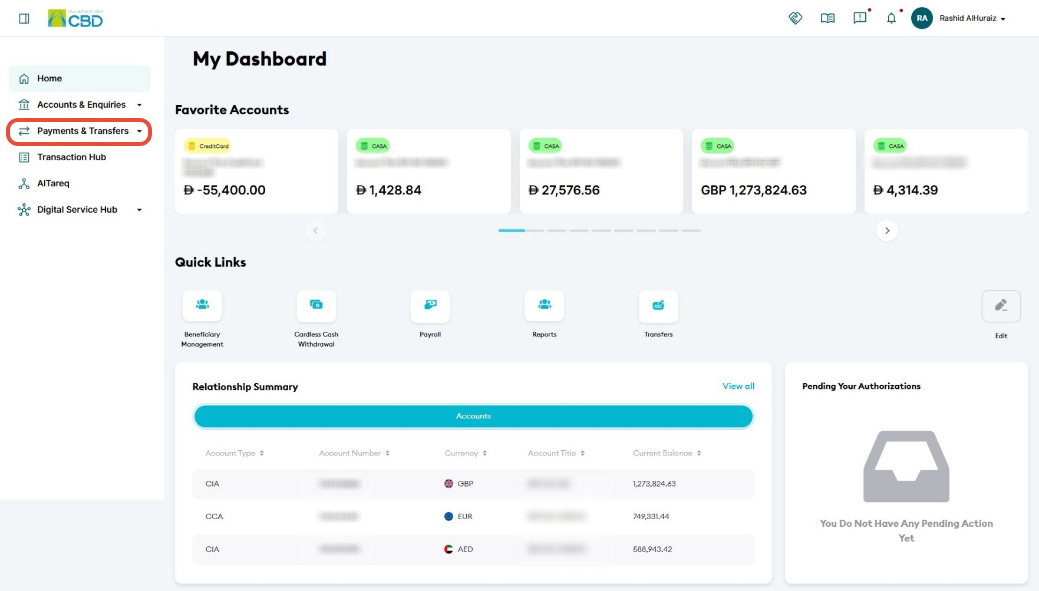
- Navigate to: Payment & Transfers ➜ Transfers ➜ Initiate Transfer
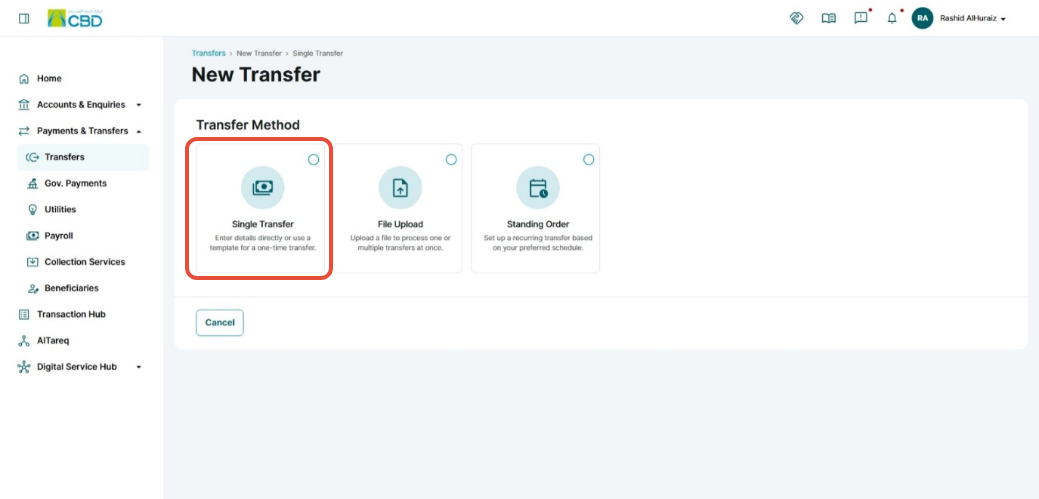
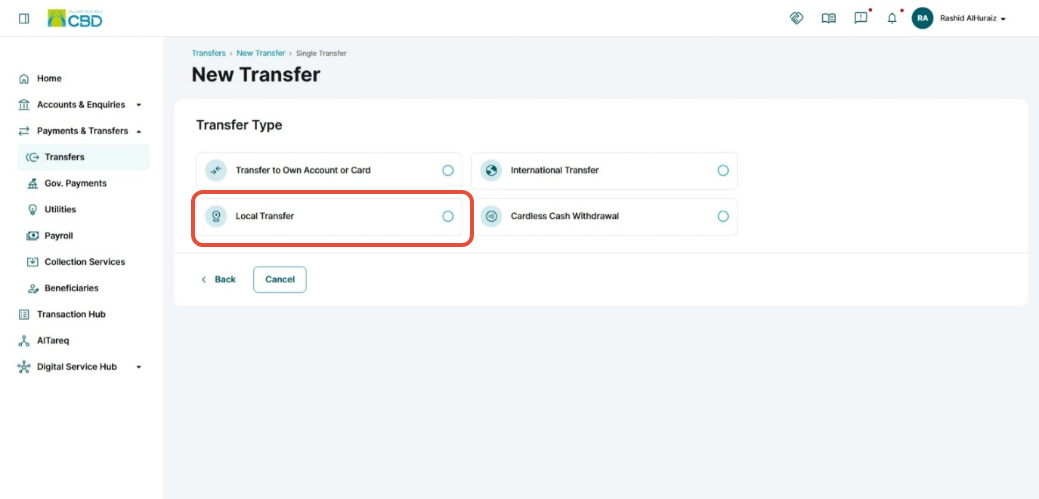
Select: Single Transfer ➜ Local Transfer
Step 2: Select or Add a Beneficiary
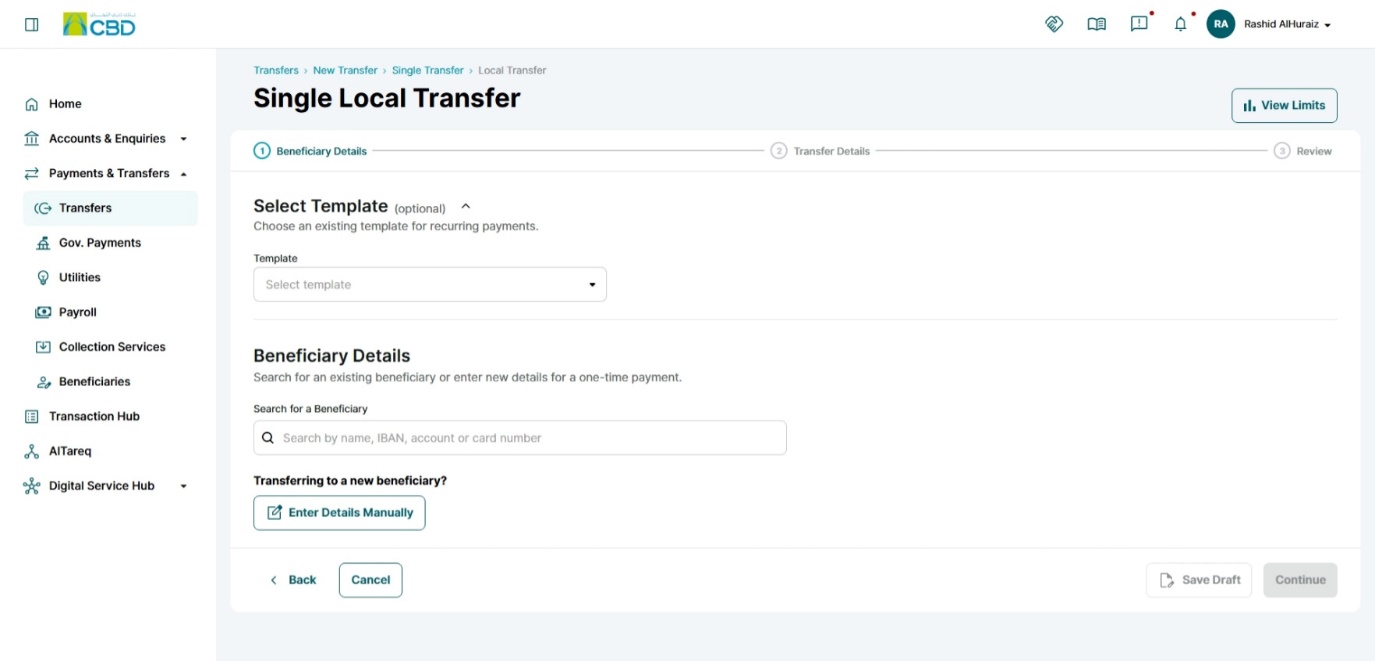
Existing Beneficiary
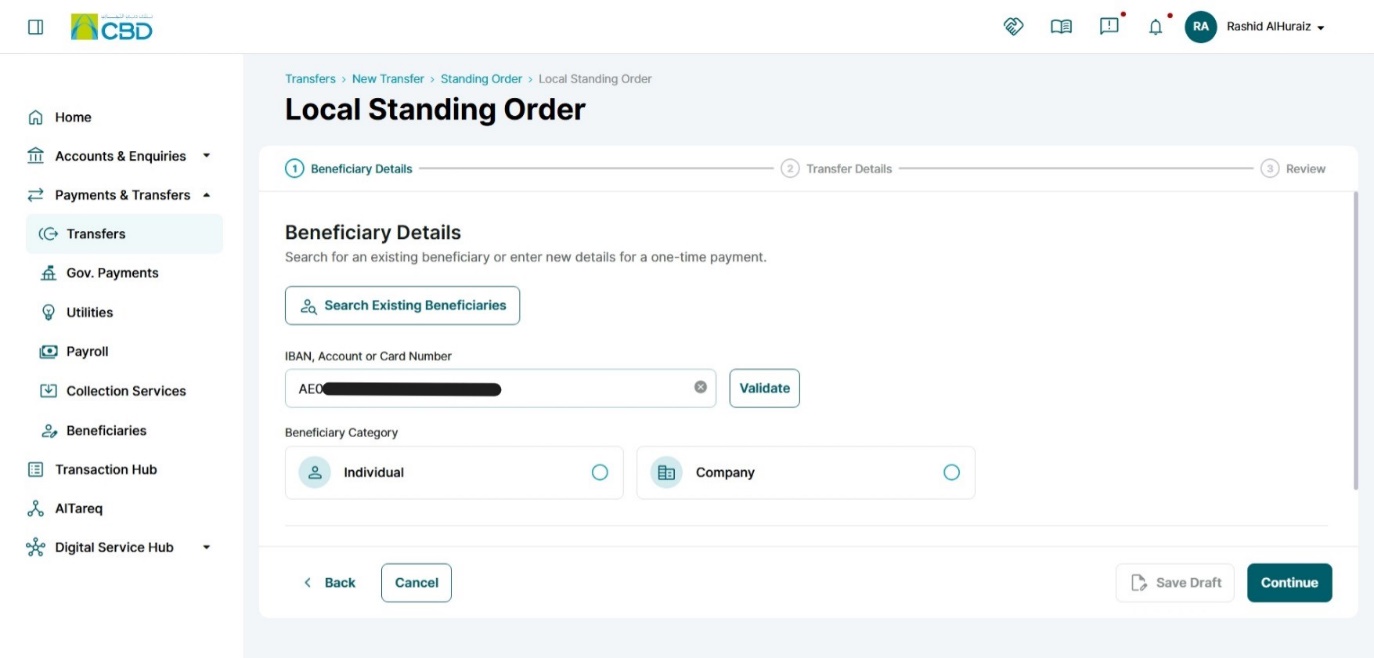
- Click Search Beneficiary.
- Use the search bar to locate the required beneficiary.
- Select the beneficiary from the list.
New Beneficiary
If the beneficiary has not been registered, you can add a new beneficiary by entering the required details.
Individual Beneficiary
Company Beneficiary
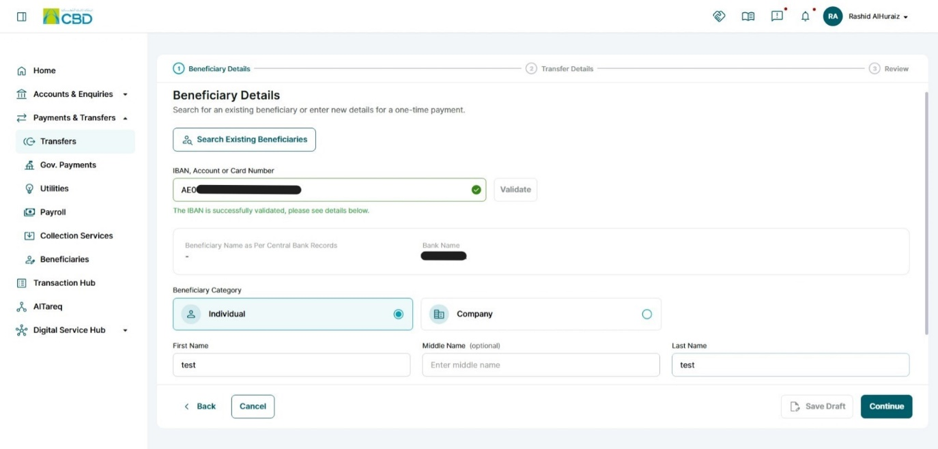
Validate Beneficiary
- Enter the beneficiary's IBAN.
- Click Validate.
- The system will verify the IBAN and retrieve the beneficiary bank details.
When validation is successful, a confirmation message will be displayed indicating that the bank identifier has been verified.
Transfer details
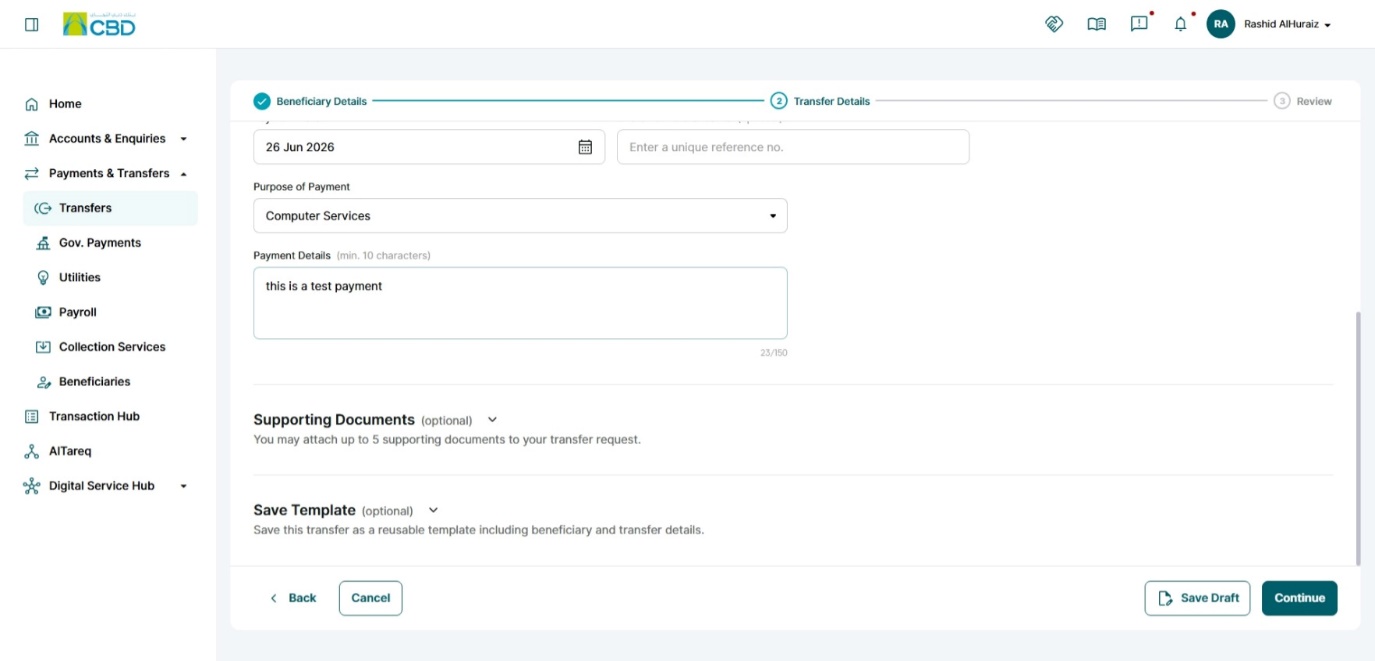
Complete the required transfer information:
- Debit Account: The bank account from which the money will be deducted for the transfer.
- Charges Account: The account that will be used to pay the transfer fees or bank charges. This can be the same as the debit account or a different account.
- Transfer Amount: The amount of money you want to send to the beneficiary. (Example: AED 5,000.00)
- Transfer Charges: Indicates who will bear the transfer fees.
- OUR: Sender pays all charges
- BEN: Beneficiary pays all charges
- SHA: Charges are shared between sender and beneficiary
- Customer Reference Number: a unique number assigned to the customer
- Payment Date: The date on which the transfer will be processed or sent.
- Purpose of Payment: The reason for sending the money, often required for compliance and regulatory purposes.
(Example: Computer Services, Rent Payments, Air Transport, Supplier Payment, etc...) - Payment Details: Additional information or remarks related to the payment that may be visible to the beneficiary.
- Save Draft: this will save the transfer for later use. Learn More
- Save Template: saving this transfer as a templet this will include the transfer details and beneficiary details. Learn More
- Supporting document: you will be able to attach up to 5 documents to your transfer request
Once completed, click Continue.
Step 4: Review and Submit
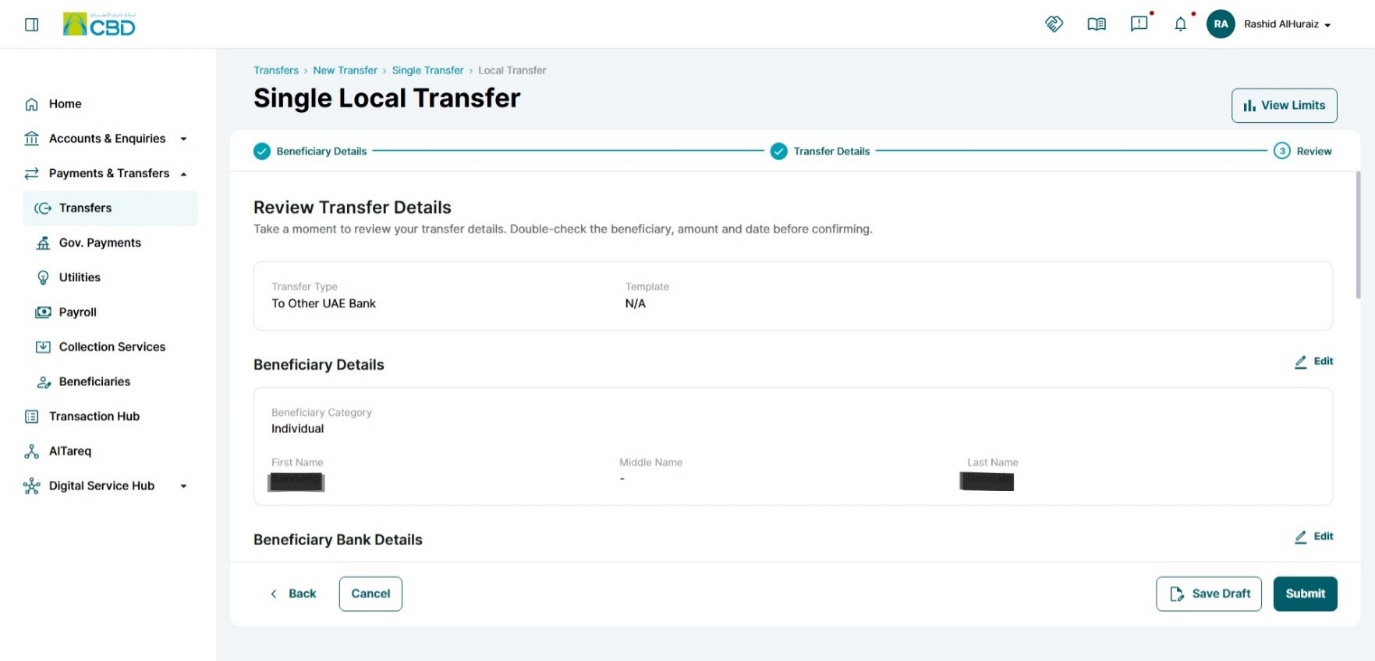
Review all details before submitting the transfer request.
Verify the following:
- Beneficiary details
- Beneficiary bank details
- Transfer amount
- Charges information
- Payment information
- Accept the Terms and Conditions.
- Click Submit.
Future-Dated Transfers
When you schedule a payment for a future date, the system will display a message based on the available balance in the selected debit account.
Insufficient Funds
If there are currently insufficient funds in the account, the following warning will be displayed:

Key Points
- The payment can still be submitted.
- Ensure sufficient funds are available before the payment date.
- If funds are not available on the payment date, the payment may not be processed.
Future-Dated Payment ScheduledIf the payment is scheduled successfully, the system will display a confirmation message:

Key Points
- The payment has been scheduled successfully.
- Funds are not reserved when the payment is created.
- Ensure sufficient funds are available on the payment date.
Best Practice: Keep enough funds in the debit account before the scheduled payment date to avoid
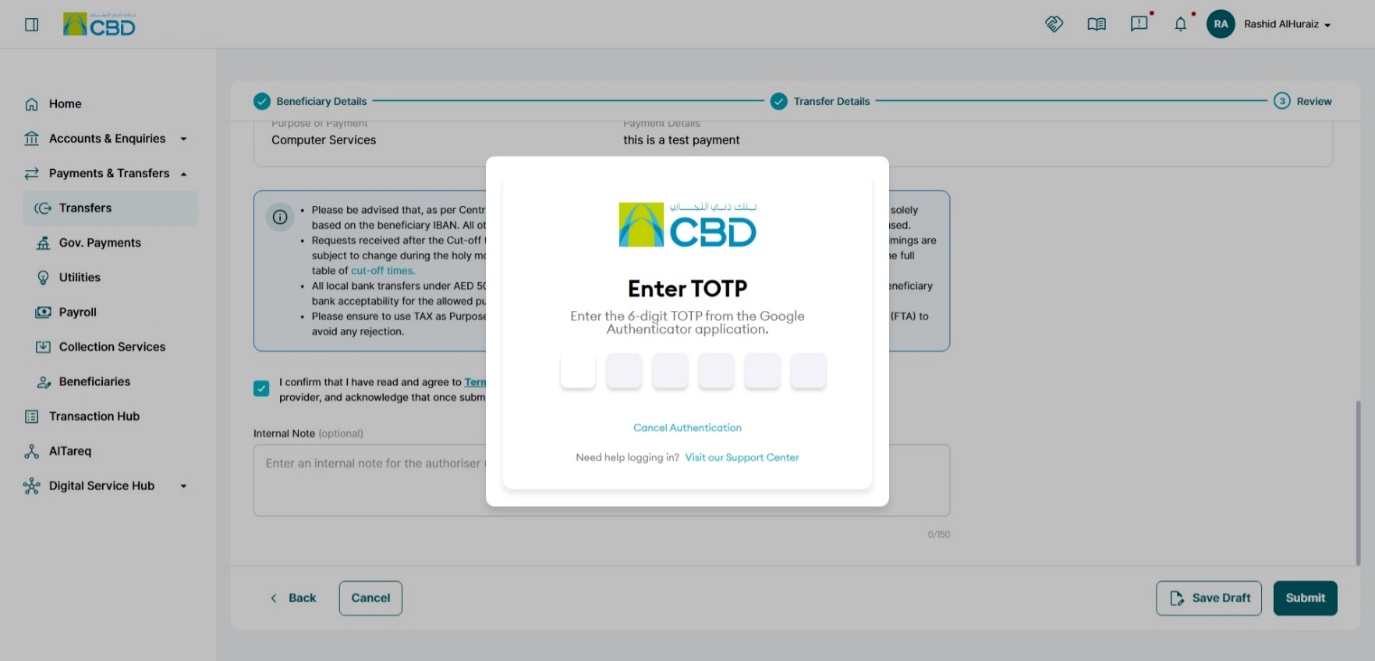
Step 5: Authenticate the Request
Complete authentication using one of the following methods:
iBusiness App Authentication
- Approve the request through the iBusiness Mobile App.
- Complete biometric or device verification.
Google Authenticator
- Open the Google Authenticator application.
- Enter the generated One-Time Password (OTP).
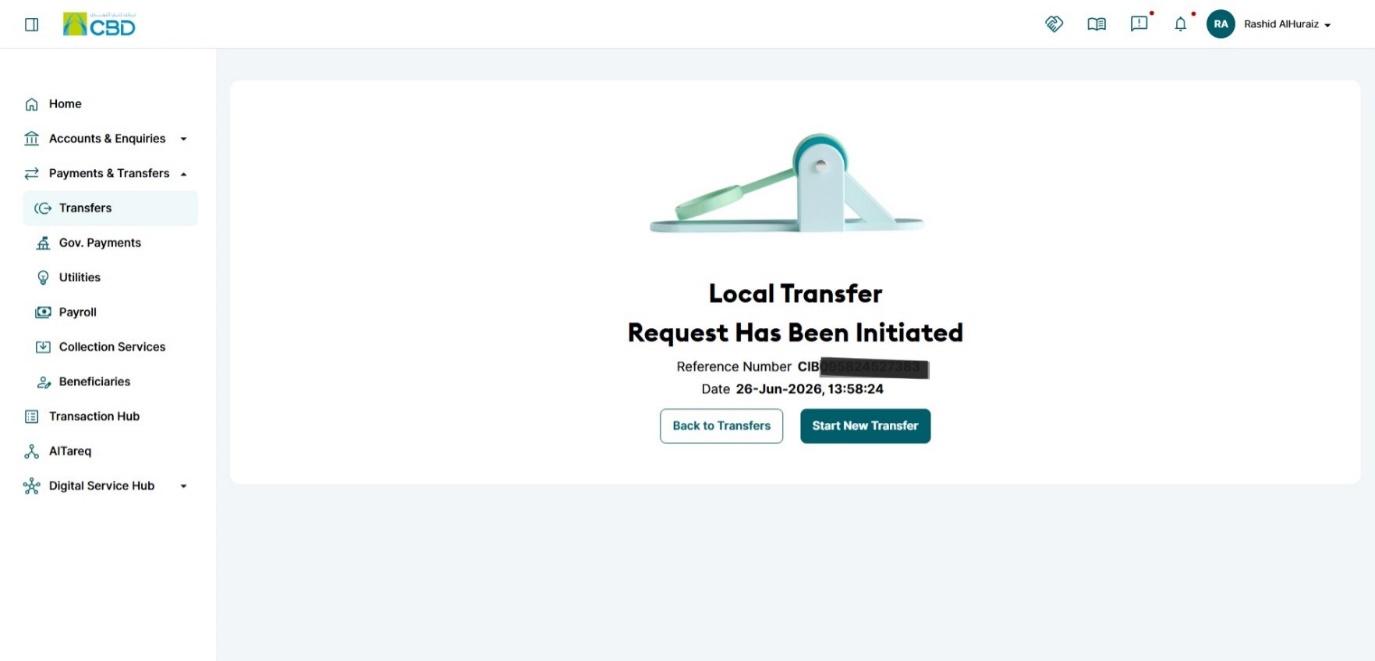
Upon successful authentication, the transfer request will be submitted for processing.
Step 6: Approval (If Maker–Checker Is Enabled)
If your organization uses a Maker–Checker setup:
- The request will be routed to a Checker/Approver.
- The Approver must:
- Log in to iBusiness
- Navigate to Transactions Hub ➜ Pending Your Authorizations
- Locate the transaction awaiting approval.
- Review the request and select: Approve or Reject
Note: The transaction type may appear according to the configured local transfer service.
Support Notes / Best Practices
- Verify beneficiary details before submitting the transfer.
- Ensure the correct debit account and charges account are selected.
- Review the transfer amount and payment date carefully.
- Select the appropriate charge method (OUR, BEN, or SHA) based on business requirements.
- Keep a record of the generated reference number for tracking and support purposes.
- Follow Maker–Checker approval procedures where applicable.