
Overview
This guide provides step-by-step instructions for making a Salik payment through the iBusiness Web Portal.
The Utility Payments service enables you to view outstanding Salik balances and make payments directly from your selected account.
Step 1: Access Utility Payments
- Log in to iBusiness.
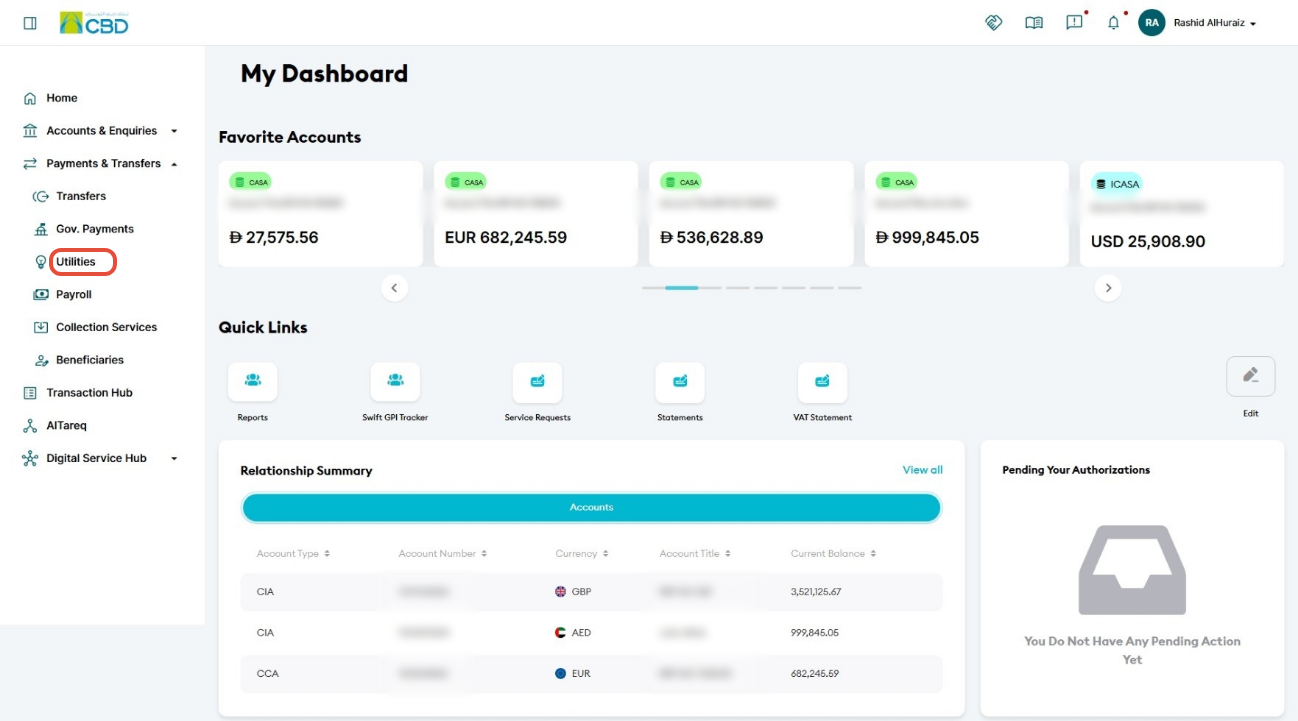
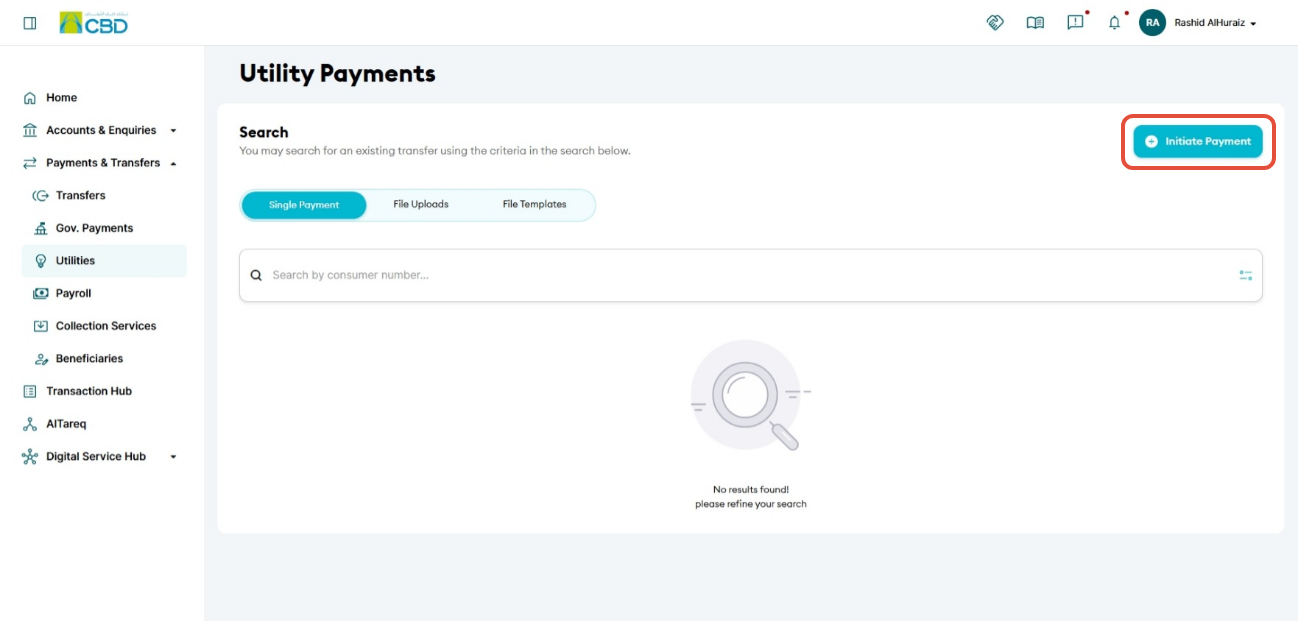
- Navigate to: Payments & Transfers ➜ Utilities ➜ Initiate Payment
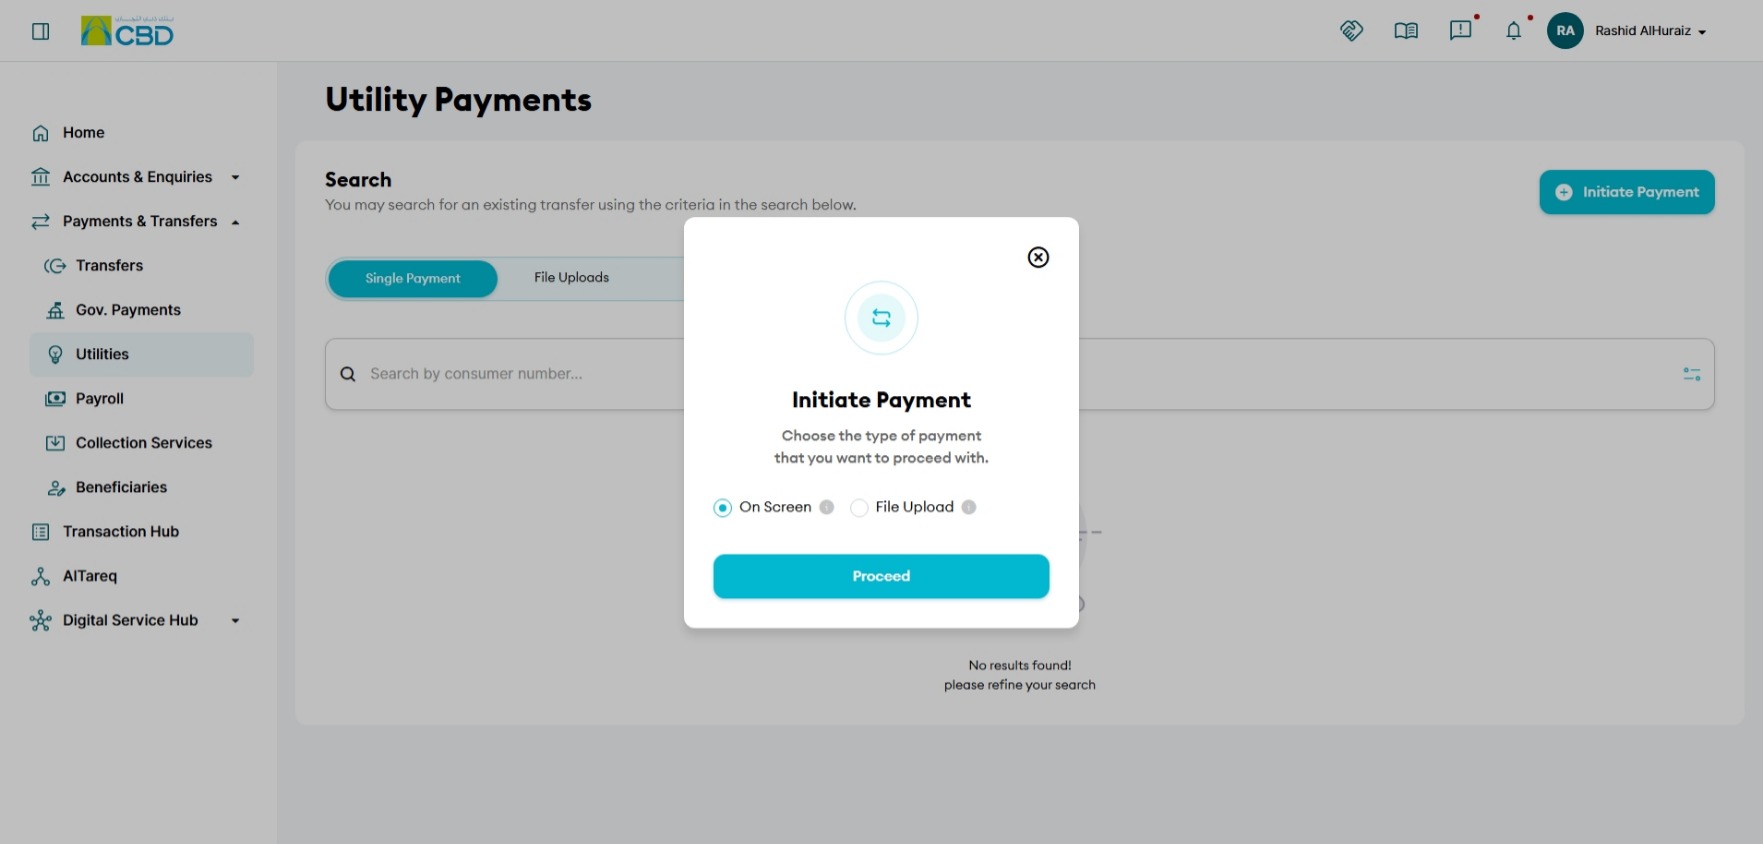
- Select On Screen.
Step 2: Select the Debit Account
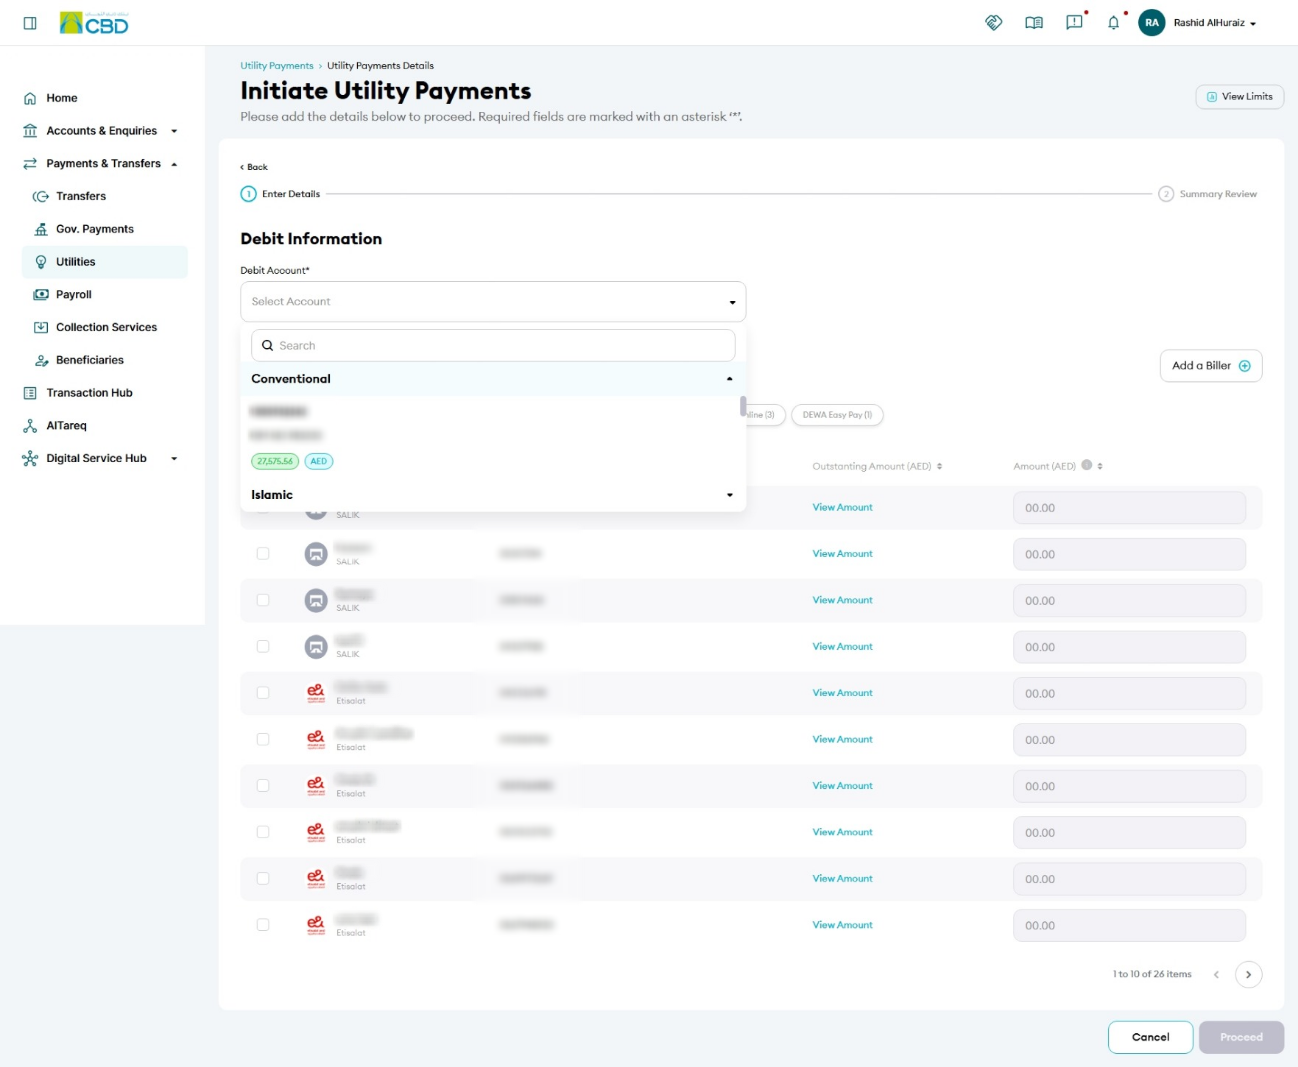
- Select the account that will be used to make the payment.
- Ensure the selected account has sufficient funds available.
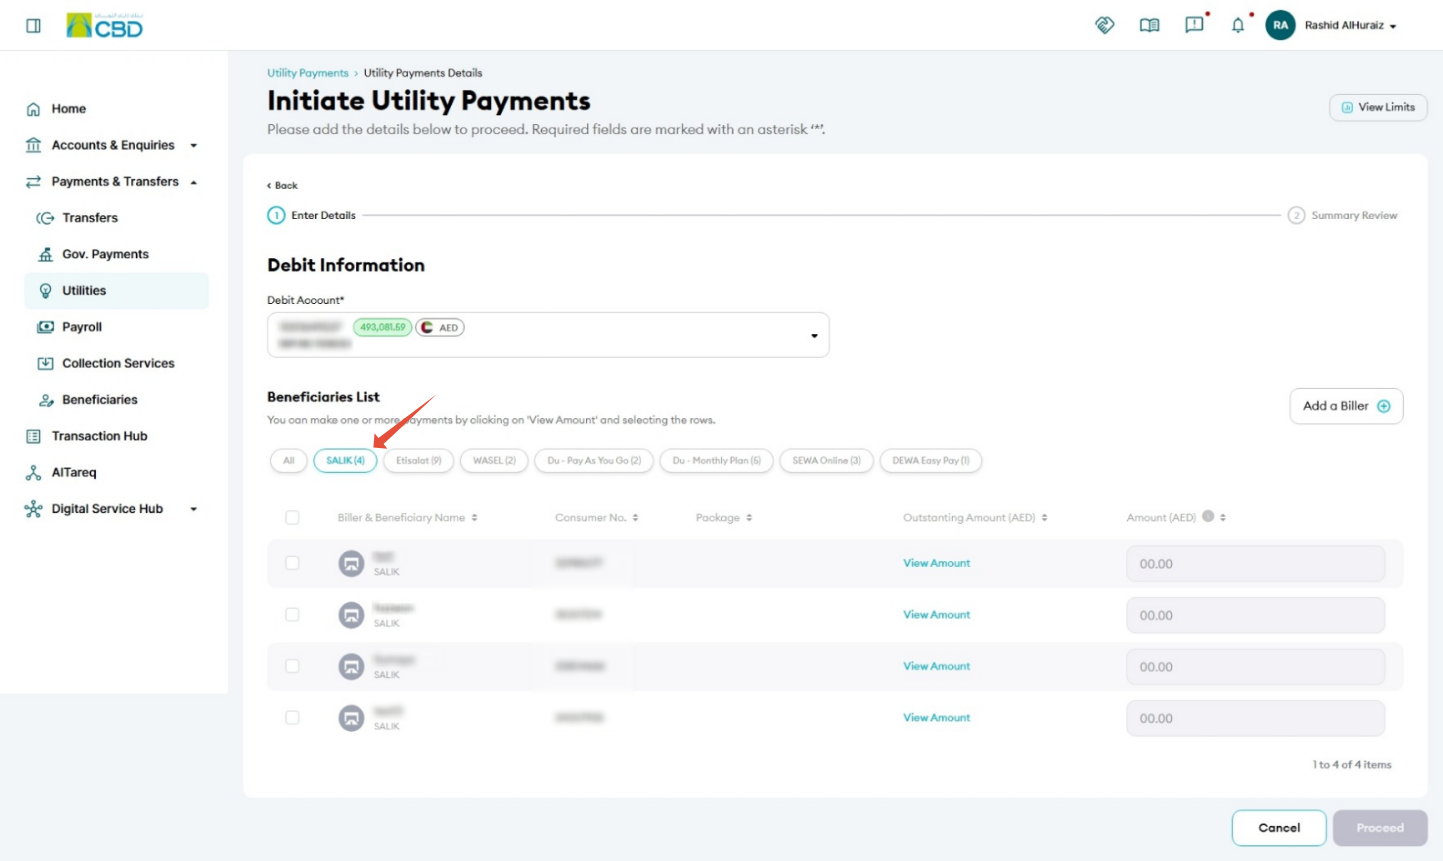
Step 3: Select the Salik Account
- Use the Filter option to narrow the list of beneficiaries.
- Select Salik to display registered Salik accounts only.
- Choose the Salik account you want to pay.
Step 4: View or Enter the Payment Amount
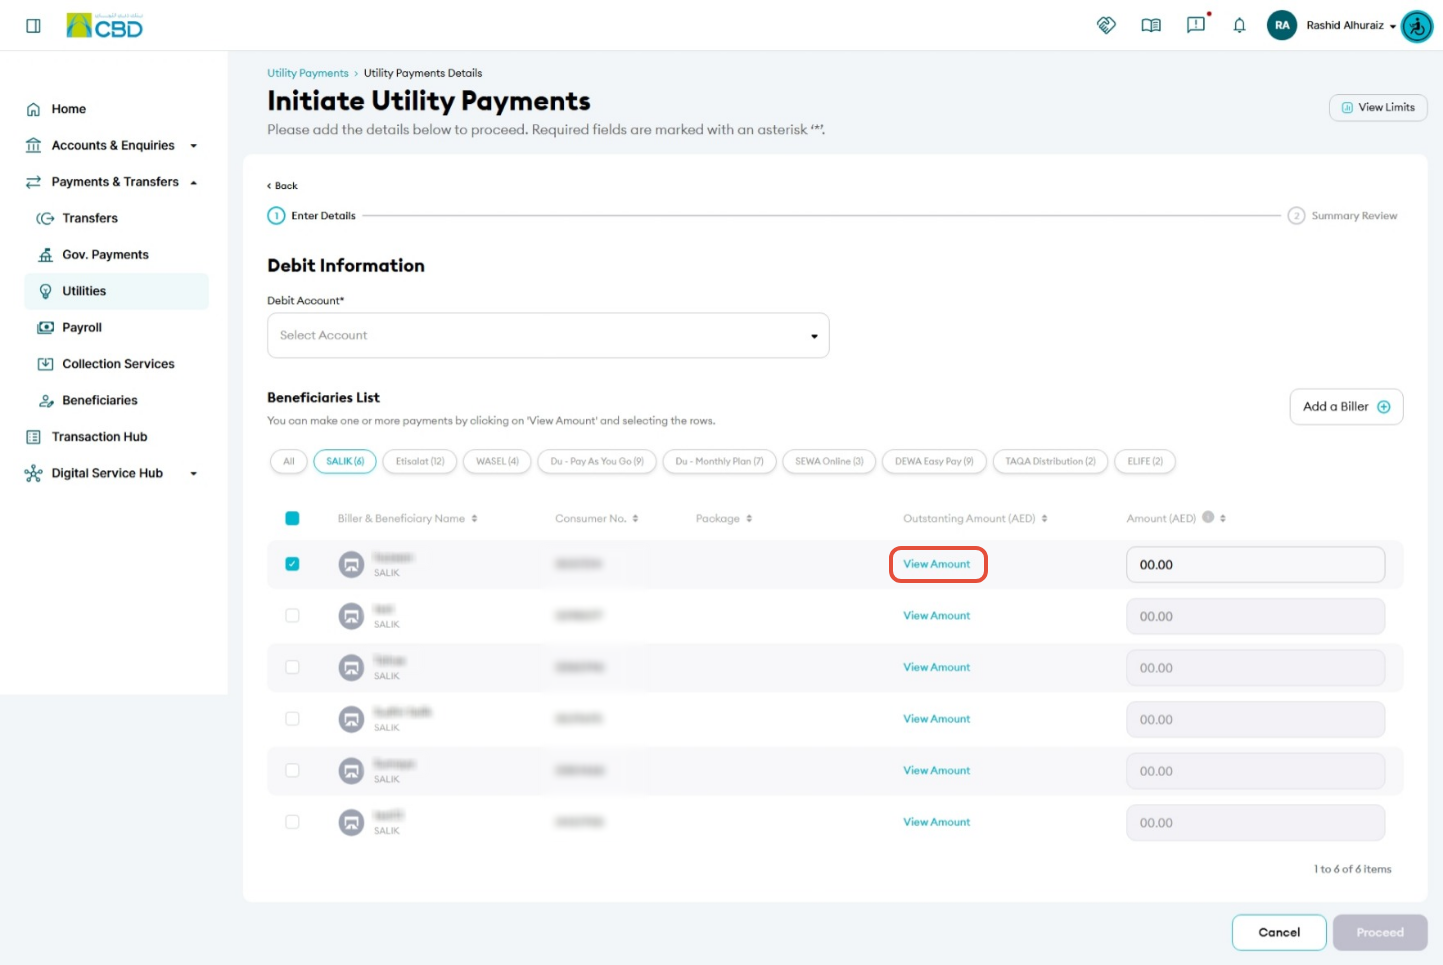
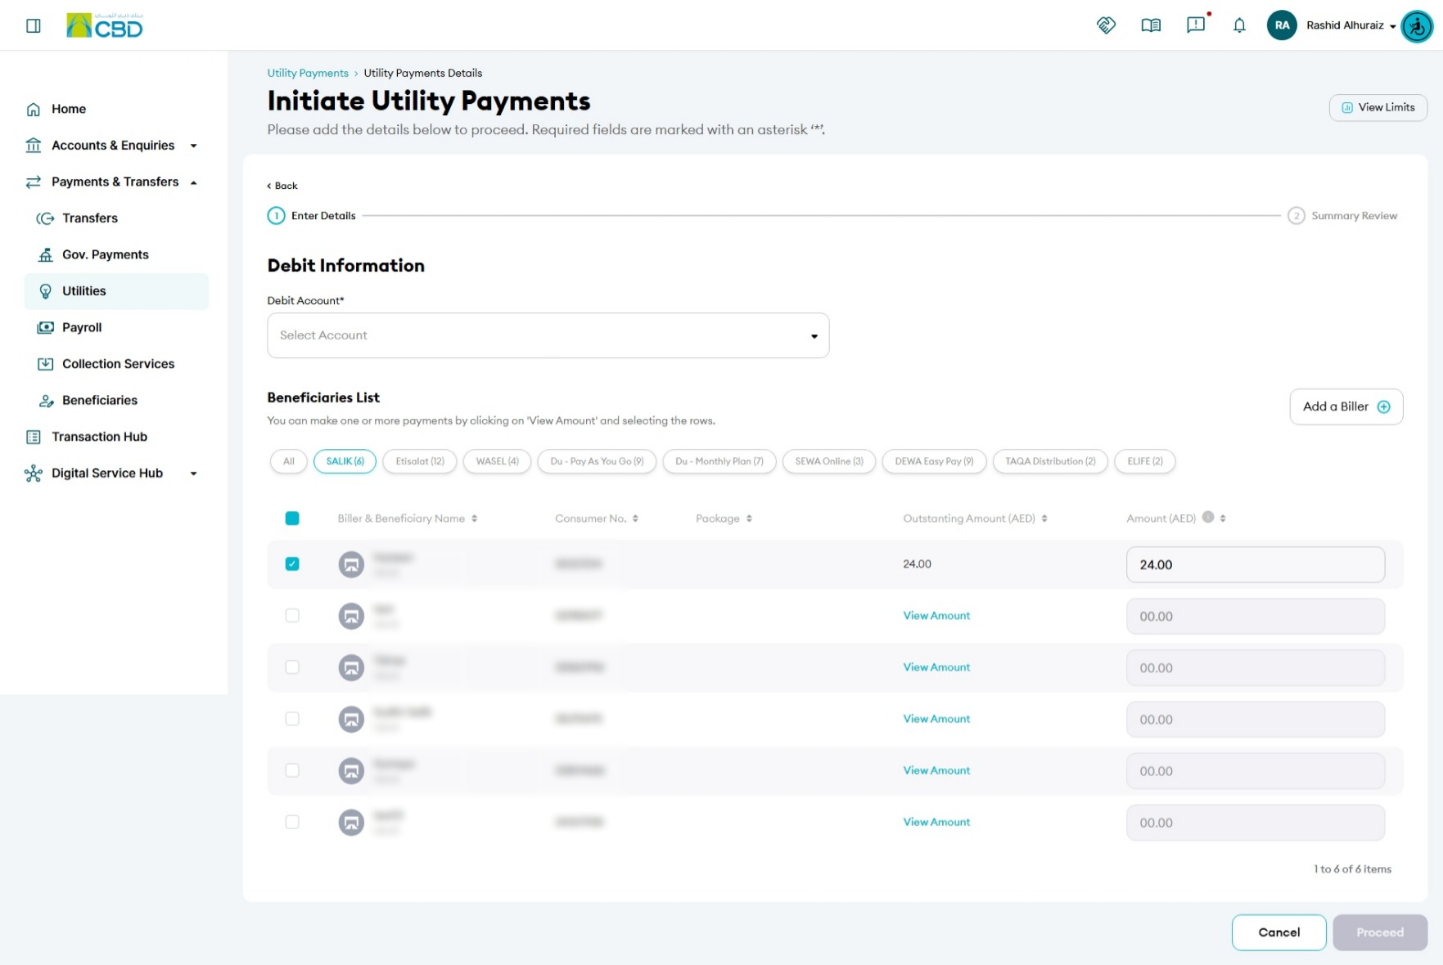
View Outstanding Amount
- Click View Amount.
- The system will retrieve and display the outstanding Salik balance.
Enter a Custom Amount
If required, you can manually enter a payment amount instead of paying the outstanding balance.
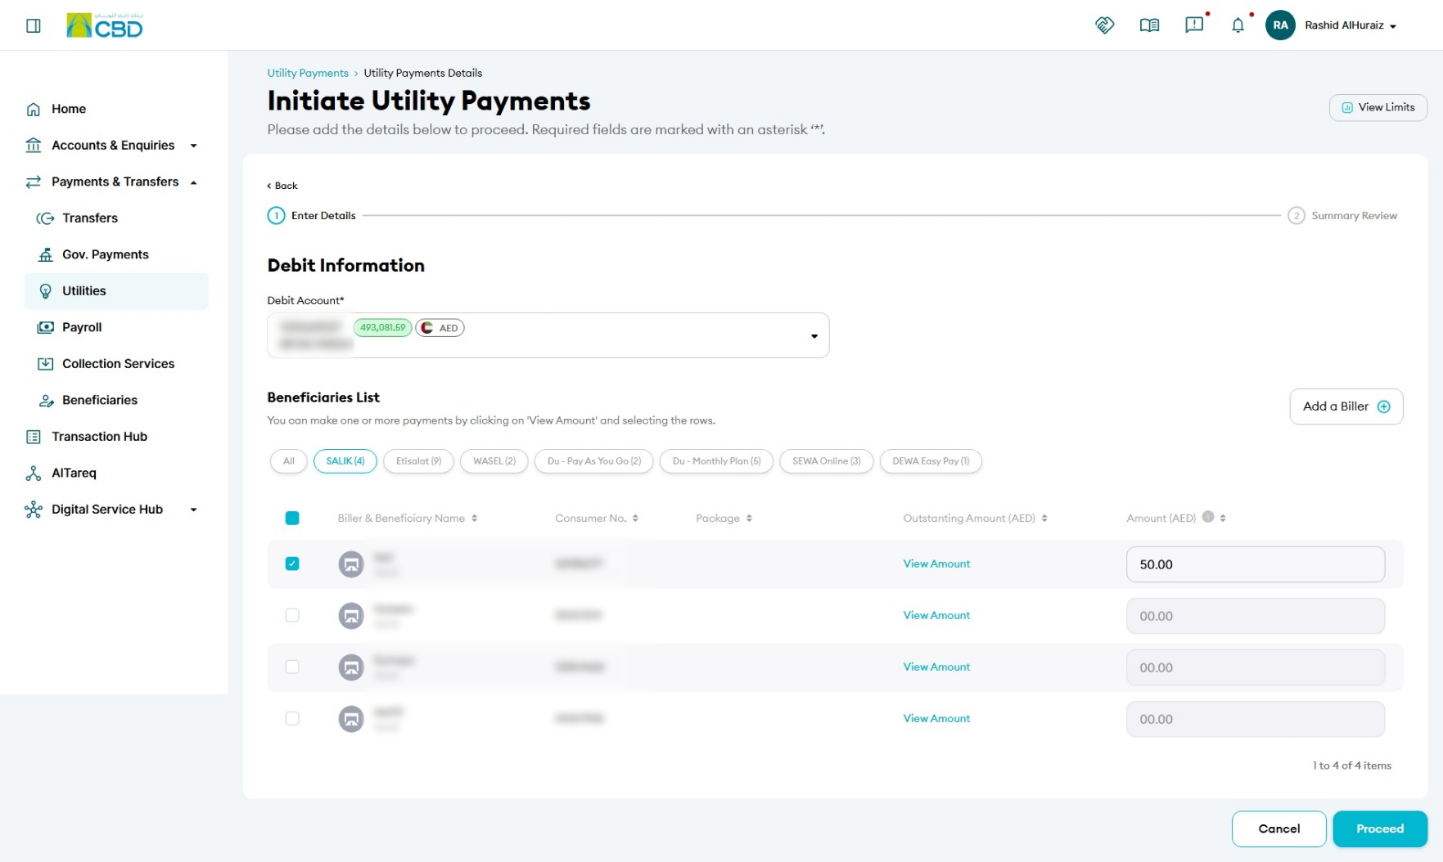
Note: Ensure the entered amount is correct before proceeding with the payment.
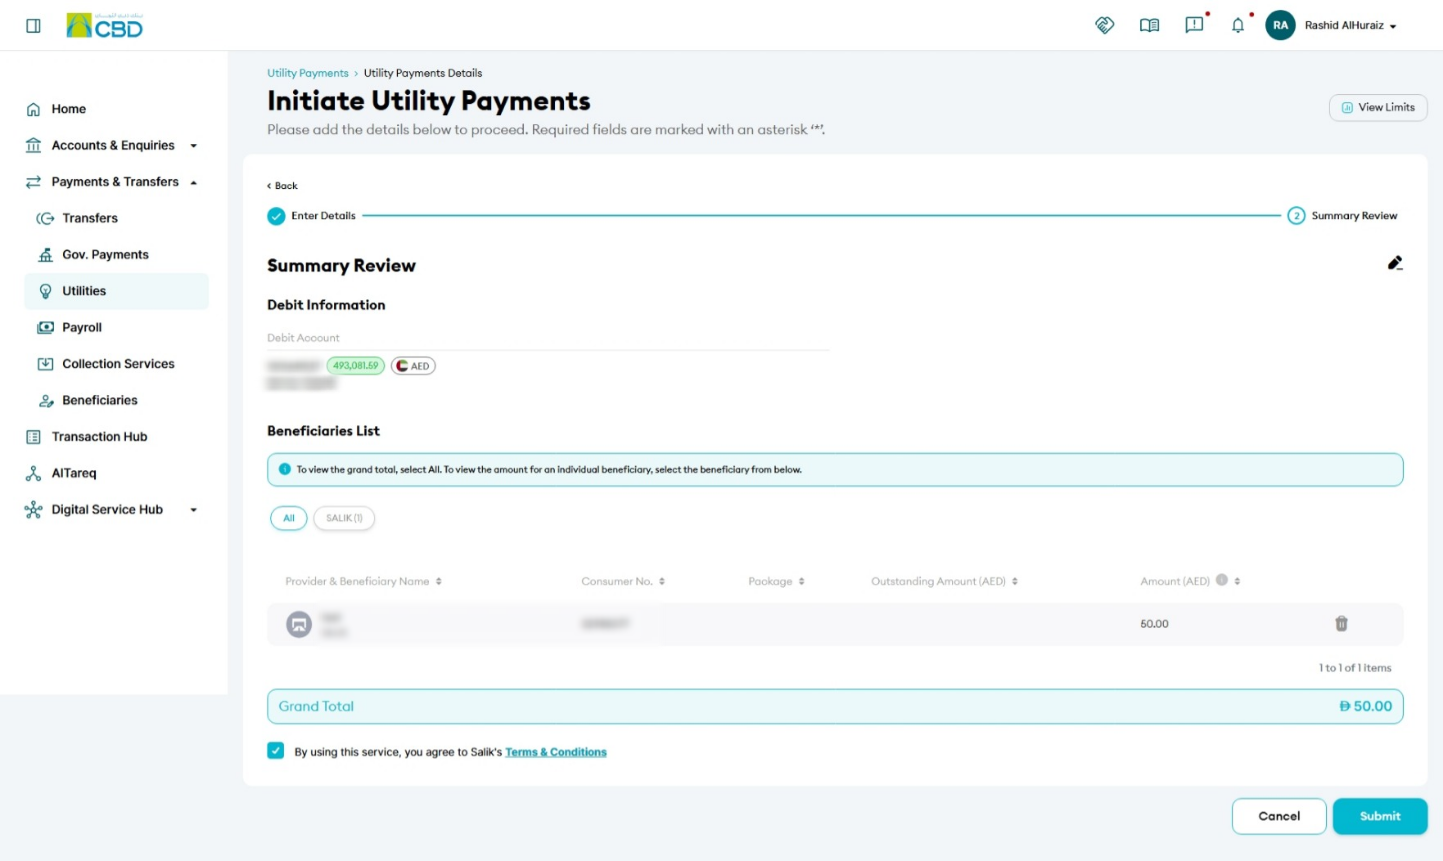
Step 5: Review and Submit
- Review the payment details carefully, including:
- Debit Account
- Salik Account
- Payment Amount
- Verify that all information is correct.
- If required, click Terms and Conditions to view and review the Salik payment terms and conditions before proceeding.
- Once you have reviewed the details and accepted the Terms and Conditions, click Submit.
Important: Review the payment amount and selected Salik account carefully before submitting the transaction. Once submitted, the payment will be processed according to the applicable Salik payment terms and conditions.
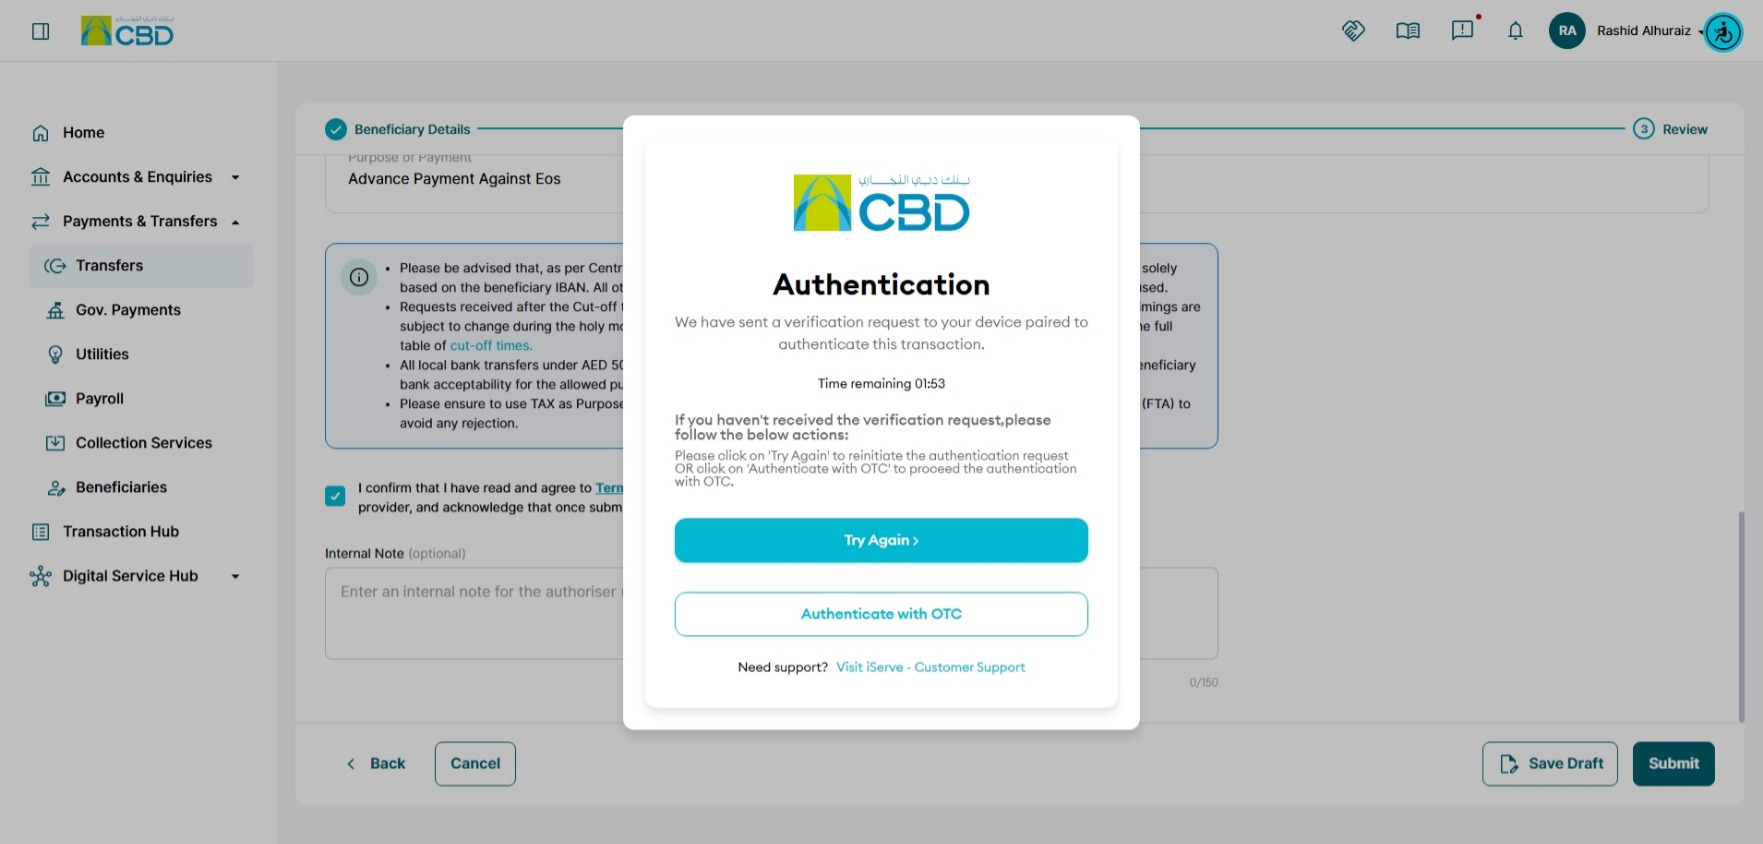
Step 6: Authenticate the Payment
Complete authentication using one of the following methods:
iBusiness App Authentication
- Approve the payment through the iBusiness Mobile App.
- Complete biometric authentication using Face ID, Touch ID, or device biometrics.
Google Authenticator
- Open the Google Authenticator application.
- Enter the generated One-Time Password (OTP).
Payment Confirmation
After successful authentication:
- The payment request will be submitted for processing.
- A confirmation message will be displayed.
- A transaction reference number will be generated for tracking purposes.
Support Notes / Best Practices
- Use View Amount to retrieve the latest outstanding Salik balance before making a payment.
- Verify the selected Salik account before submitting the transaction.
- Ensure sufficient funds are available in the selected debit account.
- Review the payment amount carefully when entering a custom amount.
- Retain the transaction reference number for future tracking or support enquiries.