
Overview
This guide provides step-by-step instructions for submitting a Preferential FX Rate Request through the iBusiness Web Portal. This service allows customers to request a preferential foreign exchange (FX) rate for eligible treasury transactions.
Step 1: Access Service Requests
- Log in to iBusiness.
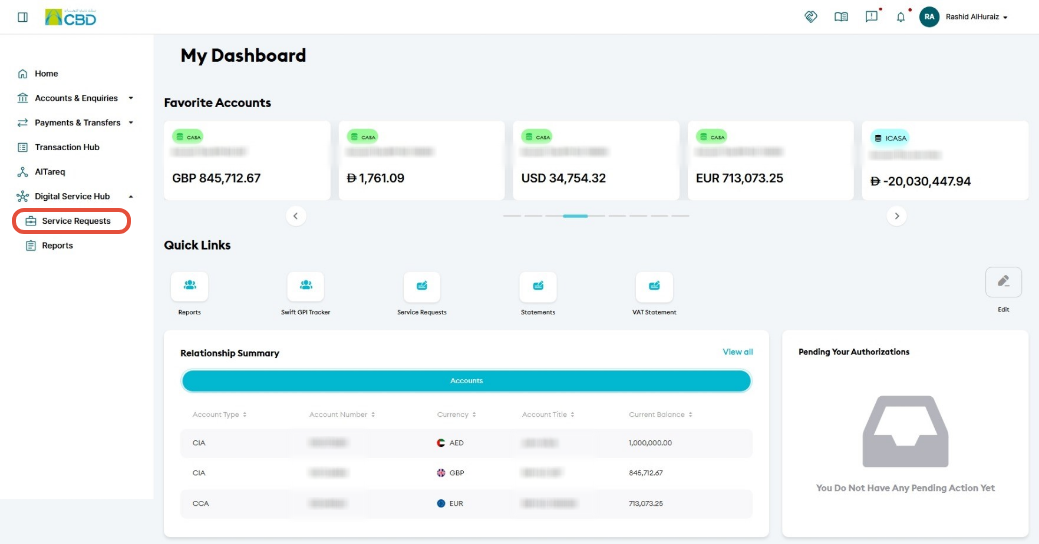
- Navigate to: Digital Service Hub ➜ Service Requests
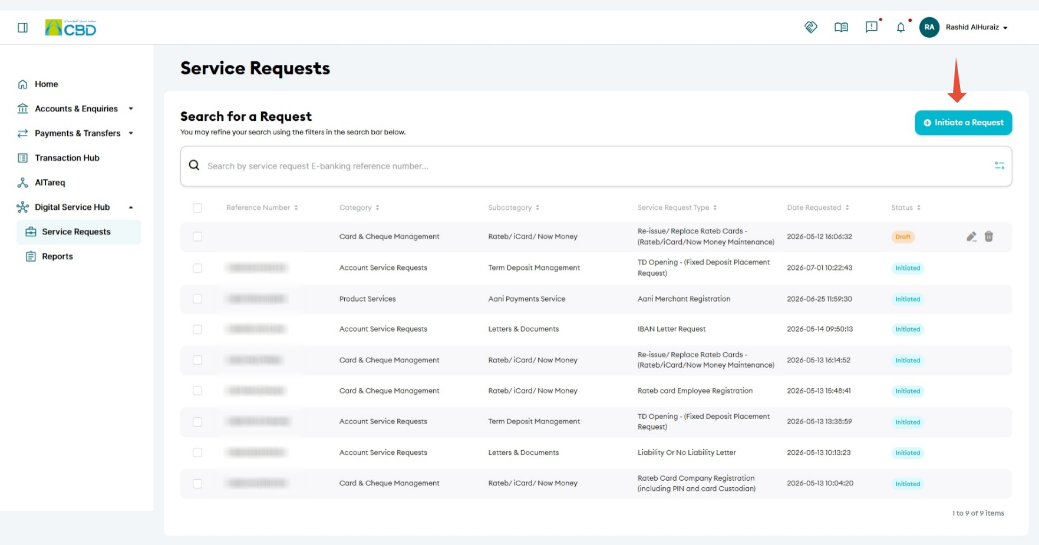
- Click Initiate a Request.
Step 2: Select the Service Type
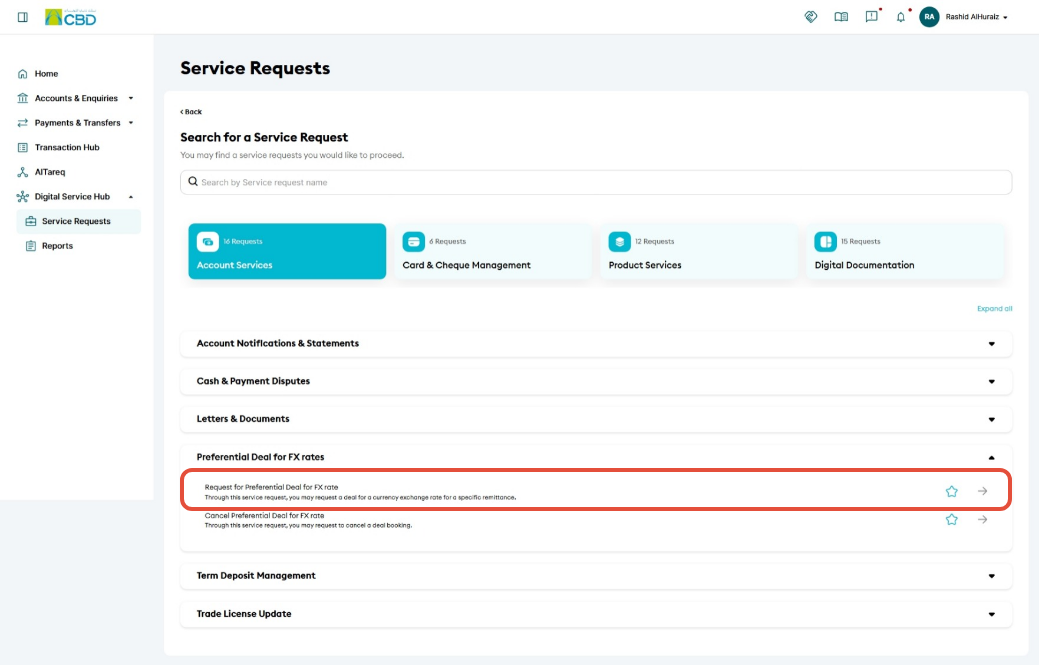
- Select Account Services.
- Open the Preferential Deal for FX Rate drop-down menu.
- Select Request for Preferential Deal for FX Rate.
This will open the Treasury Deal Rate request form.
Step 3: Complete the Request Details
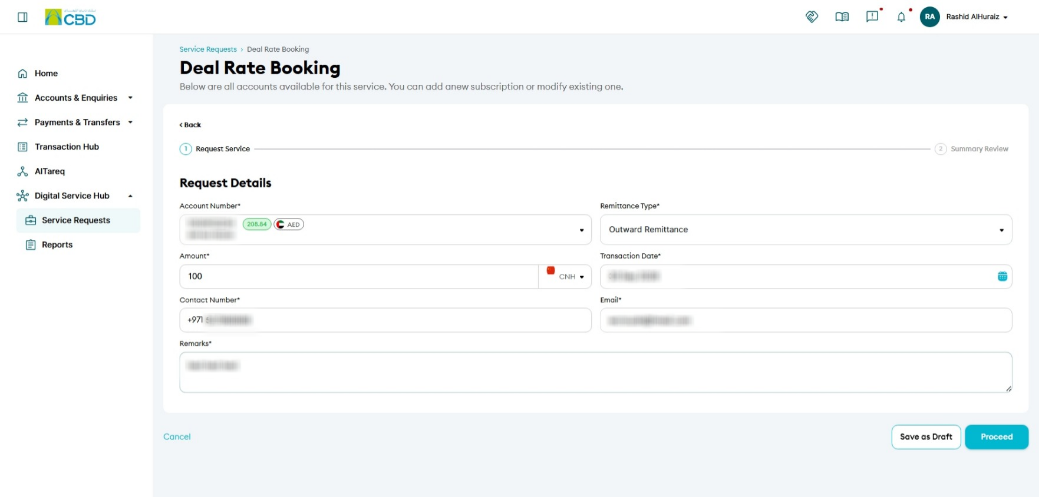
- Enter all required request information.
- Verify the entered details carefully.
- Click Proceed.
Important: Ensure all request information is accurate before proceeding, as incorrect details may delay the processing of the request.
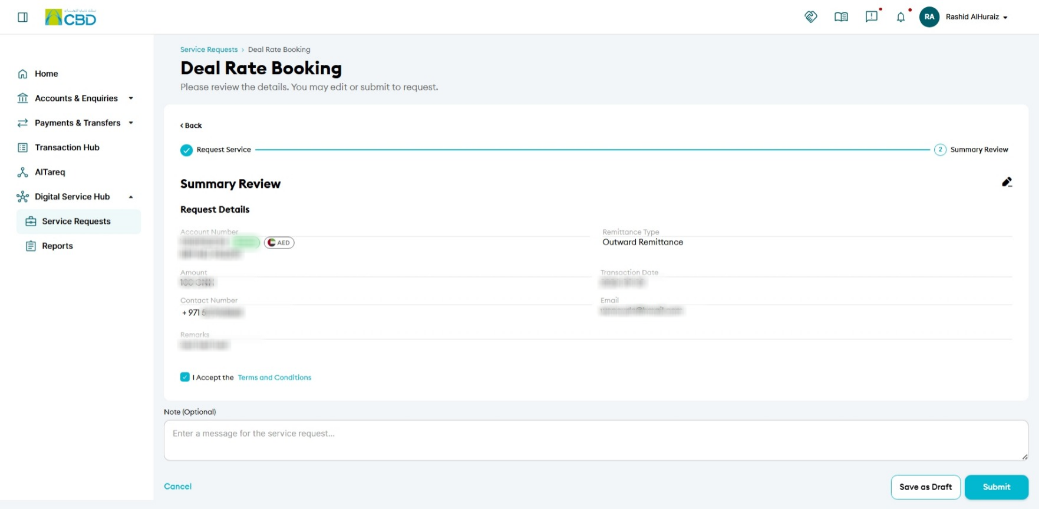
Step 4: Review and Submit
- Review all request details on the Summary Review screen.
- Verify that all information entered is correct.
- Accept the Terms and Conditions.
- Click Submit.
Step 5: Authenticate the Request
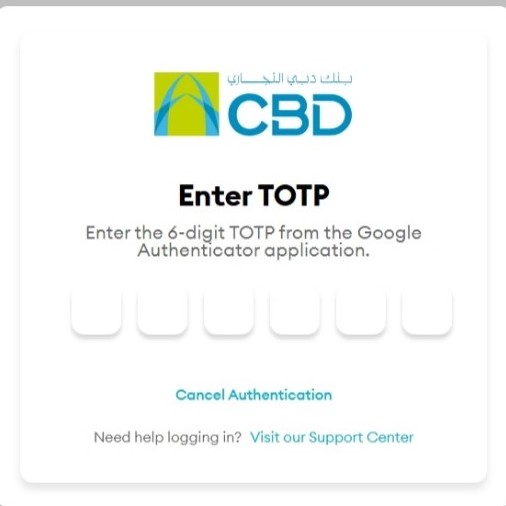
Complete authentication using one of the following methods:
iBusiness App Authentication
- A notification will be sent to the registered iBusiness Mobile App.
- Review the request details.
- Approve the request using biometric authentication or device verification.
Google Authenticator
- Open the Google Authenticator application.
- Enter the generated One-Time Password (OTP).
Once authentication is completed successfully, the request will be submitted for processing
Step 6: Request Confirmation
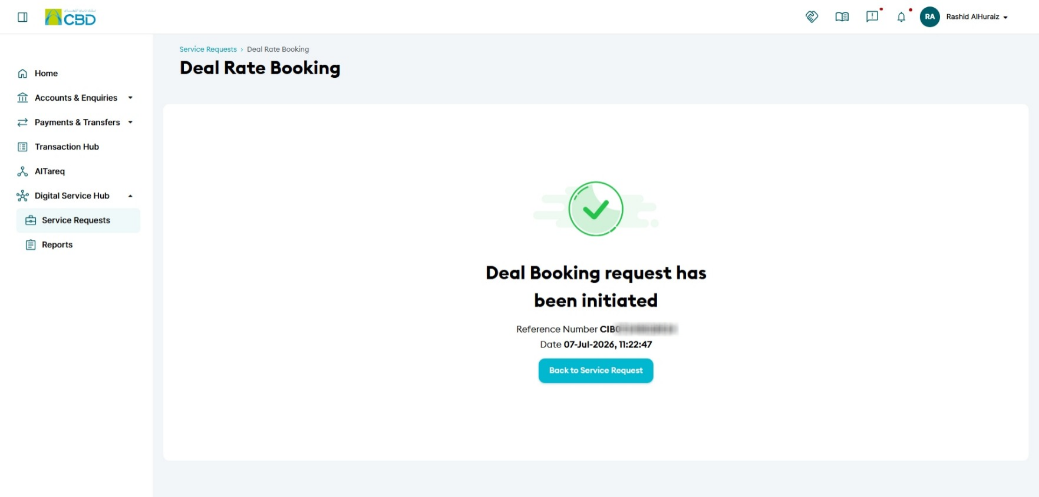
After successful submission:
- A confirmation screen will be displayed.
- A unique reference number will be generated.
- The confirmation will include the date and time of request submission.
Keep the reference number for future tracking and support enquiries.
Step 7: Approval (If Maker–Checker Is Enabled)
If your organization uses a Maker–Checker approval workflow:
- The request will be routed to the designated Approver.
- The Approver must:
- Log in to iBusiness
- Navigate to Transactions Hub ➜ Pending Your Authorizations
- Locate the request under Service Requests.
- Review the request details.
- Select: Approve or Reject
The request will only be processed after all required approvals have been completed.
Support Notes / Best Practices
- Ensure all request details are reviewed carefully before submission.
- Verify that the correct service type (Request for Preferential Deal for FX Rate) has been selected.
- Retain the generated reference number for tracking and support purposes.
- If your organization follows a Maker–Checker process, the request will not be processed until it has been approved by the designated approver.
- Monitor the status of the request through iBusiness until it has been completed.