
Overview
This guide provides step-by-step instructions for uploading and processing a WPS (Wage Protection System) Salary File through the iBusiness Web Portal.
Prerequisite: Your WPS MOL ID must be registered before you can upload and process
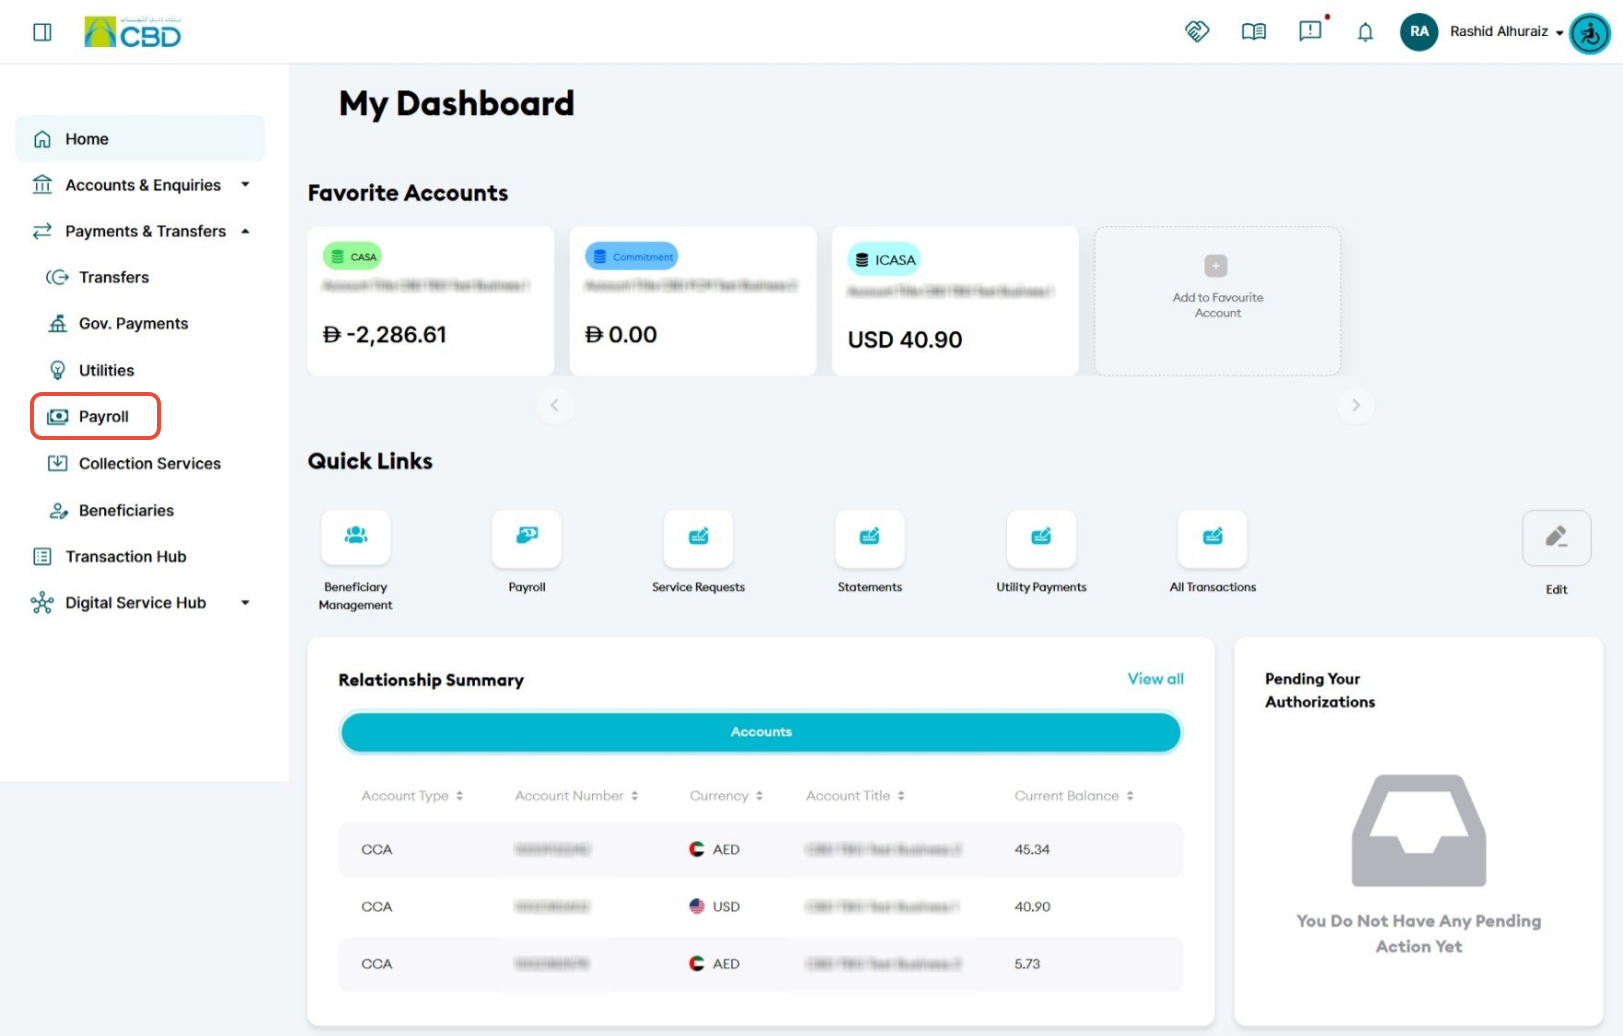
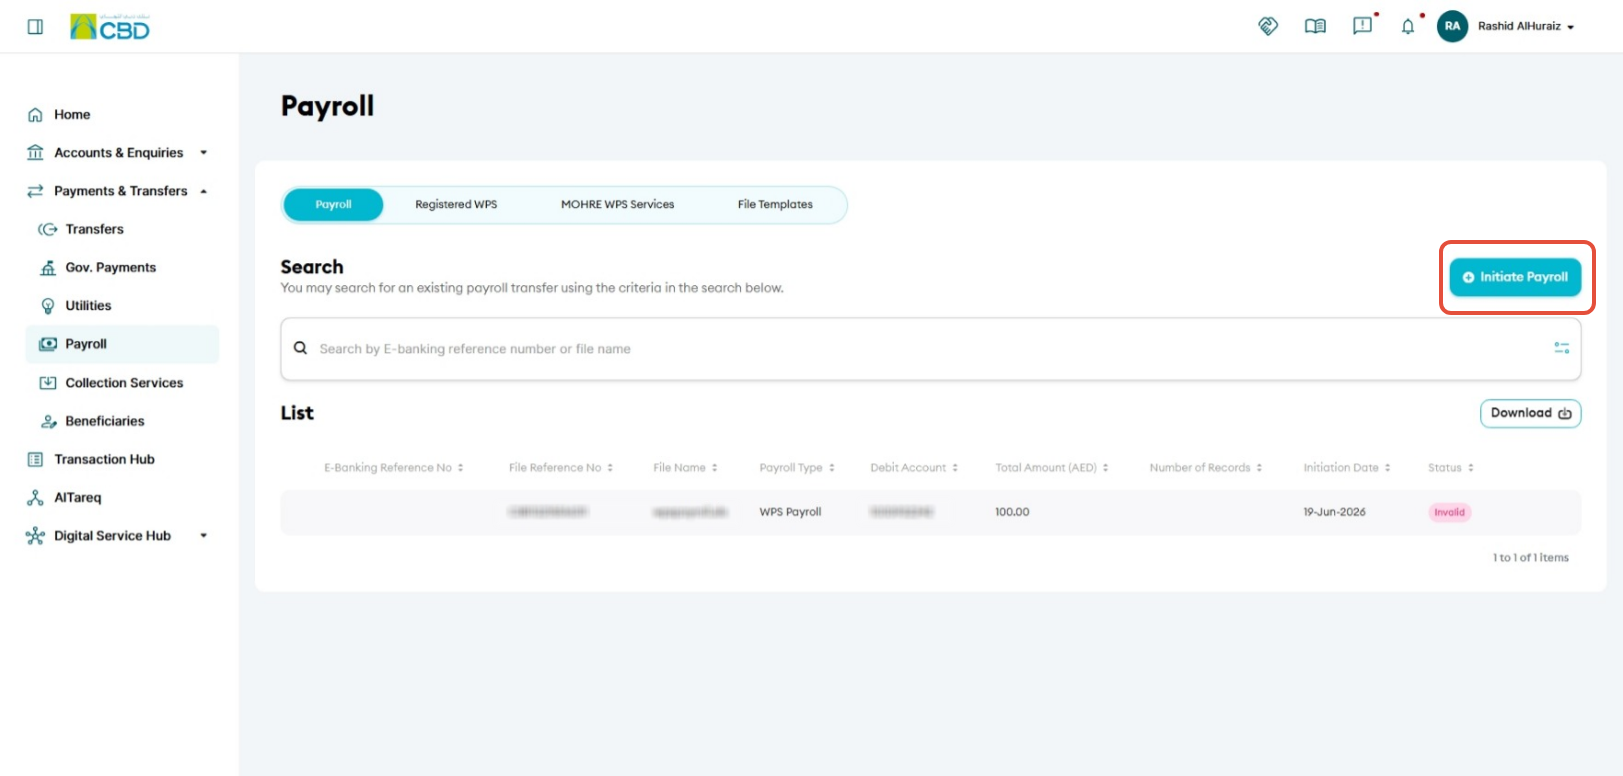
Step 1: Access WPS Payroll
- Log in to iBusiness.
- Navigate to: payment & Transfers ➜ Payroll
- Click Initiate Payroll.
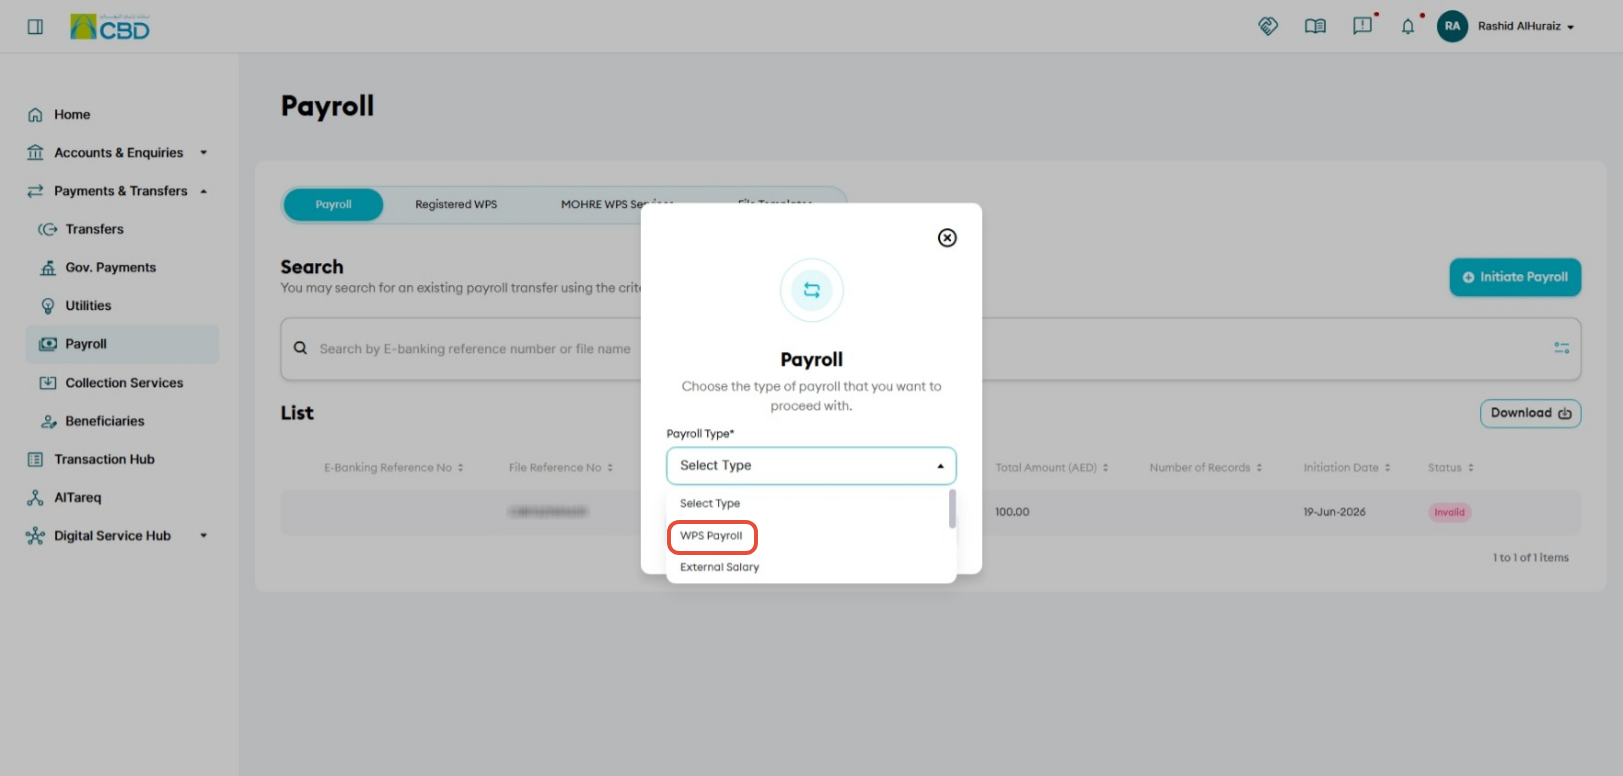
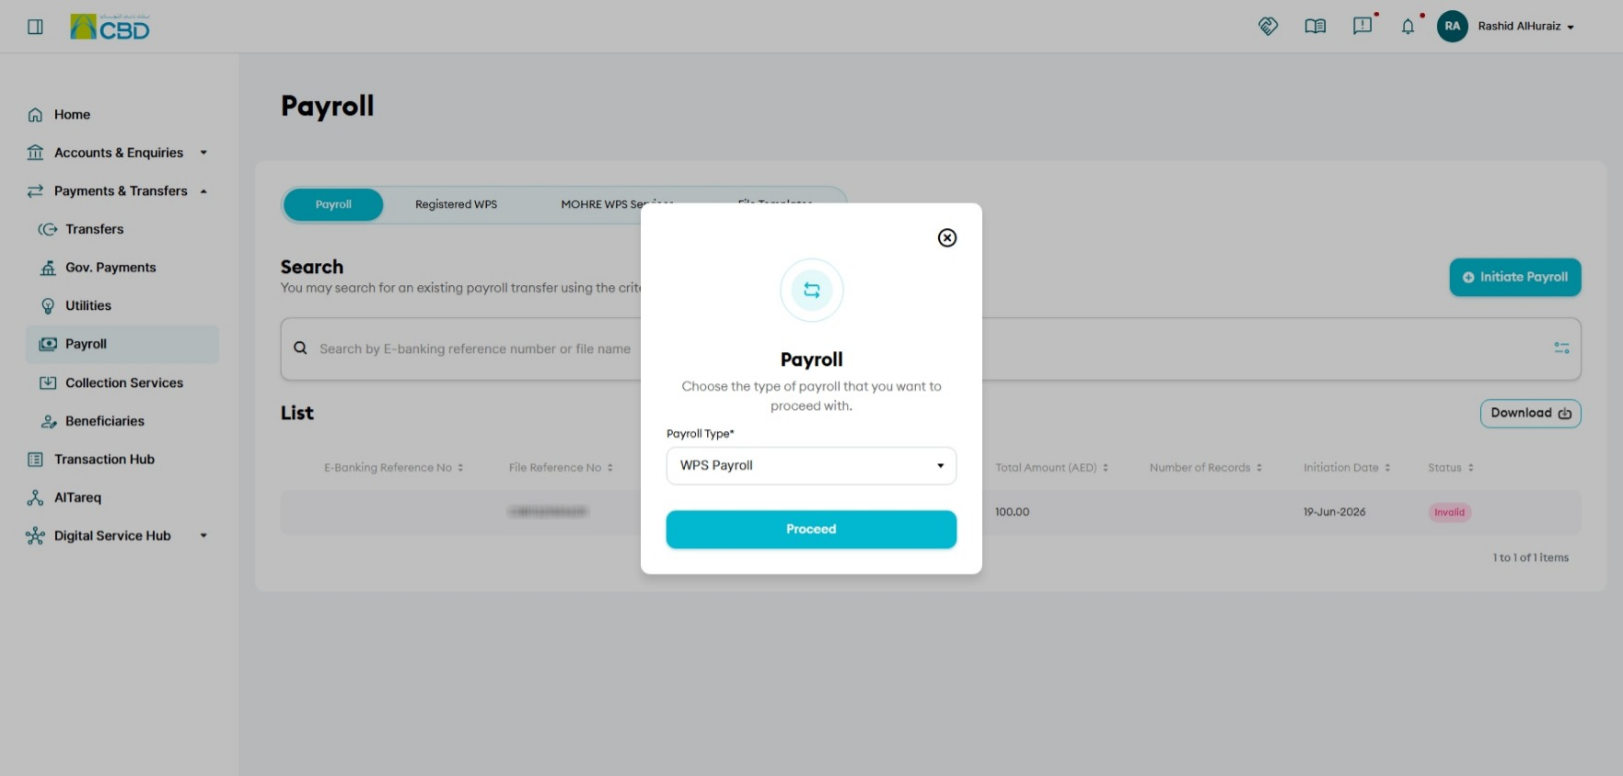
- Select WPS Payroll as the Payroll Type.
- Click Proceed.
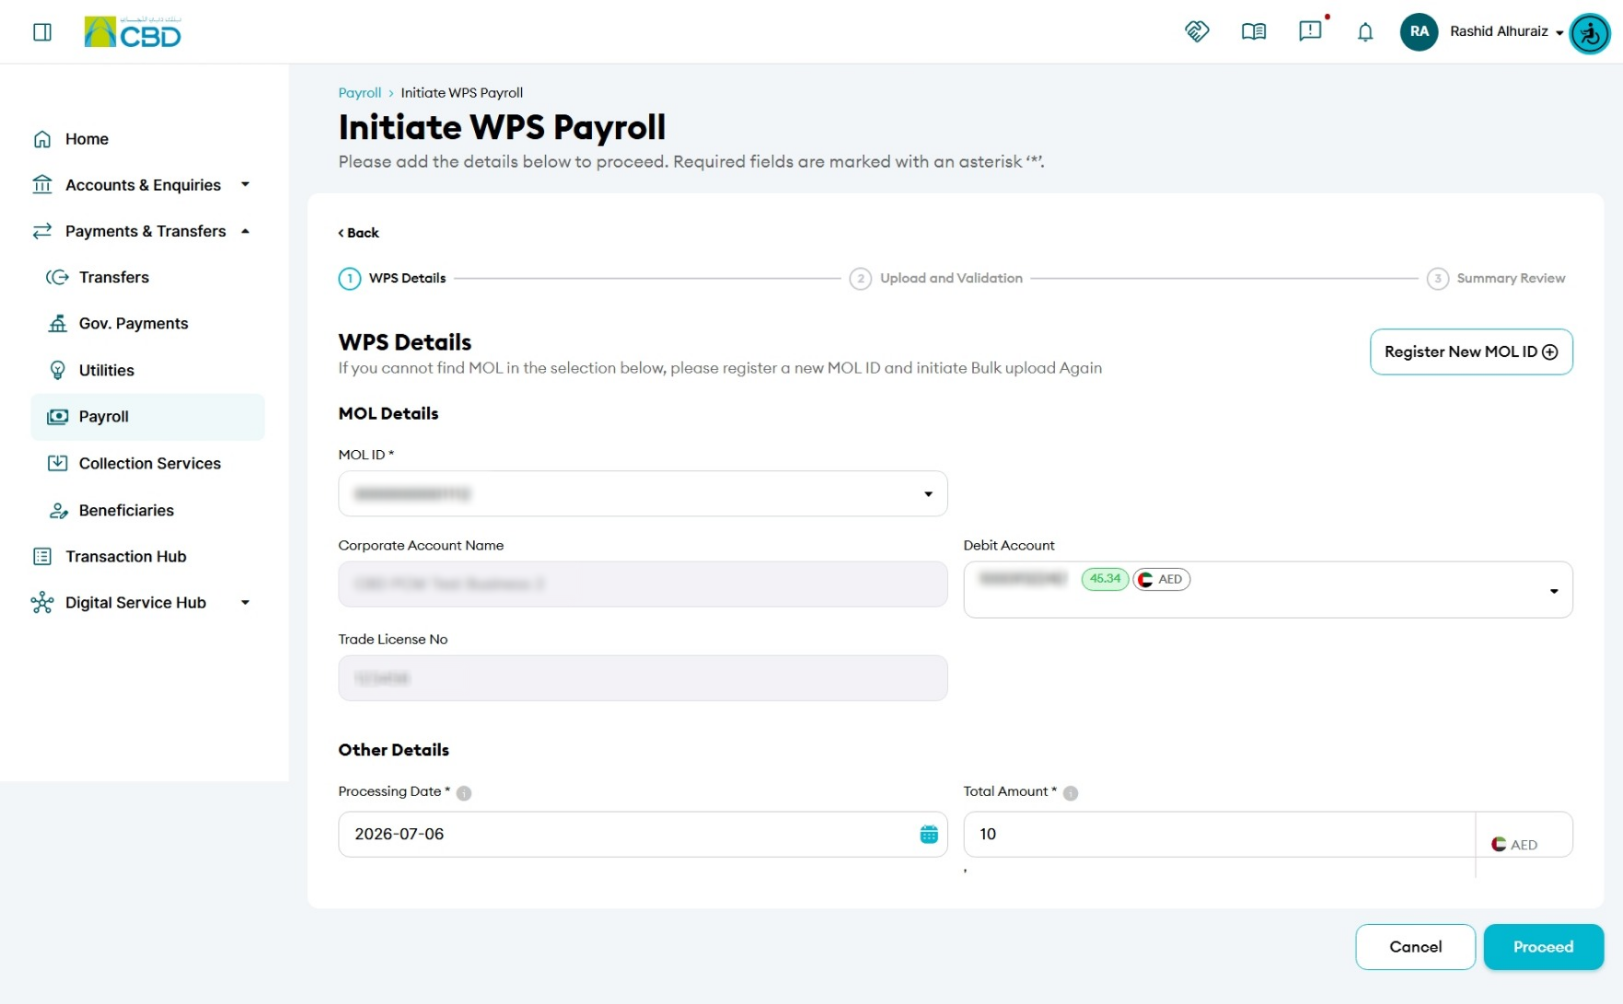
Step 2: Enter Payroll Details
- Select the required WPS MOL ID from the dropdown list.
- Enter the Total Salary Amount contained in the salary file.
Once the MOL ID is selected, the following information will be populated automatically:
- Debit Account Number
- Trade Licence Number
- Select the Processing Date.
- Click Proceed.
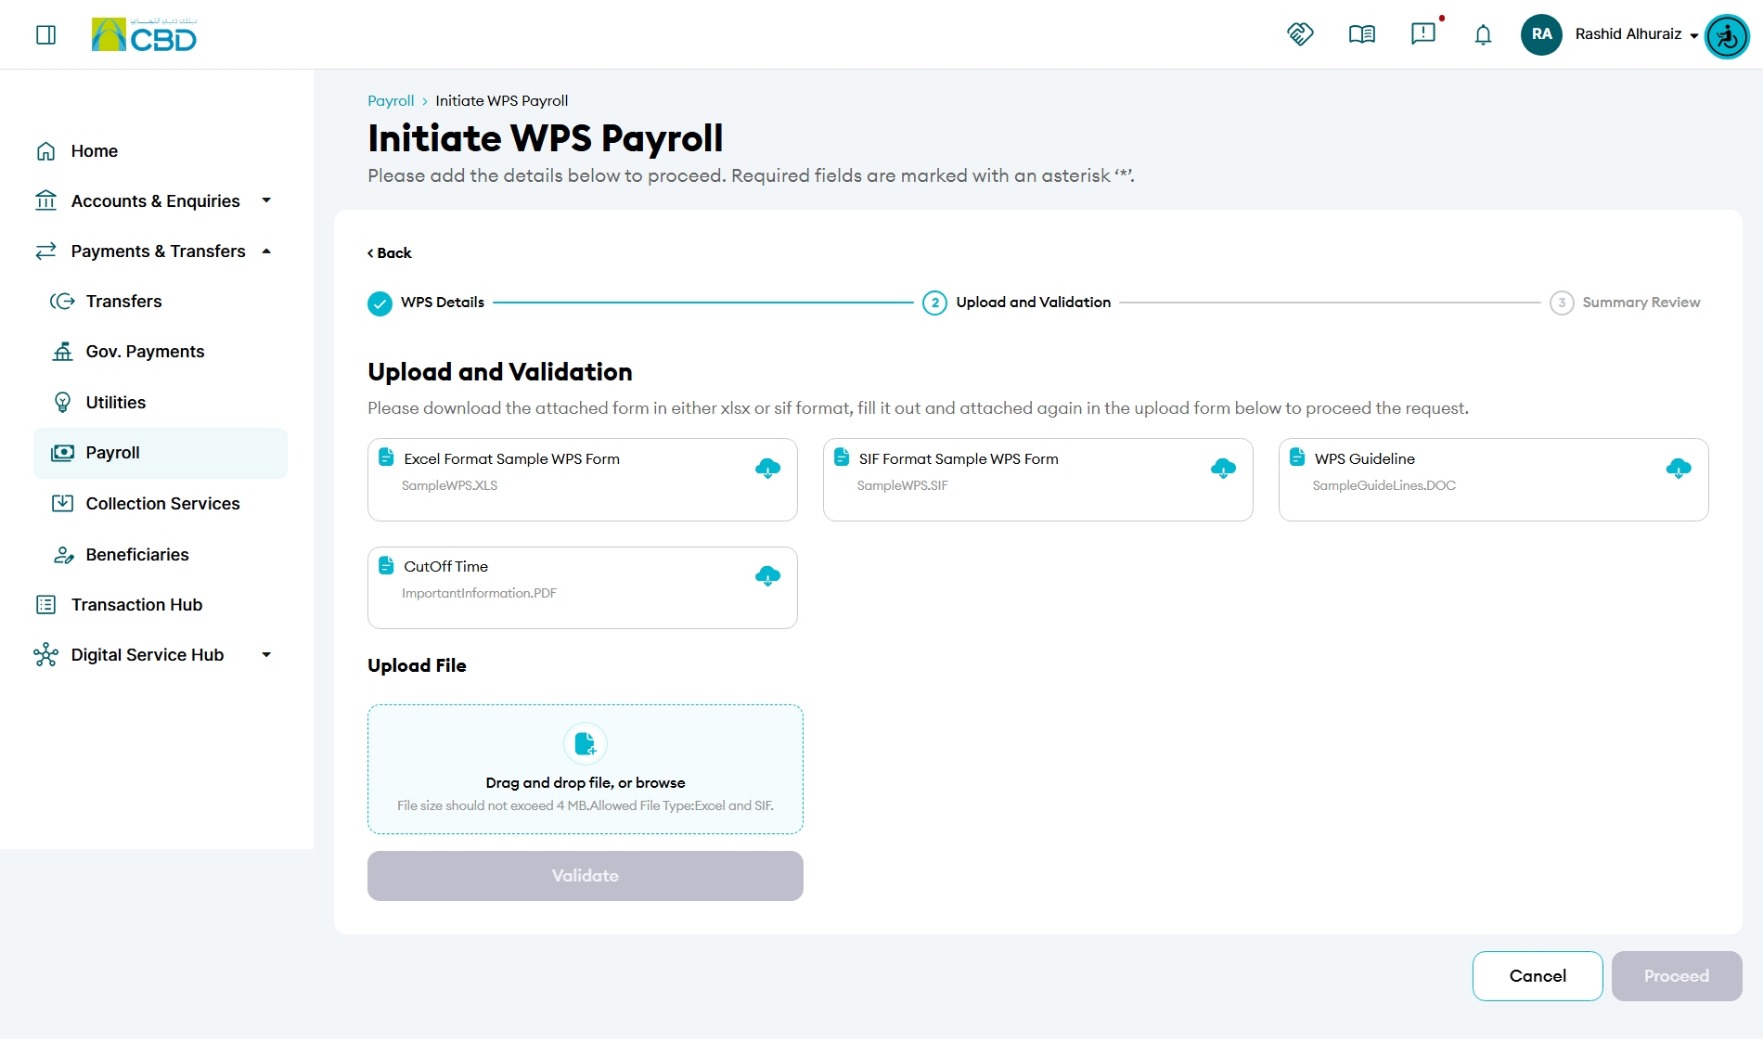
Helpful Resources
Before uploading the salary file, you can download the following:
- Download Sample Salary File – Provides the required salary file format and mandatory fields.
- WPS Salary File Completion Guide – Provides instructions on how to complete the file correctly before upload.
Using the sample file and completion guide is recommended to reduce validation errors and ensure successful file processing.
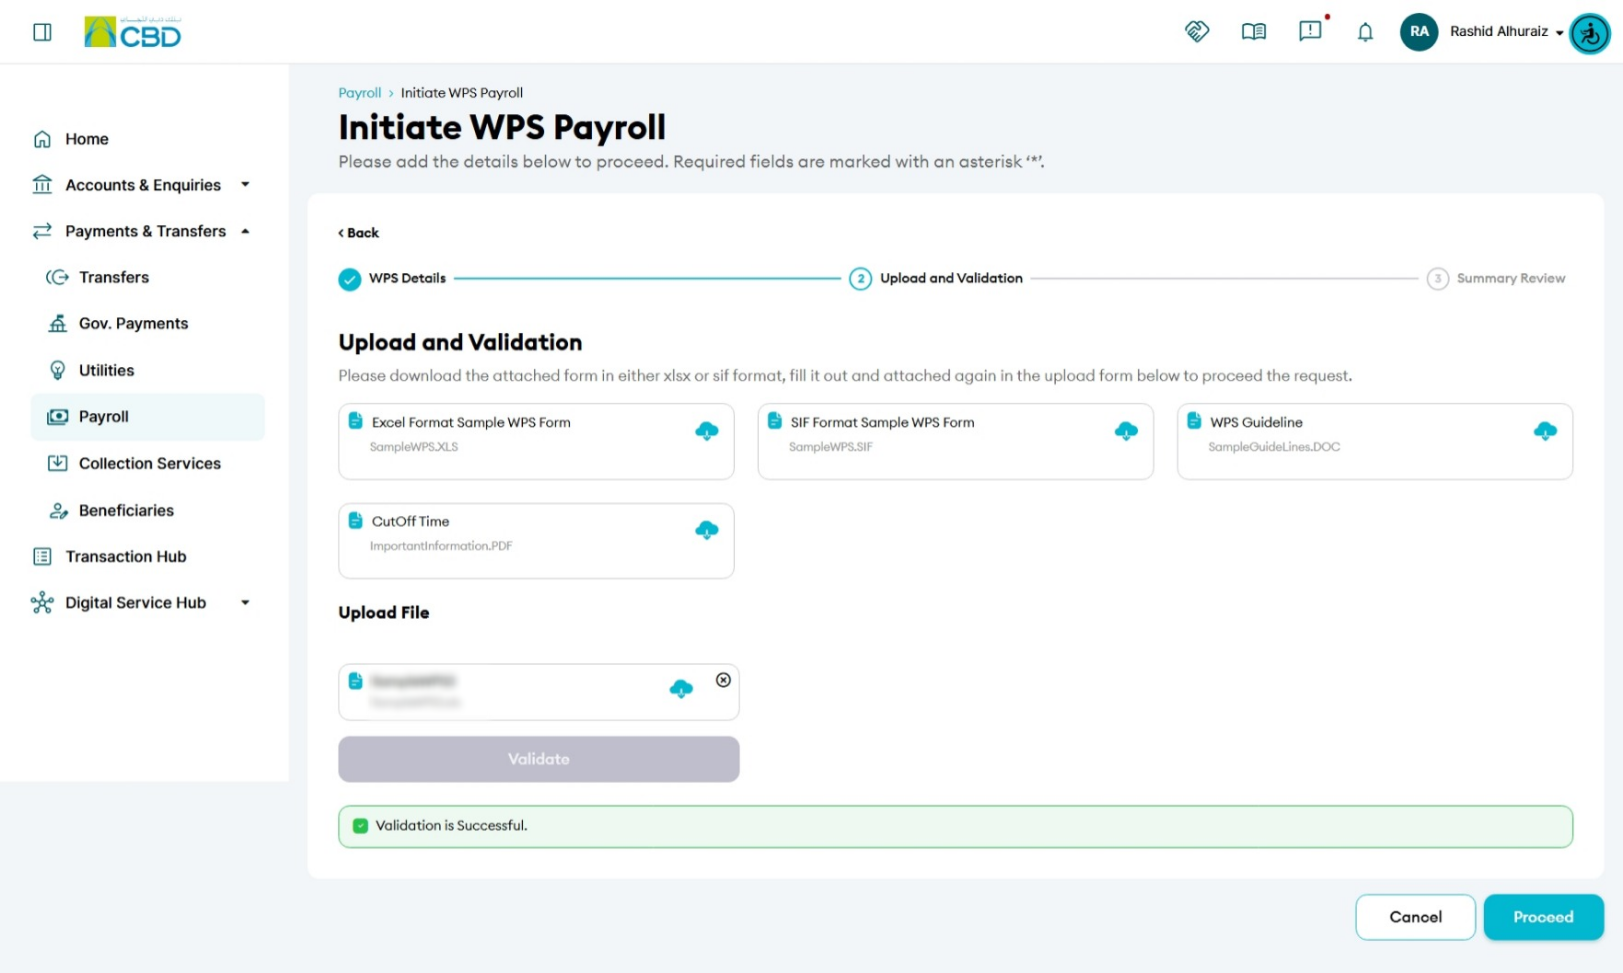
Step 3: Upload the WPS Salary File
- Upload the salary file by:
- Dragging and dropping the file into the upload area, or
- Clicking Browse and selecting the file from your device.
- You may upload either:
- A WPS Salary File, or
- An SIF (Salary Information File) template.
Helpful Resources
Before uploading the salary file, you can download the following:
- Download Sample Salary File – Provides the required salary file format and mandatory fields.
- WPS Salary File Completion Guide – Provides instructions on how to complete the file correctly before upload.
Using the sample file and completion guide is recommended to reduce validation errors and ensure successful file processing.
Click here to see "How to Fill-Out the WPS Salary File?"
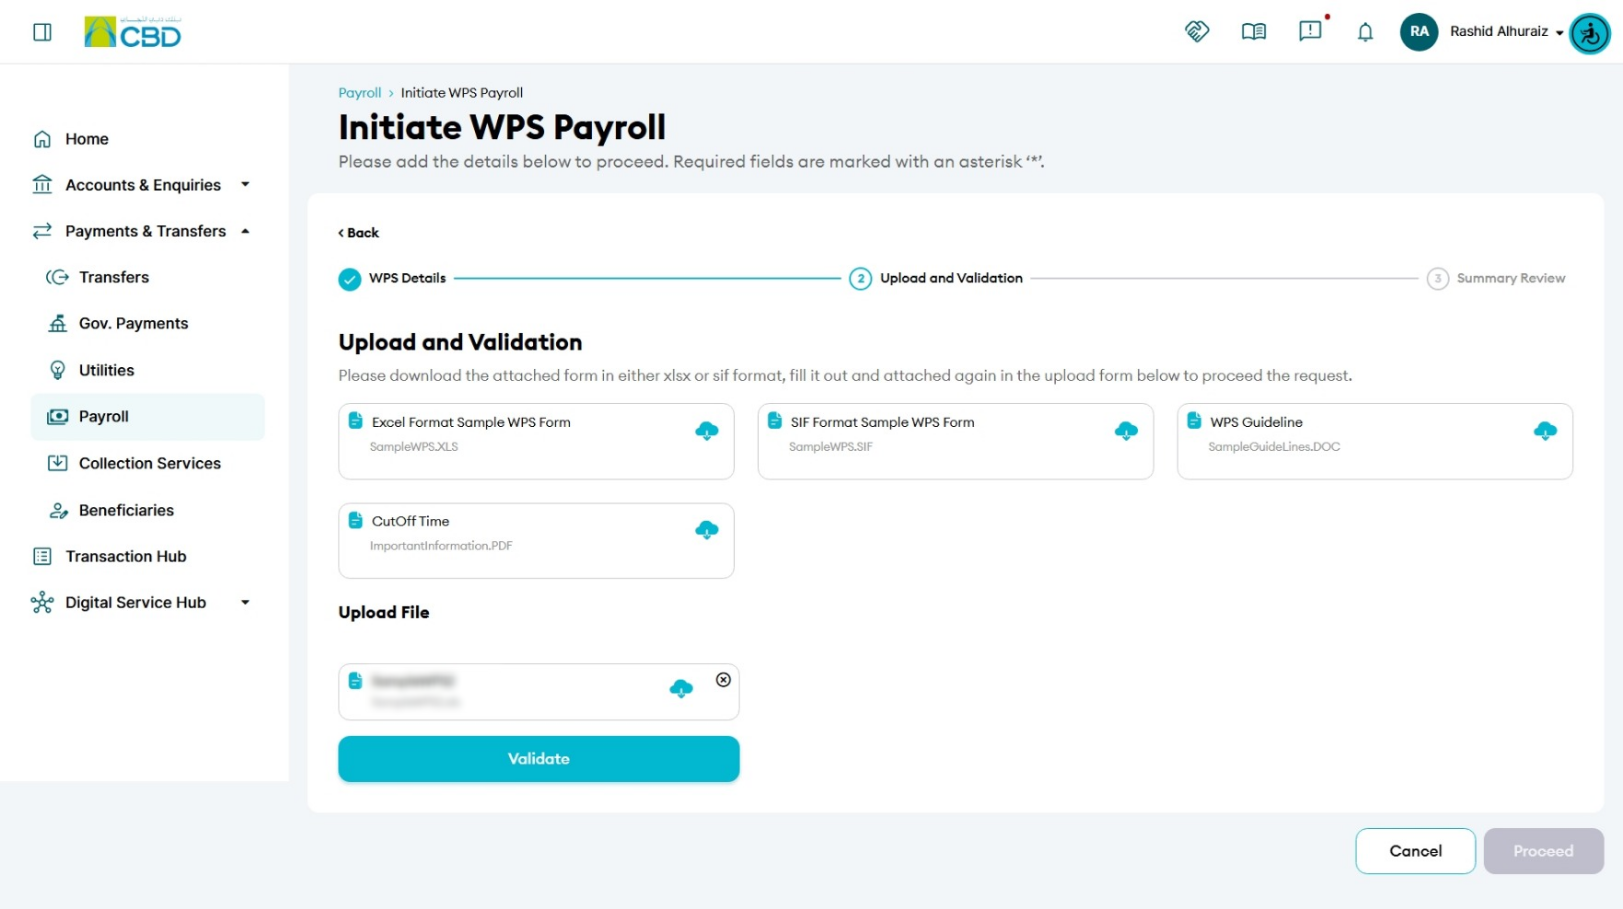
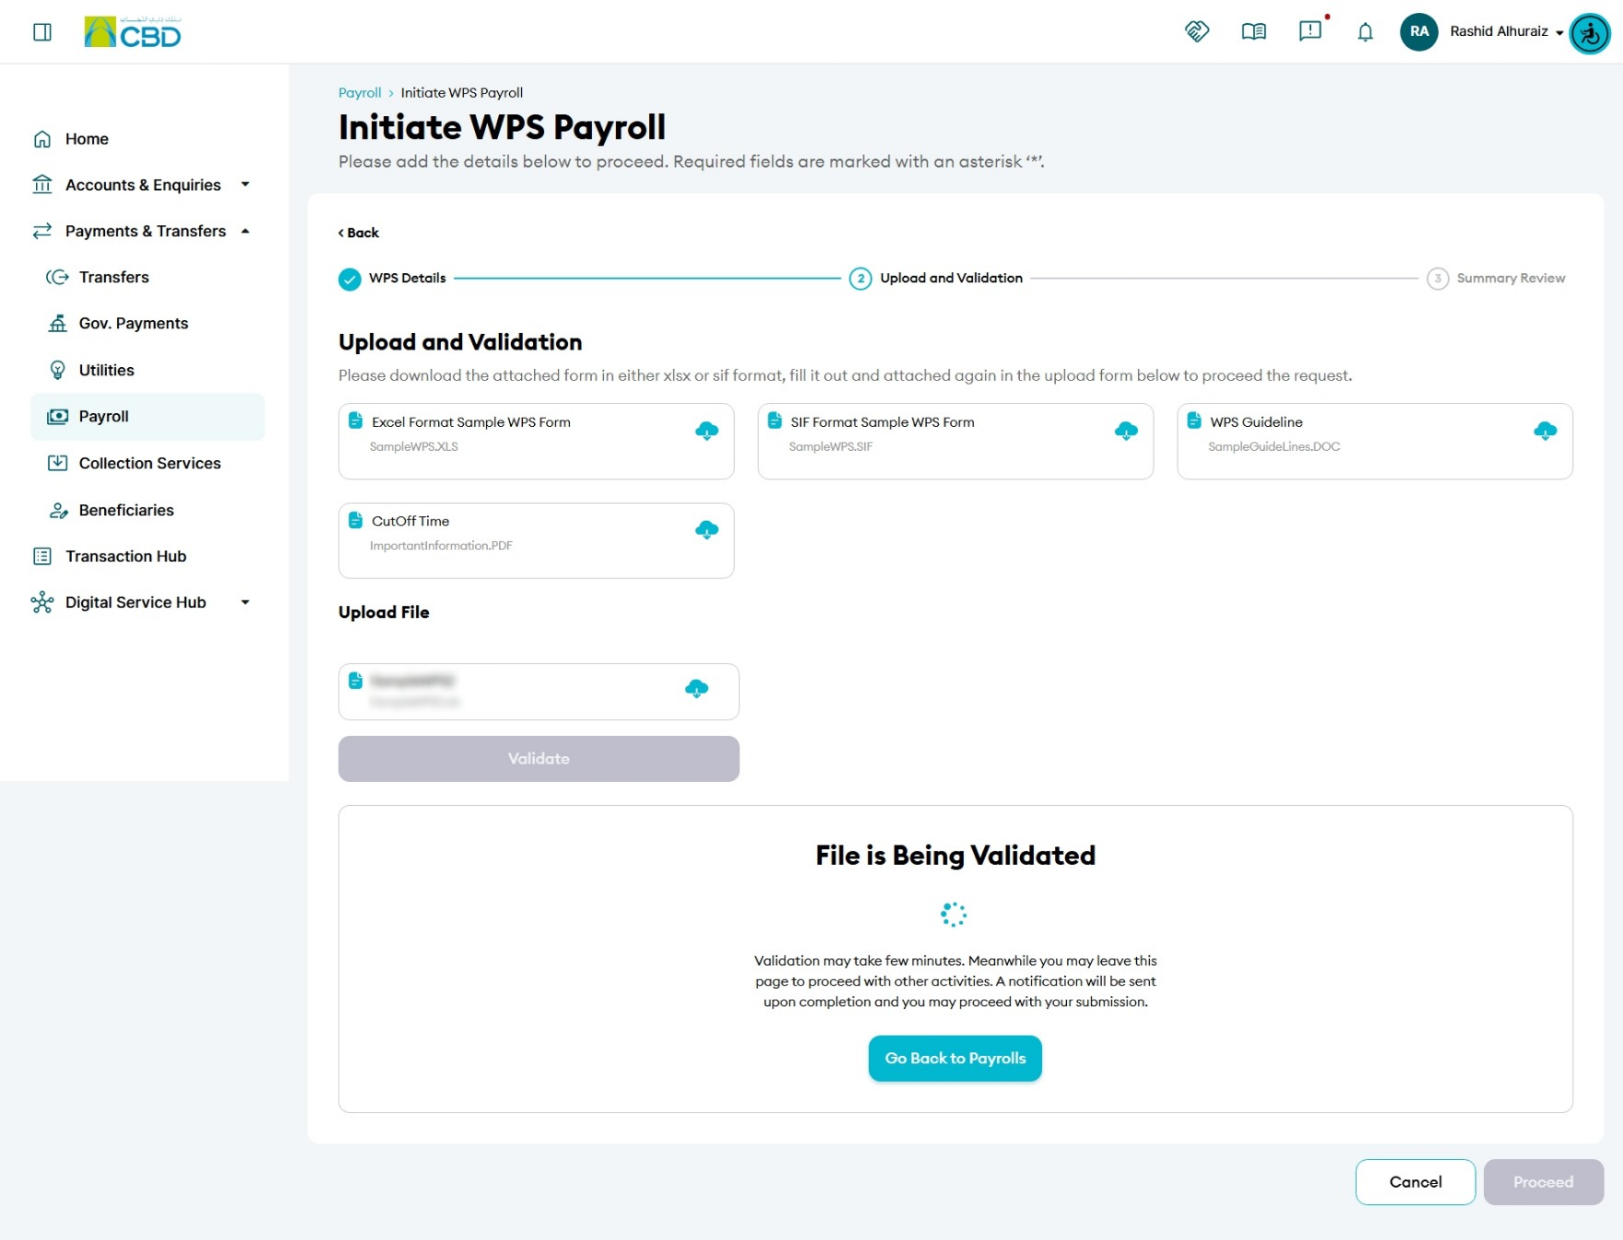
Step 4: Validate the File
- Click Validate File.
- The system will verify:
- File format
- File structure
- Mandatory fields
- Salary data integrity
If Validation Fails
If validation errors are detected:
- Review the error message displayed by the system.
- Correct the file based on the validation feedback.
- Re-upload the file.
- Run validation again.
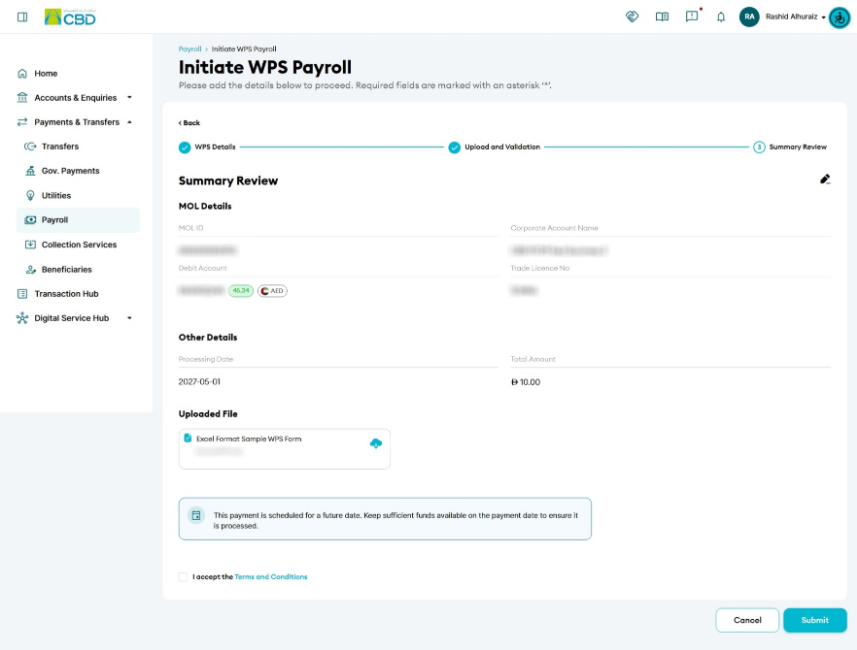
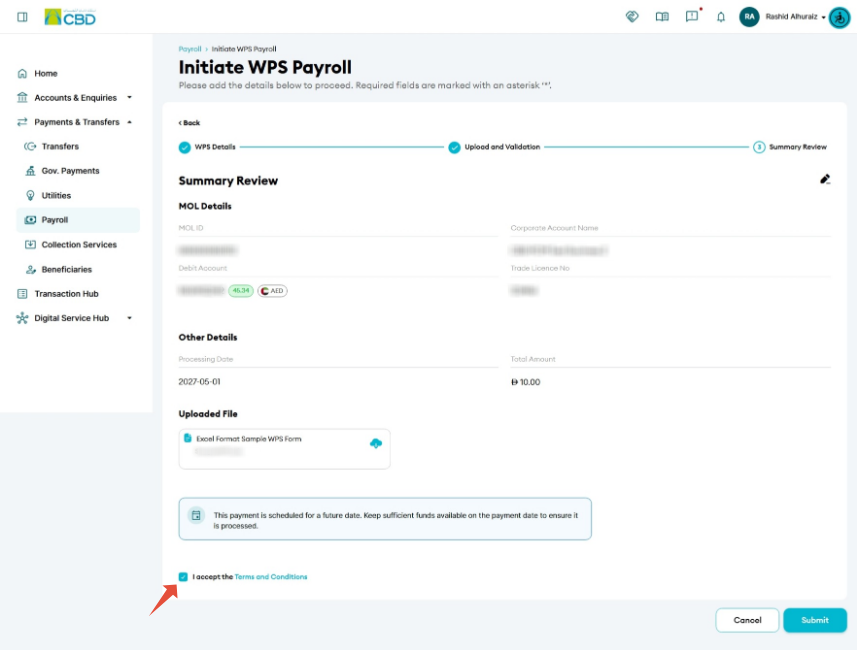
Step 5: Review and Confirm
- Review all payroll details carefully, including:
- WPS MOL ID
- Debit Account
- Trade License Number
- Total Salary Amount
- Processing Date
- Uploaded File Details
- Verify that all information is correct.
- Click Confirm.
Step 6: Authenticate the Request
Complete authentication using one of the following methods:
iBusiness App Authentication
- A notification will be sent to the registered iBusiness Mobile App.
- Review the request details.
- Approve the request using biometric or device authentication.
Google Authenticator
- Open the Google Authenticator application.
- Enter the generated One-Time Password (OTP).
Once authentication is completed successfully, the payroll request will be submitted for processing.

Step 7: Approval (If Maker–Checker Is Enabled)
If your organization uses a Maker–Checker approval workflow:
- The payroll request will be routed to the designated Approver.
- The Approver must:
- Log in to iBusiness
- Navigate to Transactions Hub ➜ Pending Your Authorizations
- Review the payroll details.
- Select: Approve or Reject
The payroll request will only be processed after all required approvals have been completed.
Important: WPS Payroll Cut-Off Time
The cut-off time for WPS Salary processing is 3:00 PM. Requests submitted after the cut-off time may be processed on the next applicable business day.
Support Notes / Best Practices
- Ensure the correct WPS MOL ID is selected before uploading the salary file.
- Use the Sample Salary File when preparing a payroll file for the first time.
- Review all validation errors carefully before re-uploading the file.
- Verify that the total salary amount entered matches the total amount in the uploaded file.
- Ensure sufficient funds are available in the selected debit account before the processing date.
- Retain the generated reference number for future tracking and support enquiries.