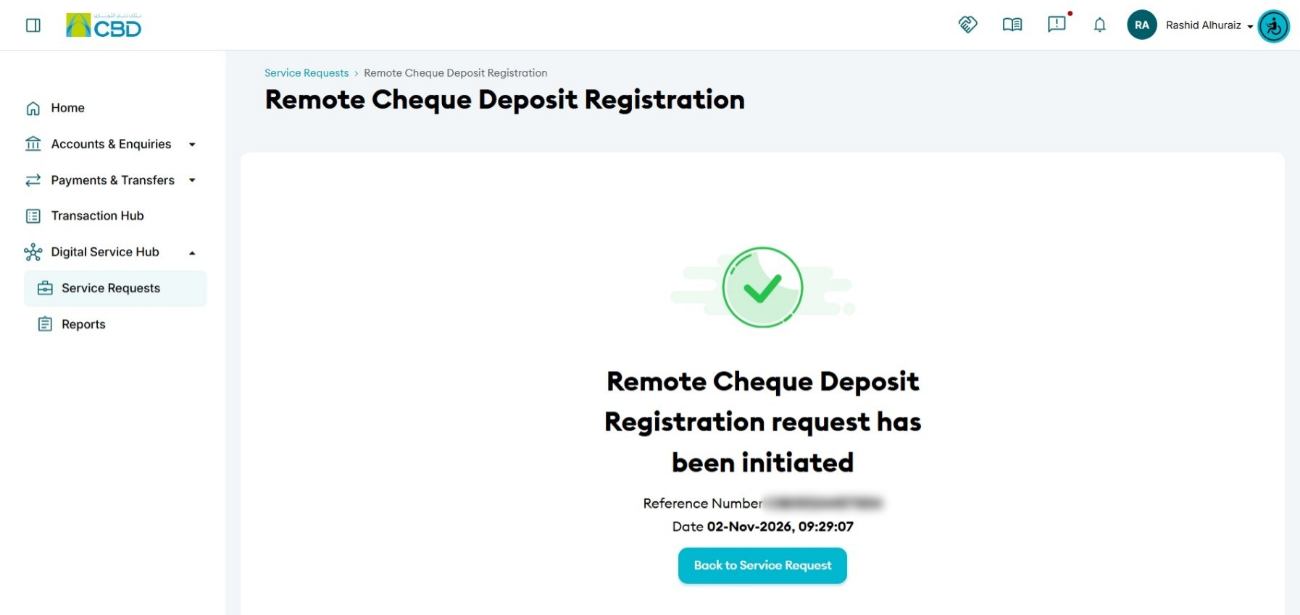
Overview
This guide explains how to register for the Remote Cheque Deposit (RCD) service through CBD iBusiness. Follow the steps below to submit your registration request successfully.
Step 1: Access the Service
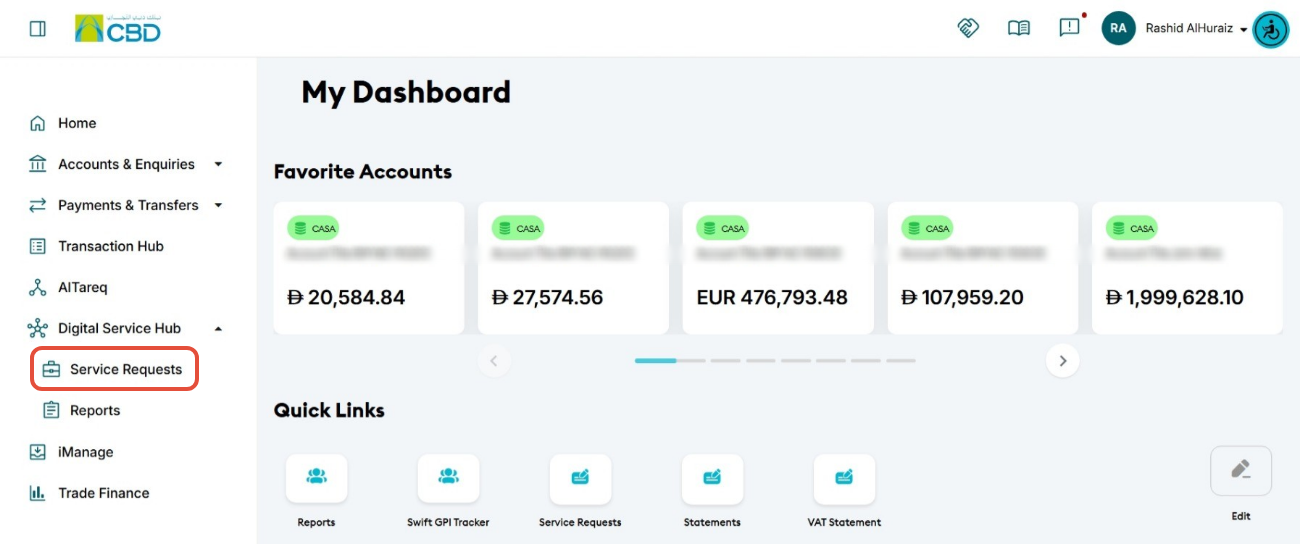
- Log in to iBusiness.
- Navigate to: Digital Service Hub > Service Request.
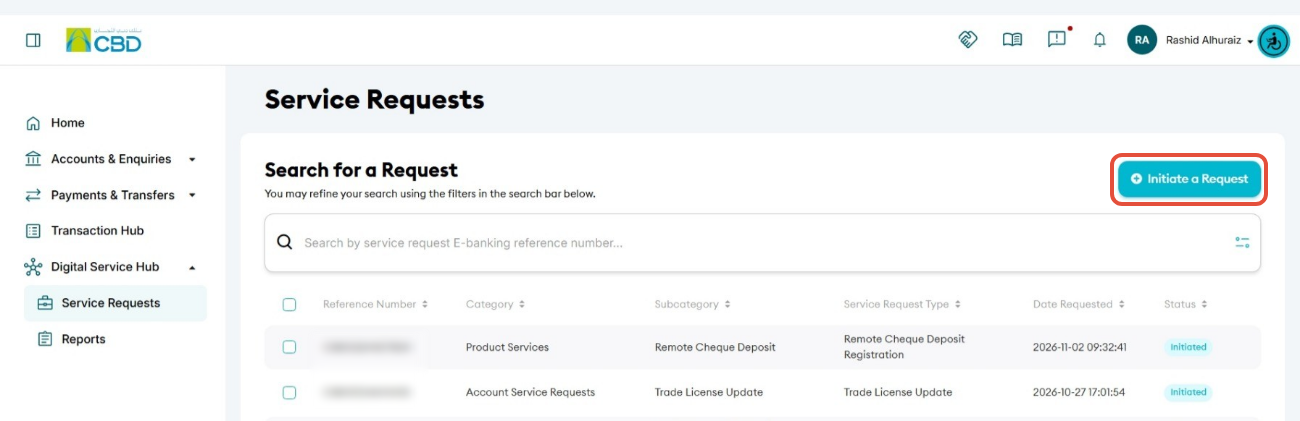
- Click Initiate Request.
Step 2: Select the Service
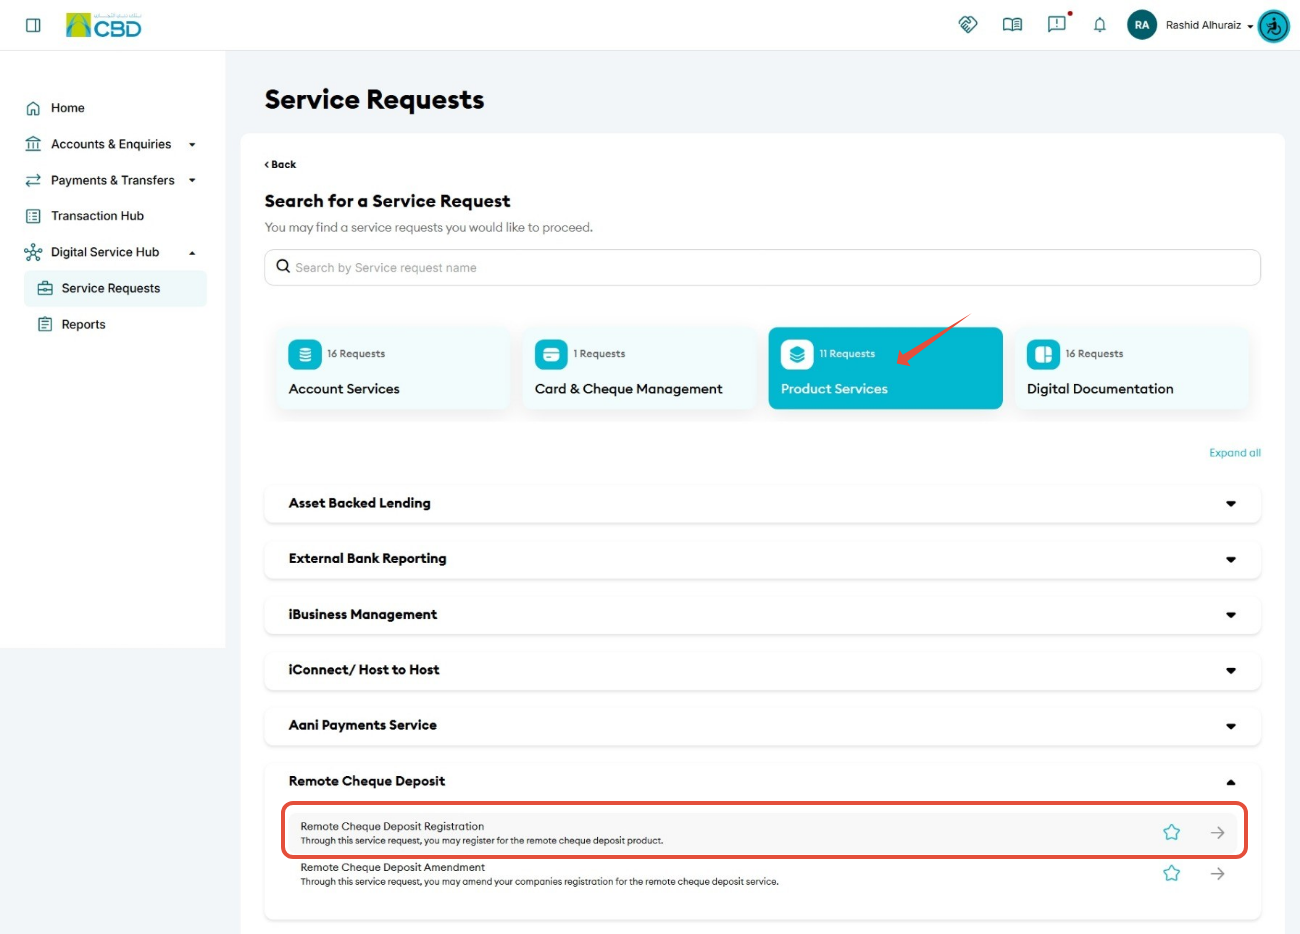
- Navigate to: Product Services ➜ Remote Cheque Deposit ➜ Remote Cheque Deposit Registration.
- Proceed to the next step.
Step 3: Select the Linked Account
- Select the charge account.
- Choose the account that will be linked to the Remote Cheque Deposit service.
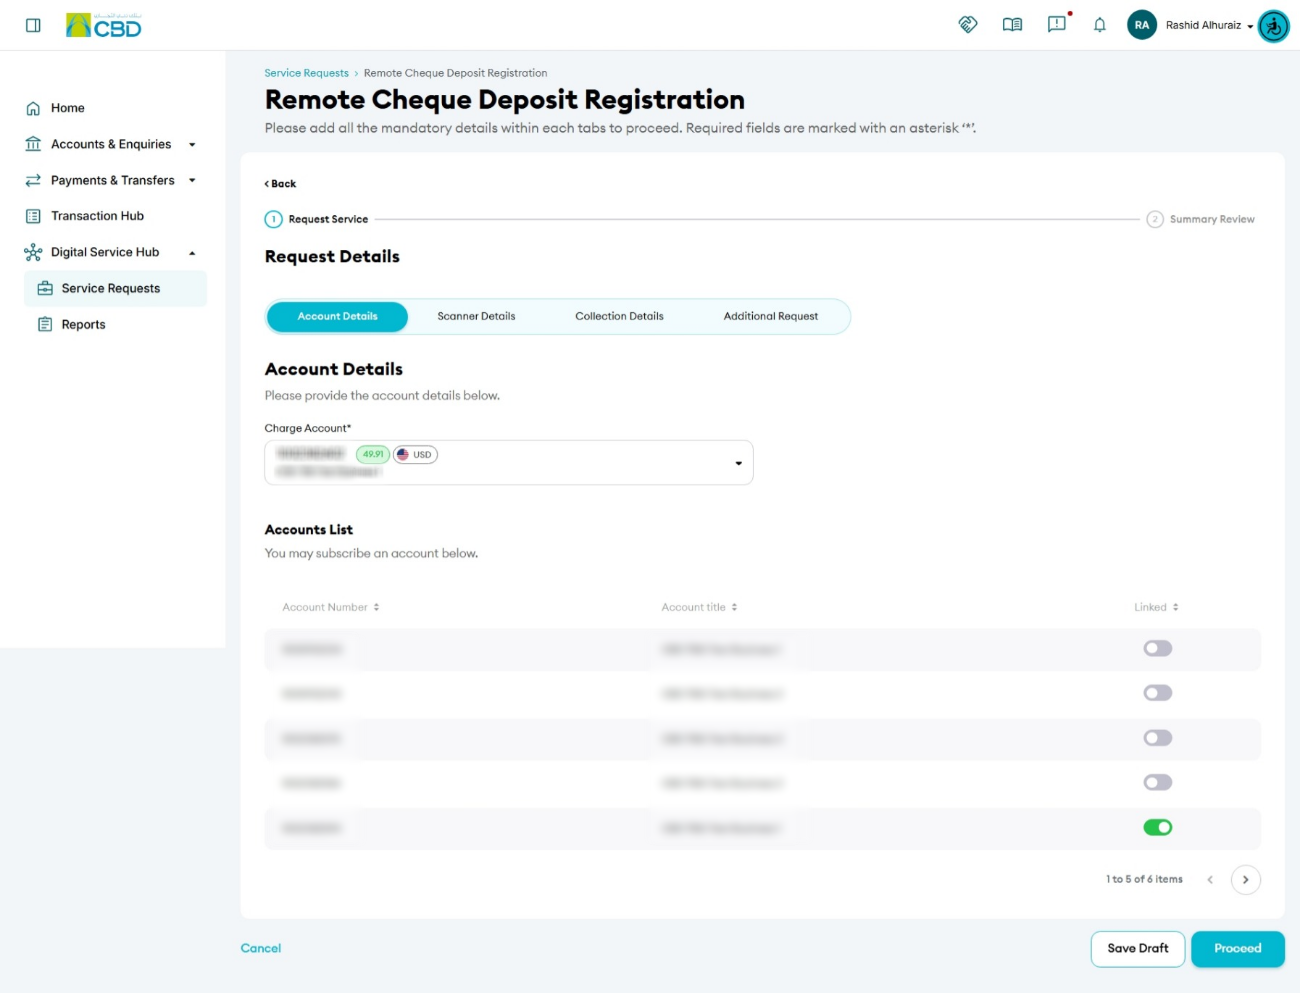
Step 4: Configure Scanner and Address Details
- Select the required number of scanners.
- Enter the following address and contact information:
- Contact Person Name
- Contact Person Phone Number
- Email Address
- Building Name/Number
- Office Phone Number
- Nearest Landmark
- Area
- City
- P.O. Box
- Emirate
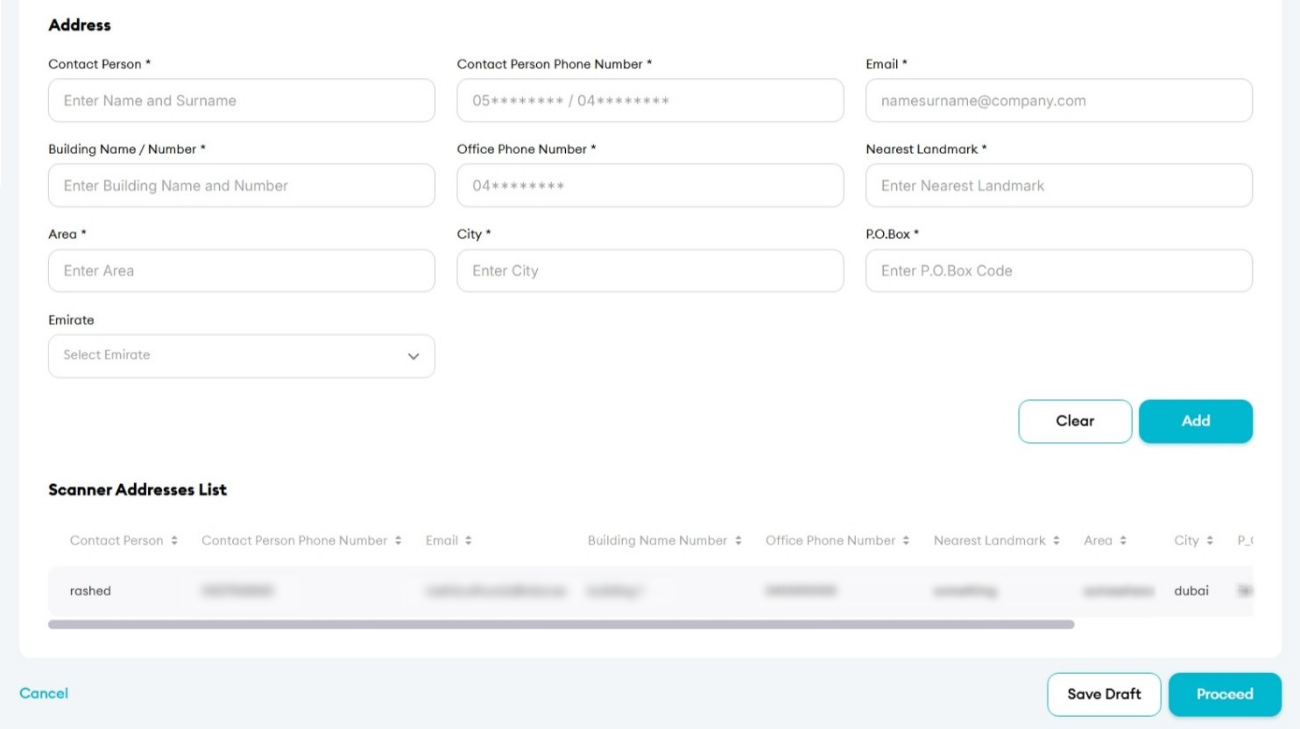
- Click Add to save the address. Multiple Addresses
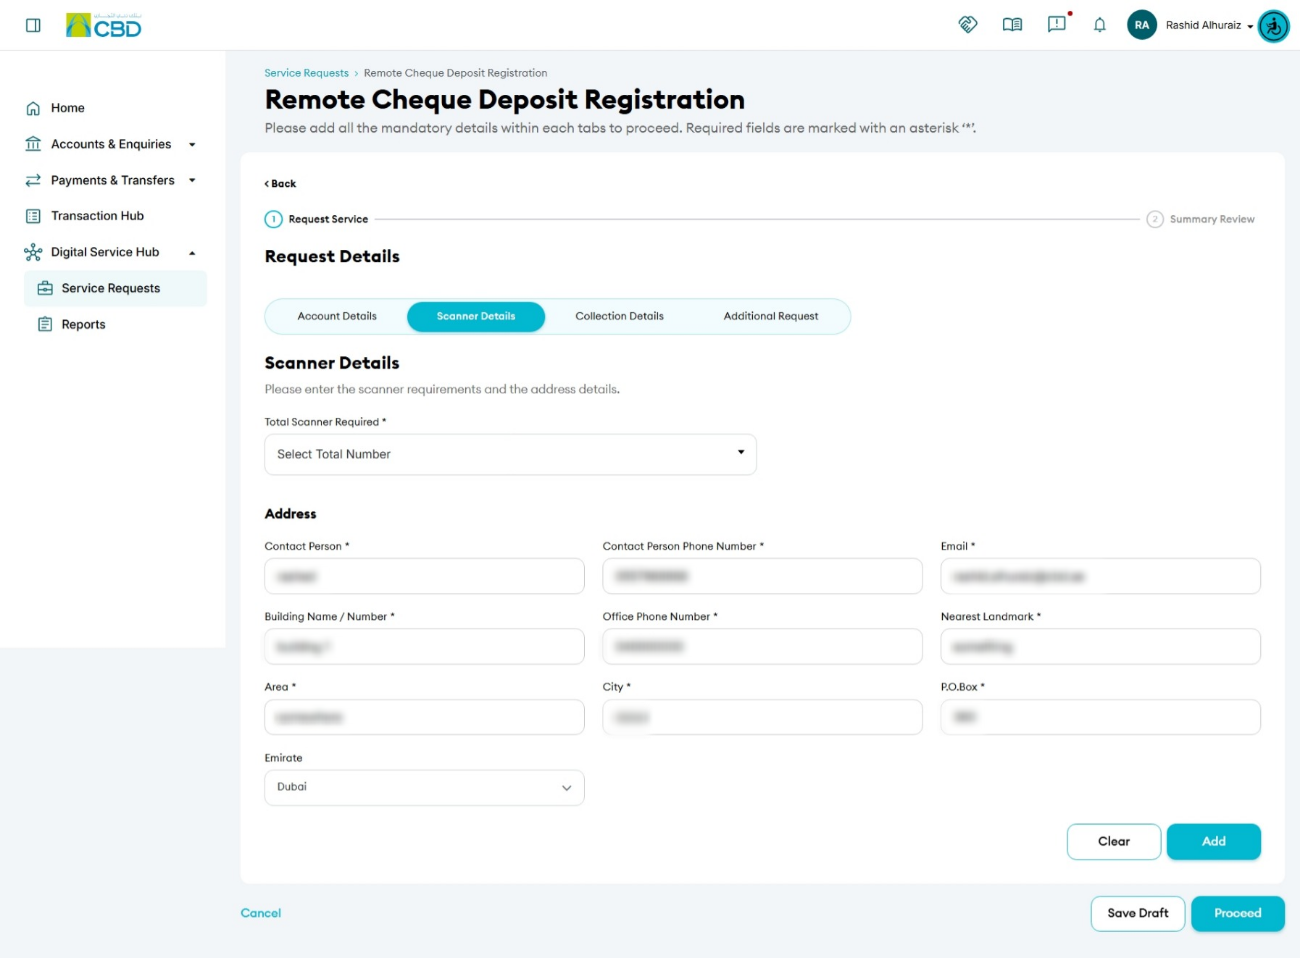
If required, you can add additional addresses by selecting Add Another Address.
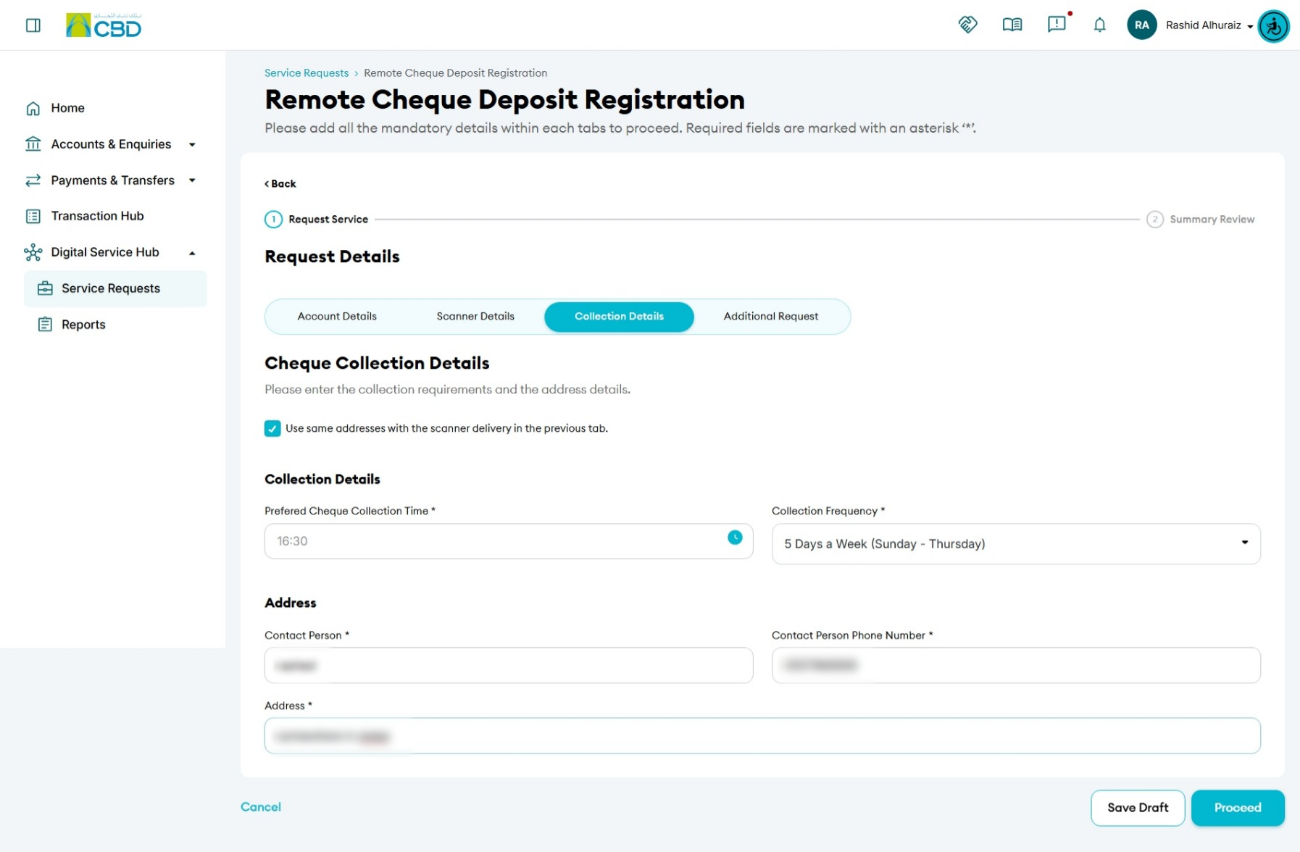
Step 5: Enter Collection Details
Collection Preferences
- Select your preferred Cheque Collection Time.
- Select the required Collection Frequency.
Collection Address
Provide the following details:
- Contact Person Name
- Contact Person Phone Number
- Collection Address
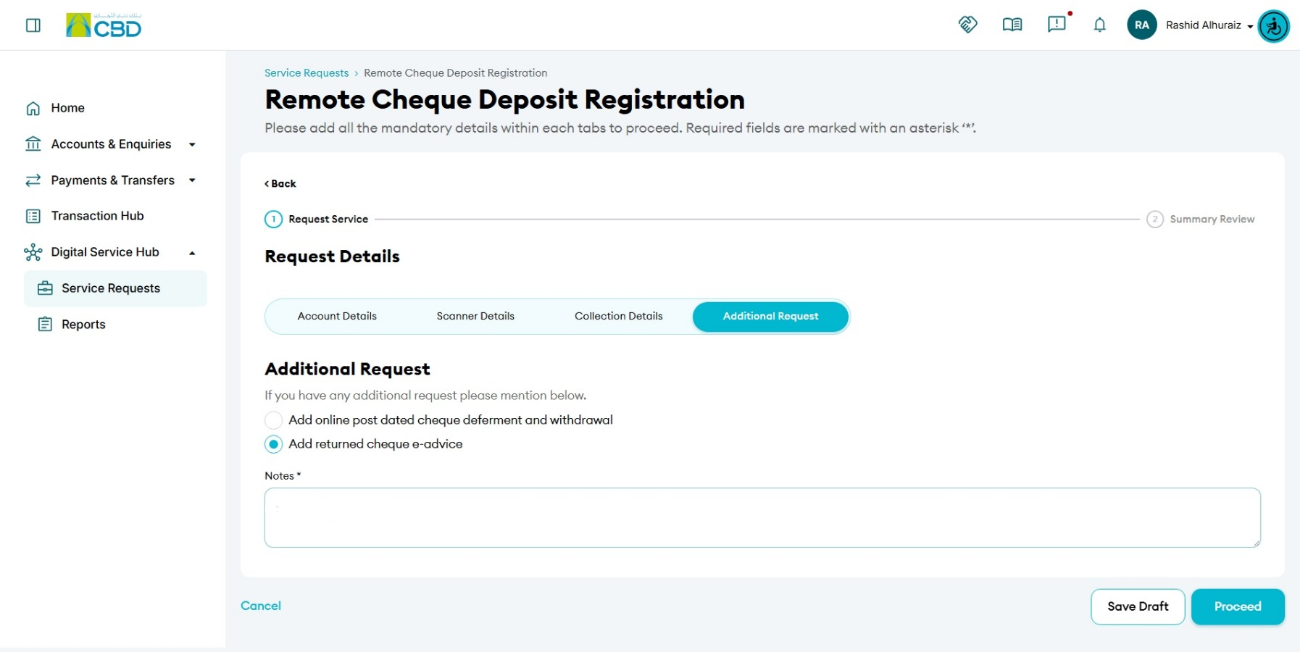
Step 6: Select Additional Services
Choose any additional services required:
- Online Cheque Deferment and Withdrawal
- Returned Cheque e-Advice
You may also add a note if required. This field is optional.
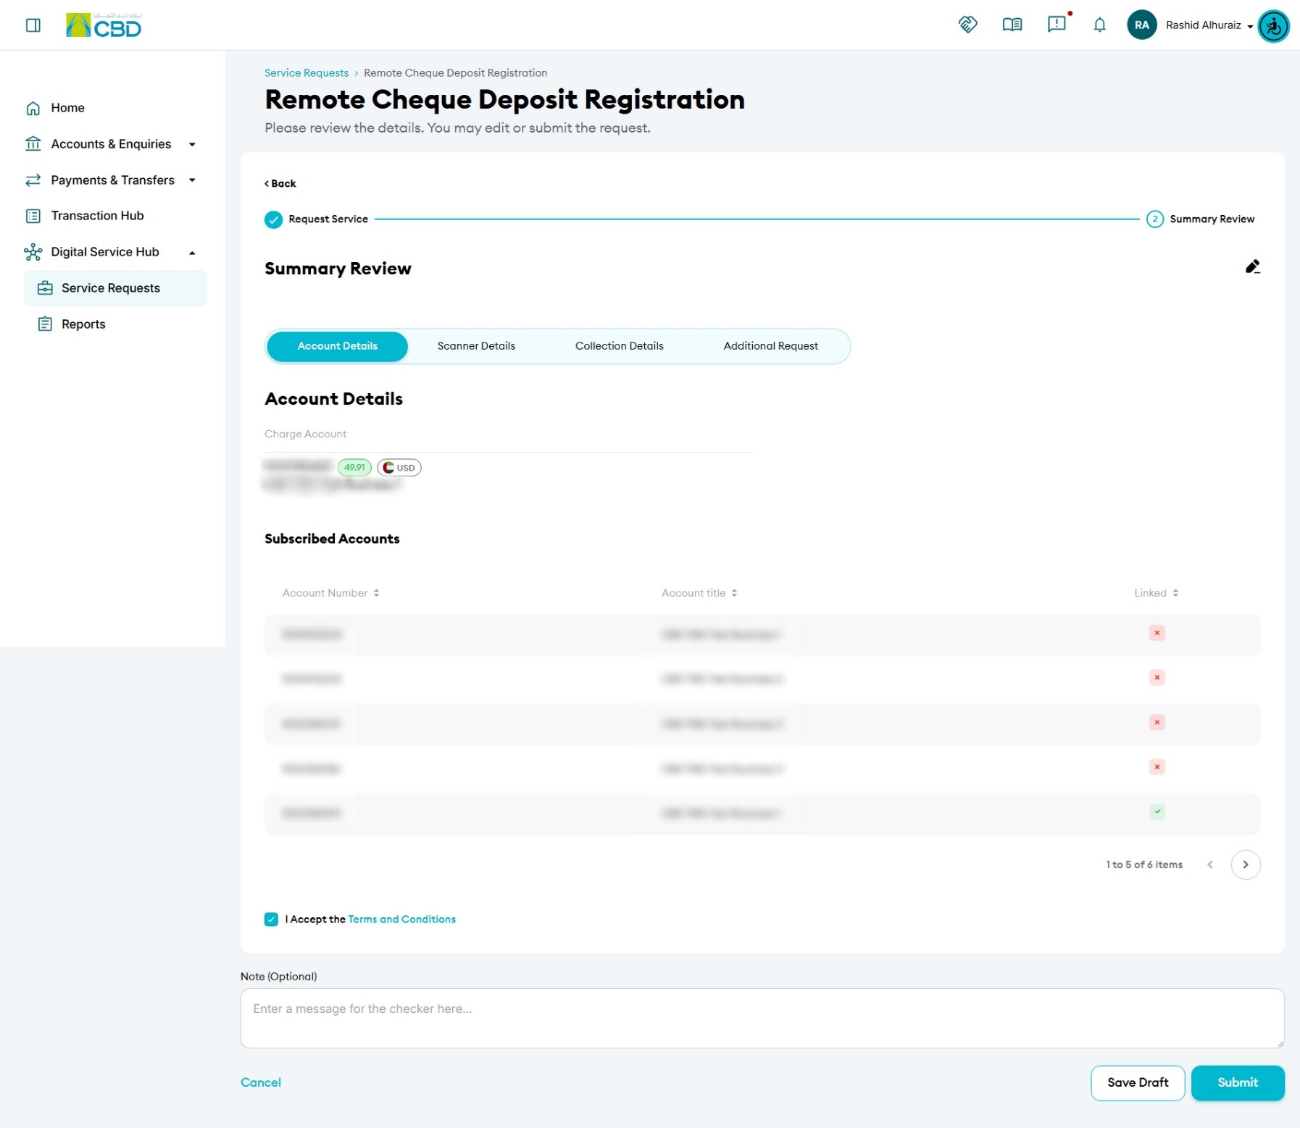
Step 7: Review and Submit
- Review all entered information carefully.
- Add a note if required (optional).
- Accept the Terms and Conditions.
- Click Submit.
Step 8: Authenticate the Request
Complete authentication using one of the following methods:
iBusiness App Authentication
- A notification will be sent to the registered iBusiness Mobile App.
- Review the request details.
- Approve the request using biometric authentication or device verification.
Google Authenticator
- Open the Google Authenticator application.
- Enter the generated One-Time Password (OTP).
Once authentication is completed successfully, the request will be submitted for processing.