
The E-Statement service allows you to receive account statements either by email or postal mail, based on your preferred delivery method and frequency. You can also choose which accounts should receive statements.
Step 1: Access the E-Statement Service
- Log in to iBusiness.
- Navigate to: Digital Service Hub ➜ Service Requests
- Click Initiate a Request.
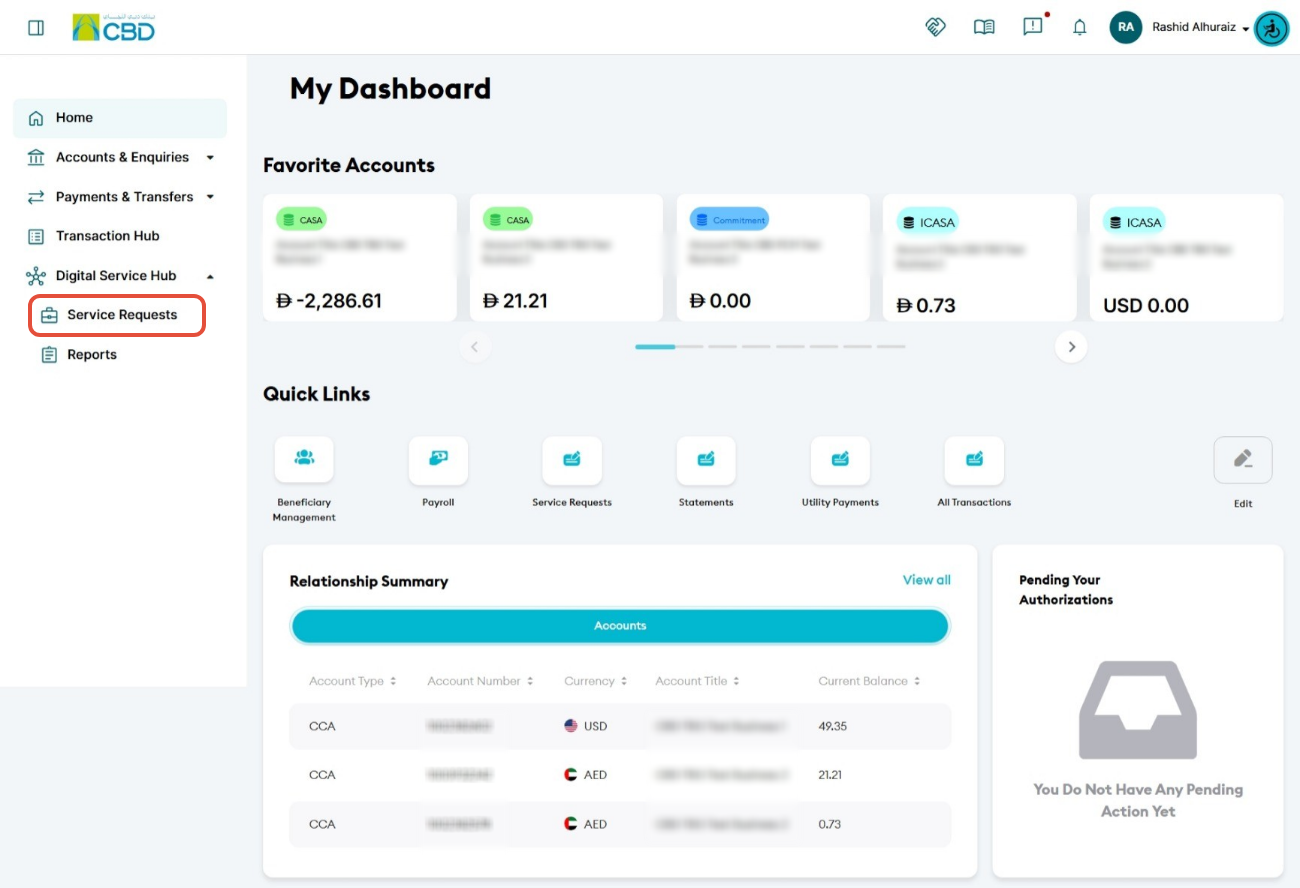
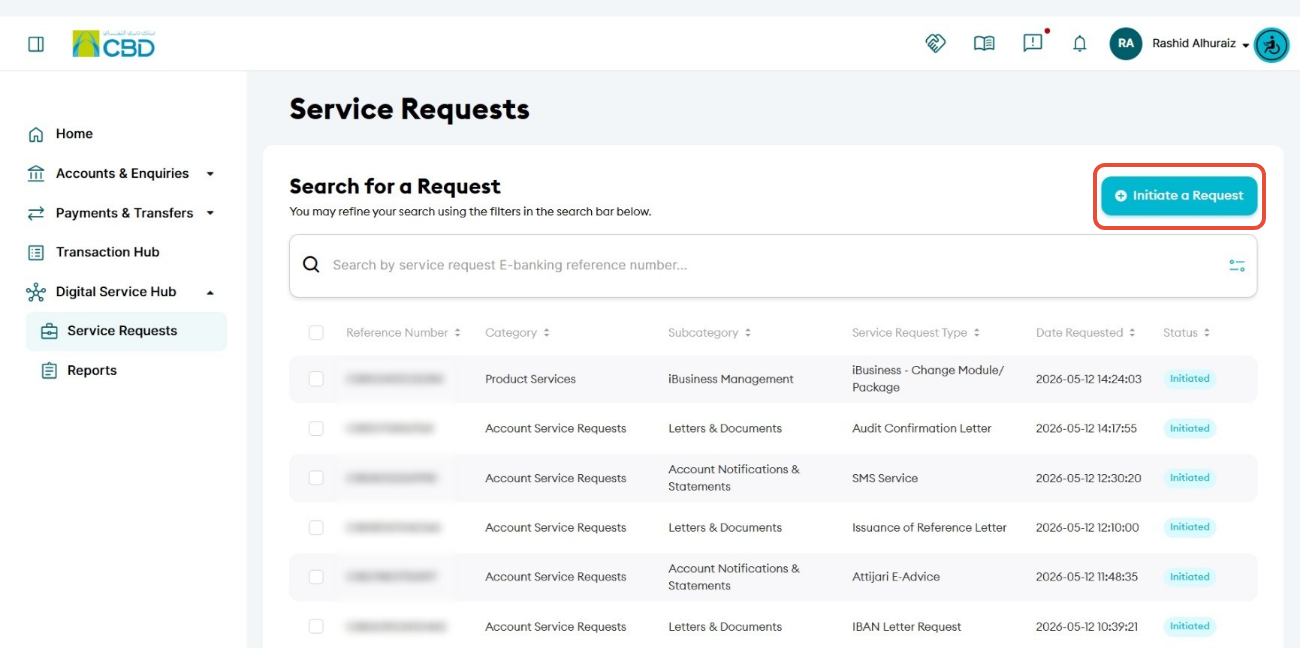
Step 2: Select the E-Statement Service
- Select Account Services.
- Choose E-Statement from the available services.
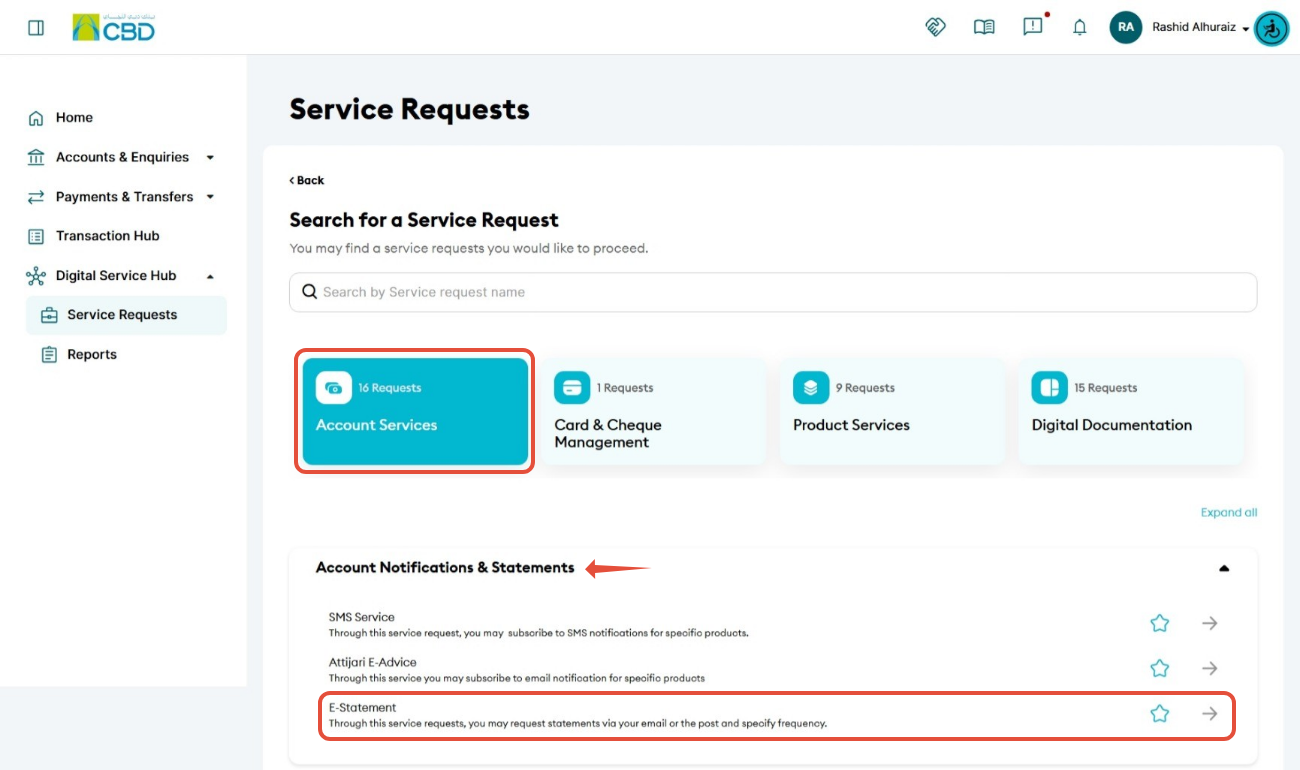
Step 3: Select the Account(s)
The system will display all accounts available under your profile.
- Select the account(s) you want to enroll for E-Statements by ticking the checkbox next to the account.
- To select all available accounts, tick the checkbox in the header row.
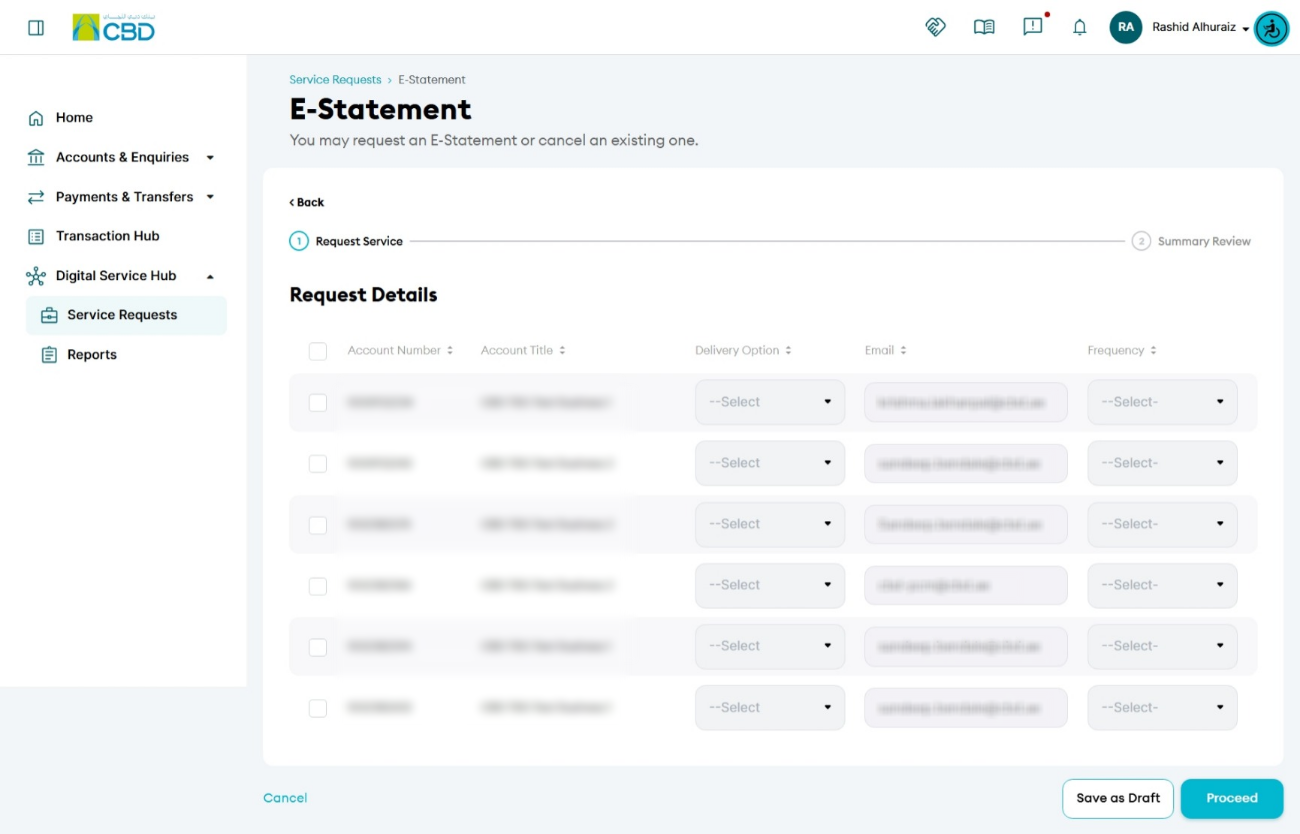
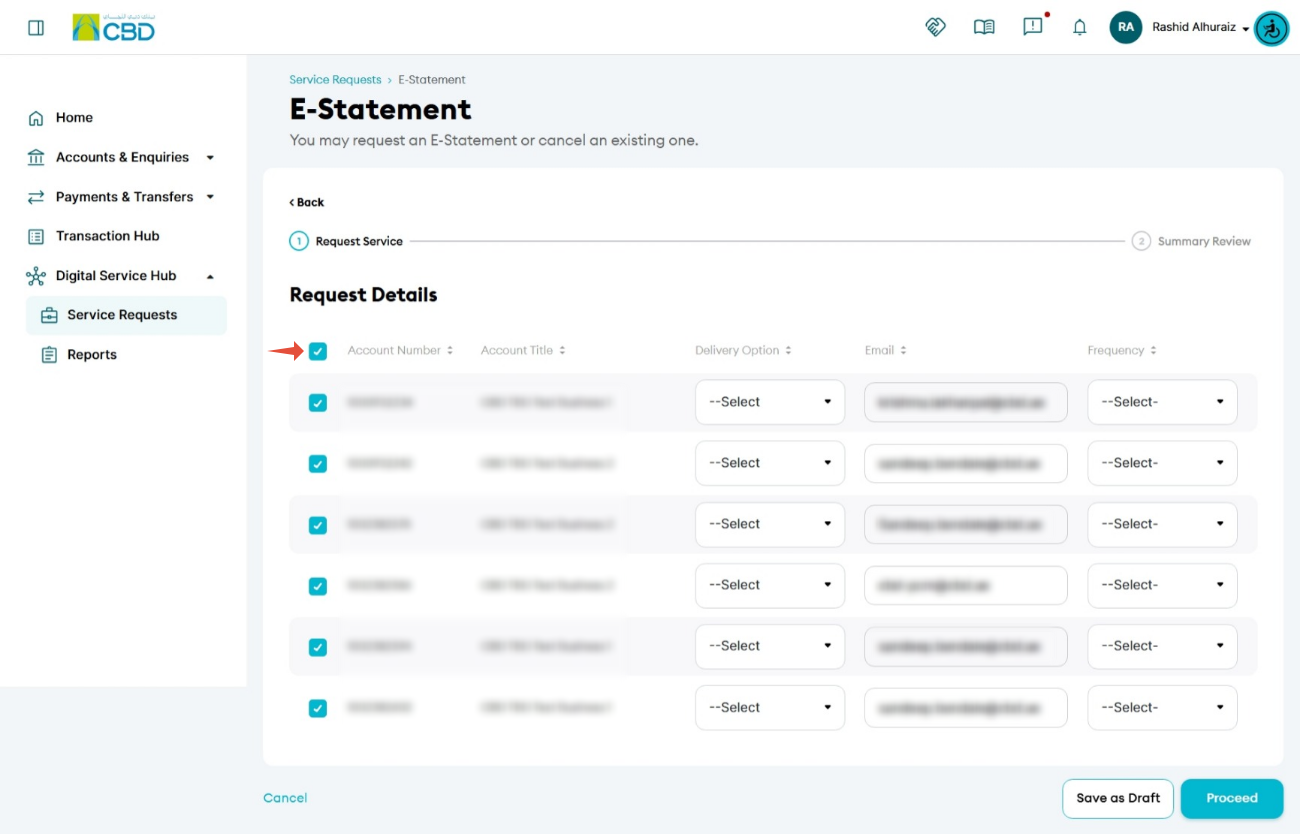
Step 4: Configure Statement Preferences
Choose your preferred statement delivery options.
Delivery Option
Select how you would like to receive your statements:
- Post (where applicable)
Email Address
If Email is selected as the delivery method:
- Enter the email address where statements should be delivered.
- Verify the email address carefully before proceeding.
Statement Frequency
Select how often you would like to receive statements:
- Monthly
- Quarterly
- Half Yearly
- Annually
Once all required information has been entered, click Proceed.
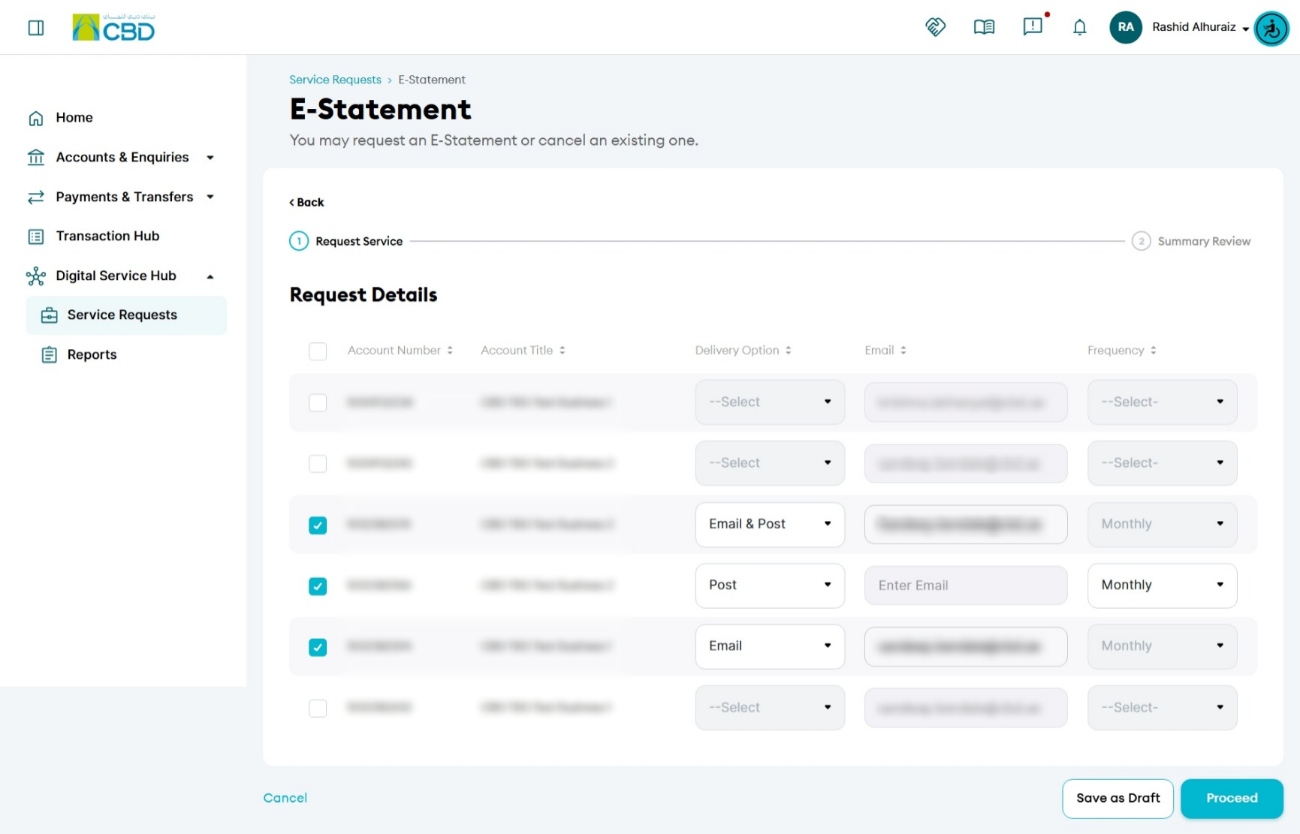
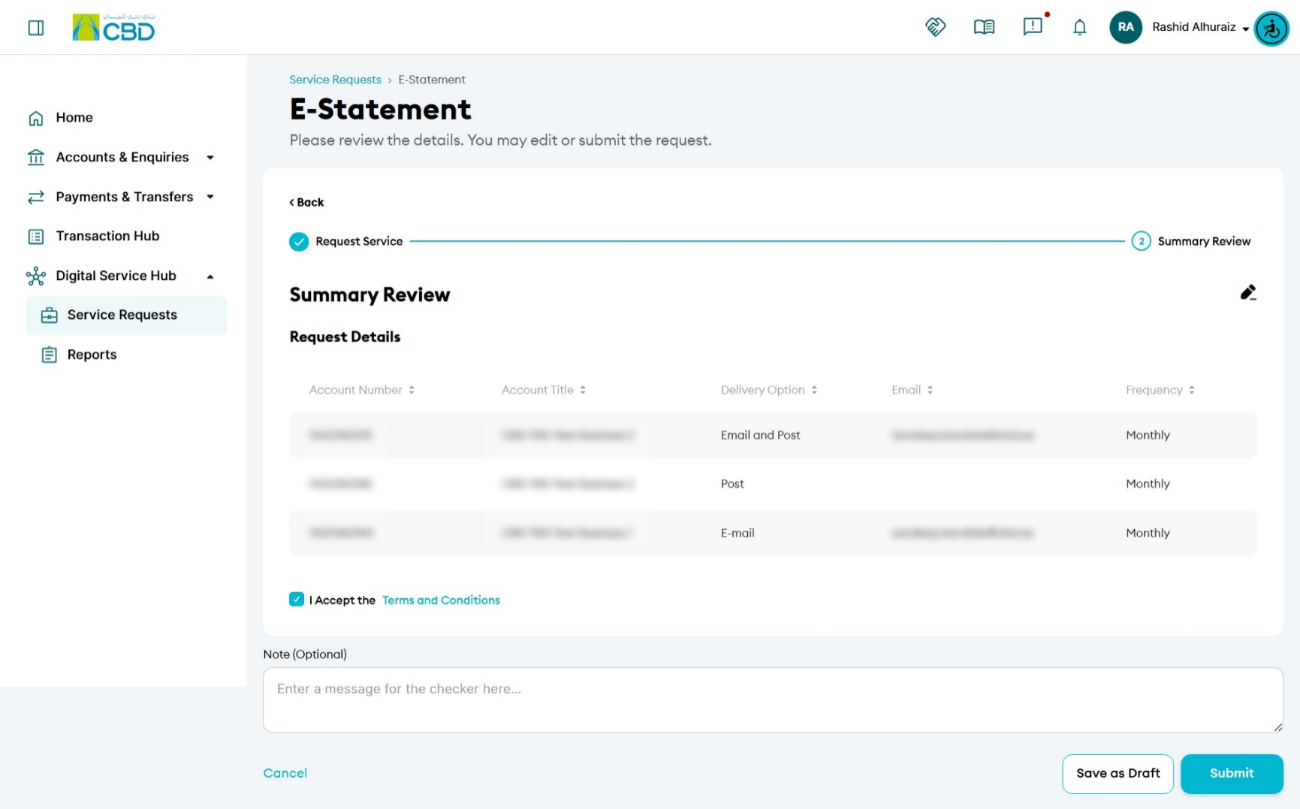
Step 5: Review and Submit
- Review all selected accounts and statement preferences.
- Verify:
- Selected account(s)
- Delivery option
- Email address (if applicable)
- Statement frequency
- click Terms and Conditions to review the applicable service terms.
- Accept the Terms and Conditions.
- Click Submit.
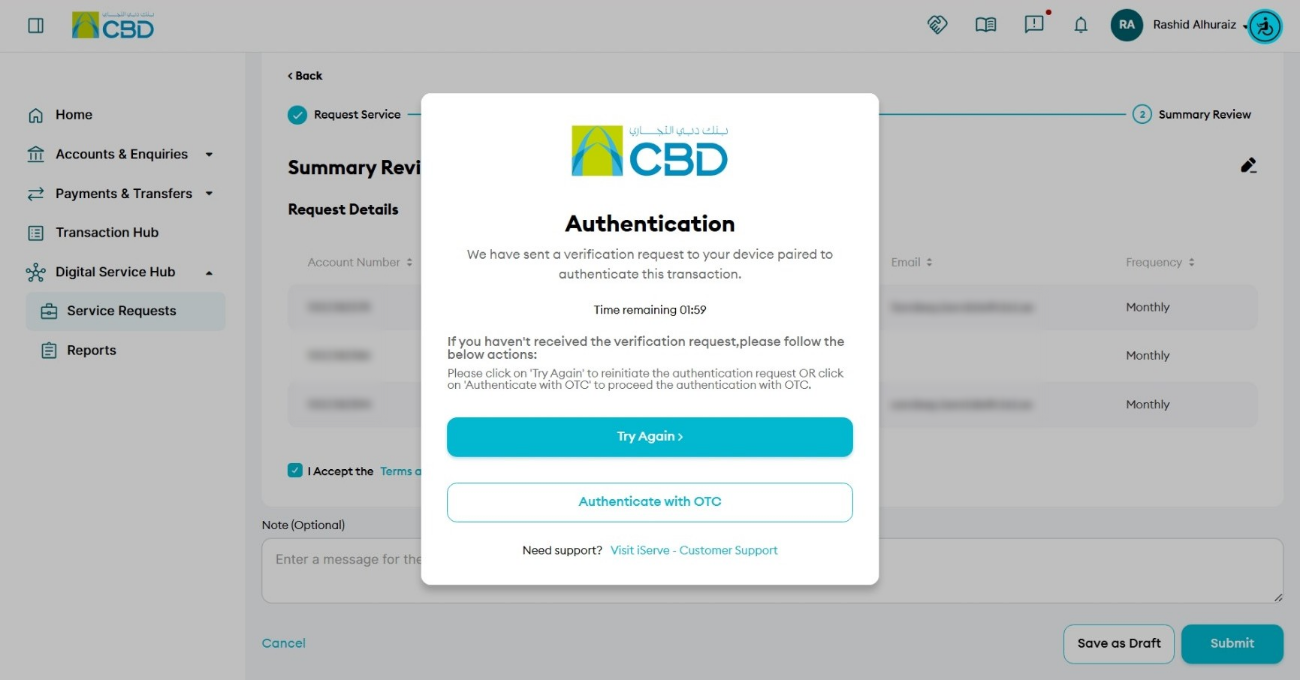
Step 6: Authenticate the Request
Complete authentication using one of the following methods:
iBusiness App Authentication
- Approve the request through the iBusiness Mobile App.
- Complete biometric authentication.
Google Authenticator
- Open the Google Authenticator application.
- Enter the generated One-Time Password (OTP).
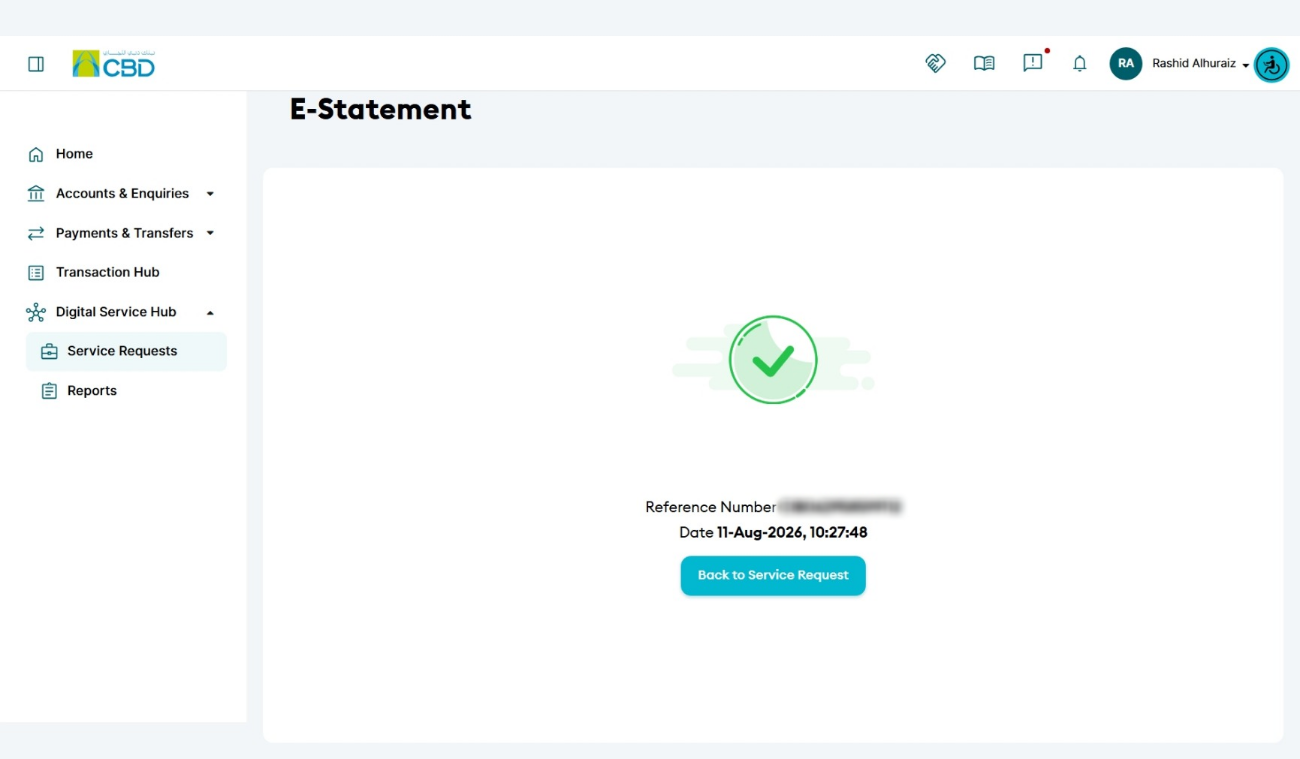
Step 7: Confirmation
Once authentication is completed successfully:
- The request will be submitted for processing.
- A confirmation screen will be displayed.
- A unique reference number will be generated.
Use the reference number to track the status of the request if required.
Support Notes / Best Practices
- Ensure the correct account(s) are selected before submitting the request.
- Verify the email address carefully when selecting email delivery.
- Select a statement frequency that meets your business requirements.
- Review all details on the Summary Review screen before submission.
- Retain the generated reference number for tracking and support enquiries.