
Overview
This guide provides step-by-step instructions for submitting a Settlement & Mortgage Release Request through the iBusiness Web Portal.
This service allows customers to request the settlement of a loan or financing facility and initiate the mortgage release process where applicable. The request supports both Full Settlement and Partial Settlement options.
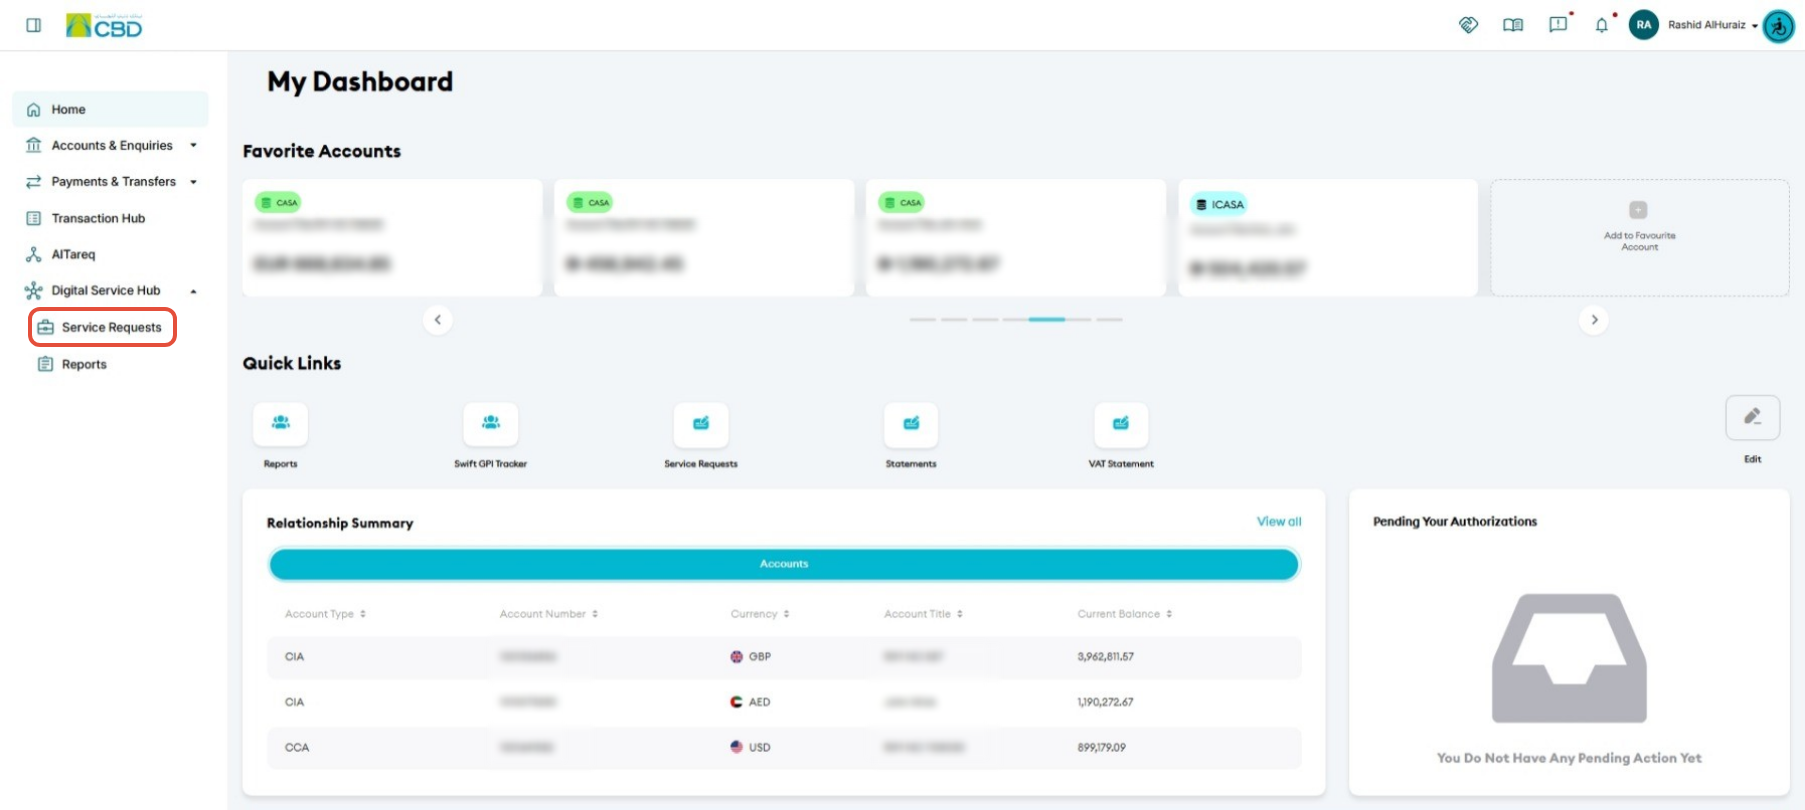
Step 1: Access the Service Request
- Log in to iBusiness.
- Navigate to:
- Digital Service Hub
- Service Requests
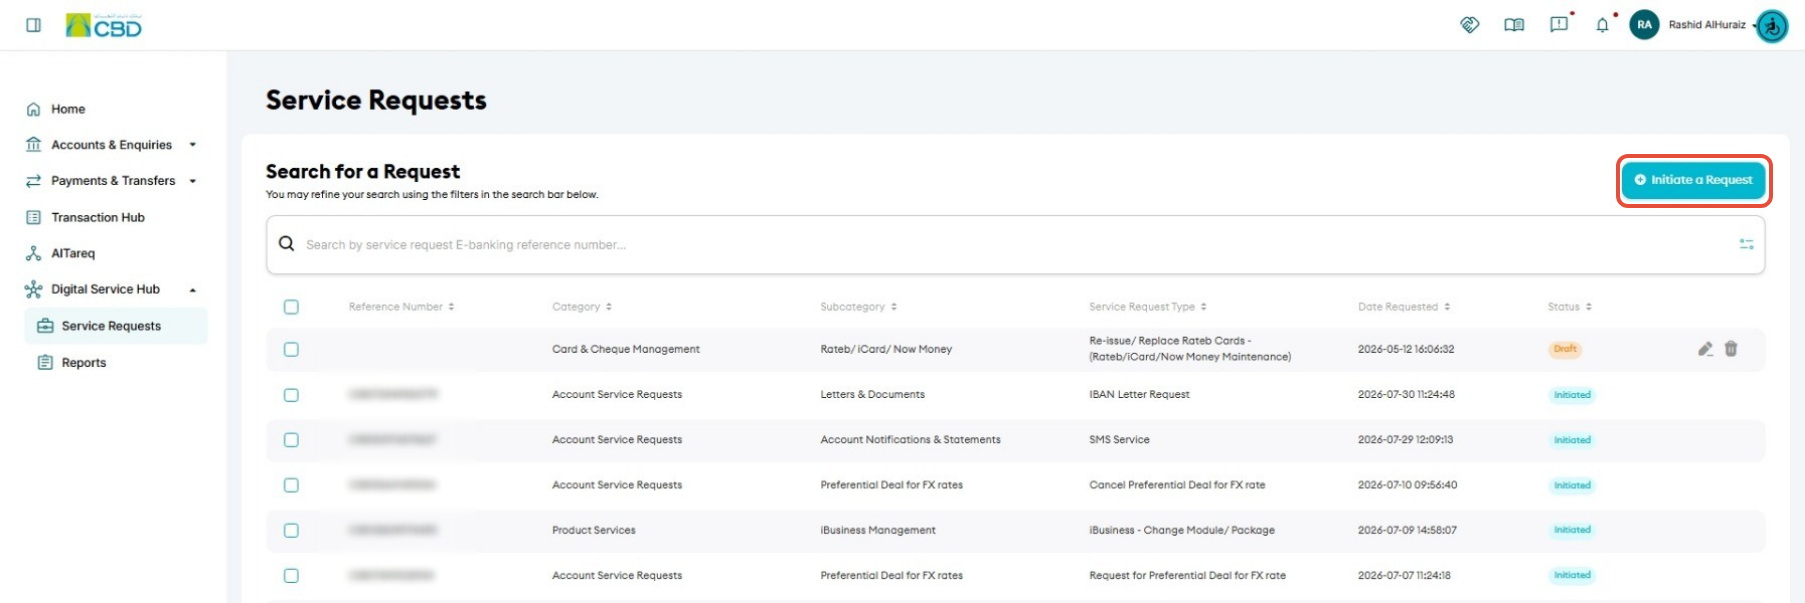
- Click Initiate a Request.
Step 2: Select the Service Type
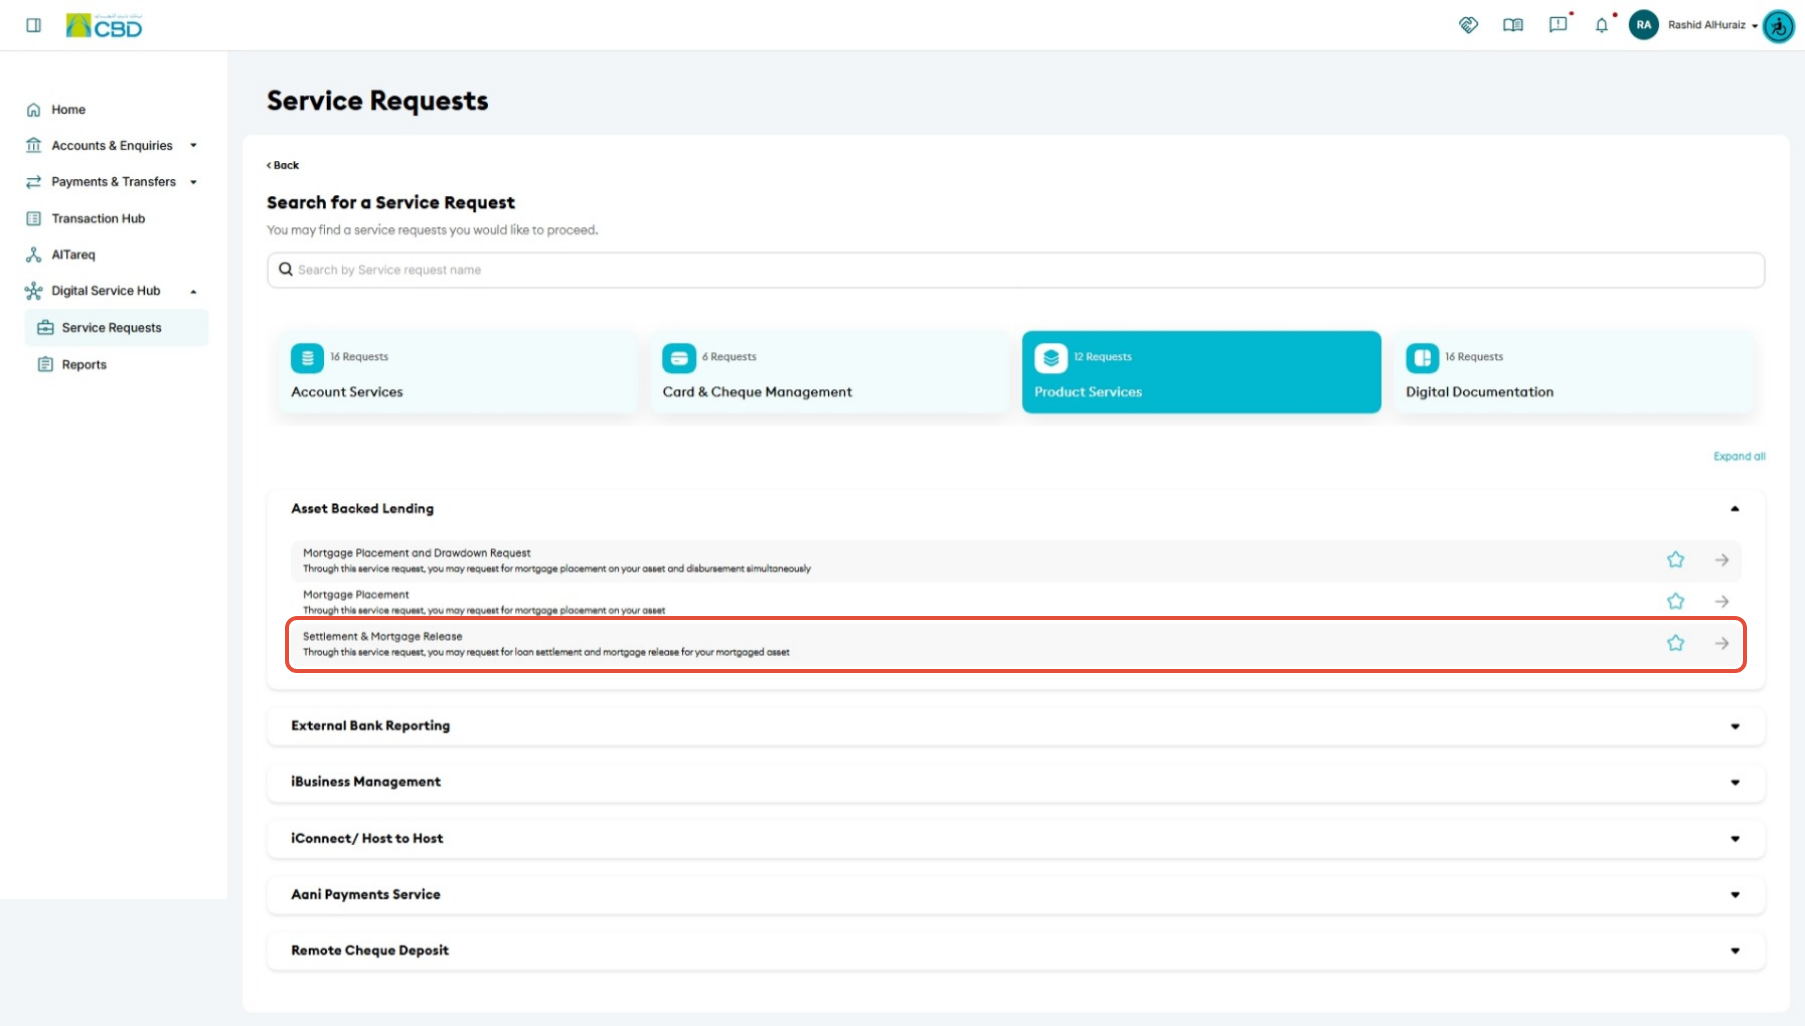
- Select Product Services.
- Choose Settlement & Mortgage Release.
This will open the Settlement & Mortgage Release request form.
Step 2: Select the Service Type
- Select Product Services.
- Choose Settlement & Mortgage Release.
This will open the Settlement & Mortgage Release request form.
Step 3: Complete the Request Details
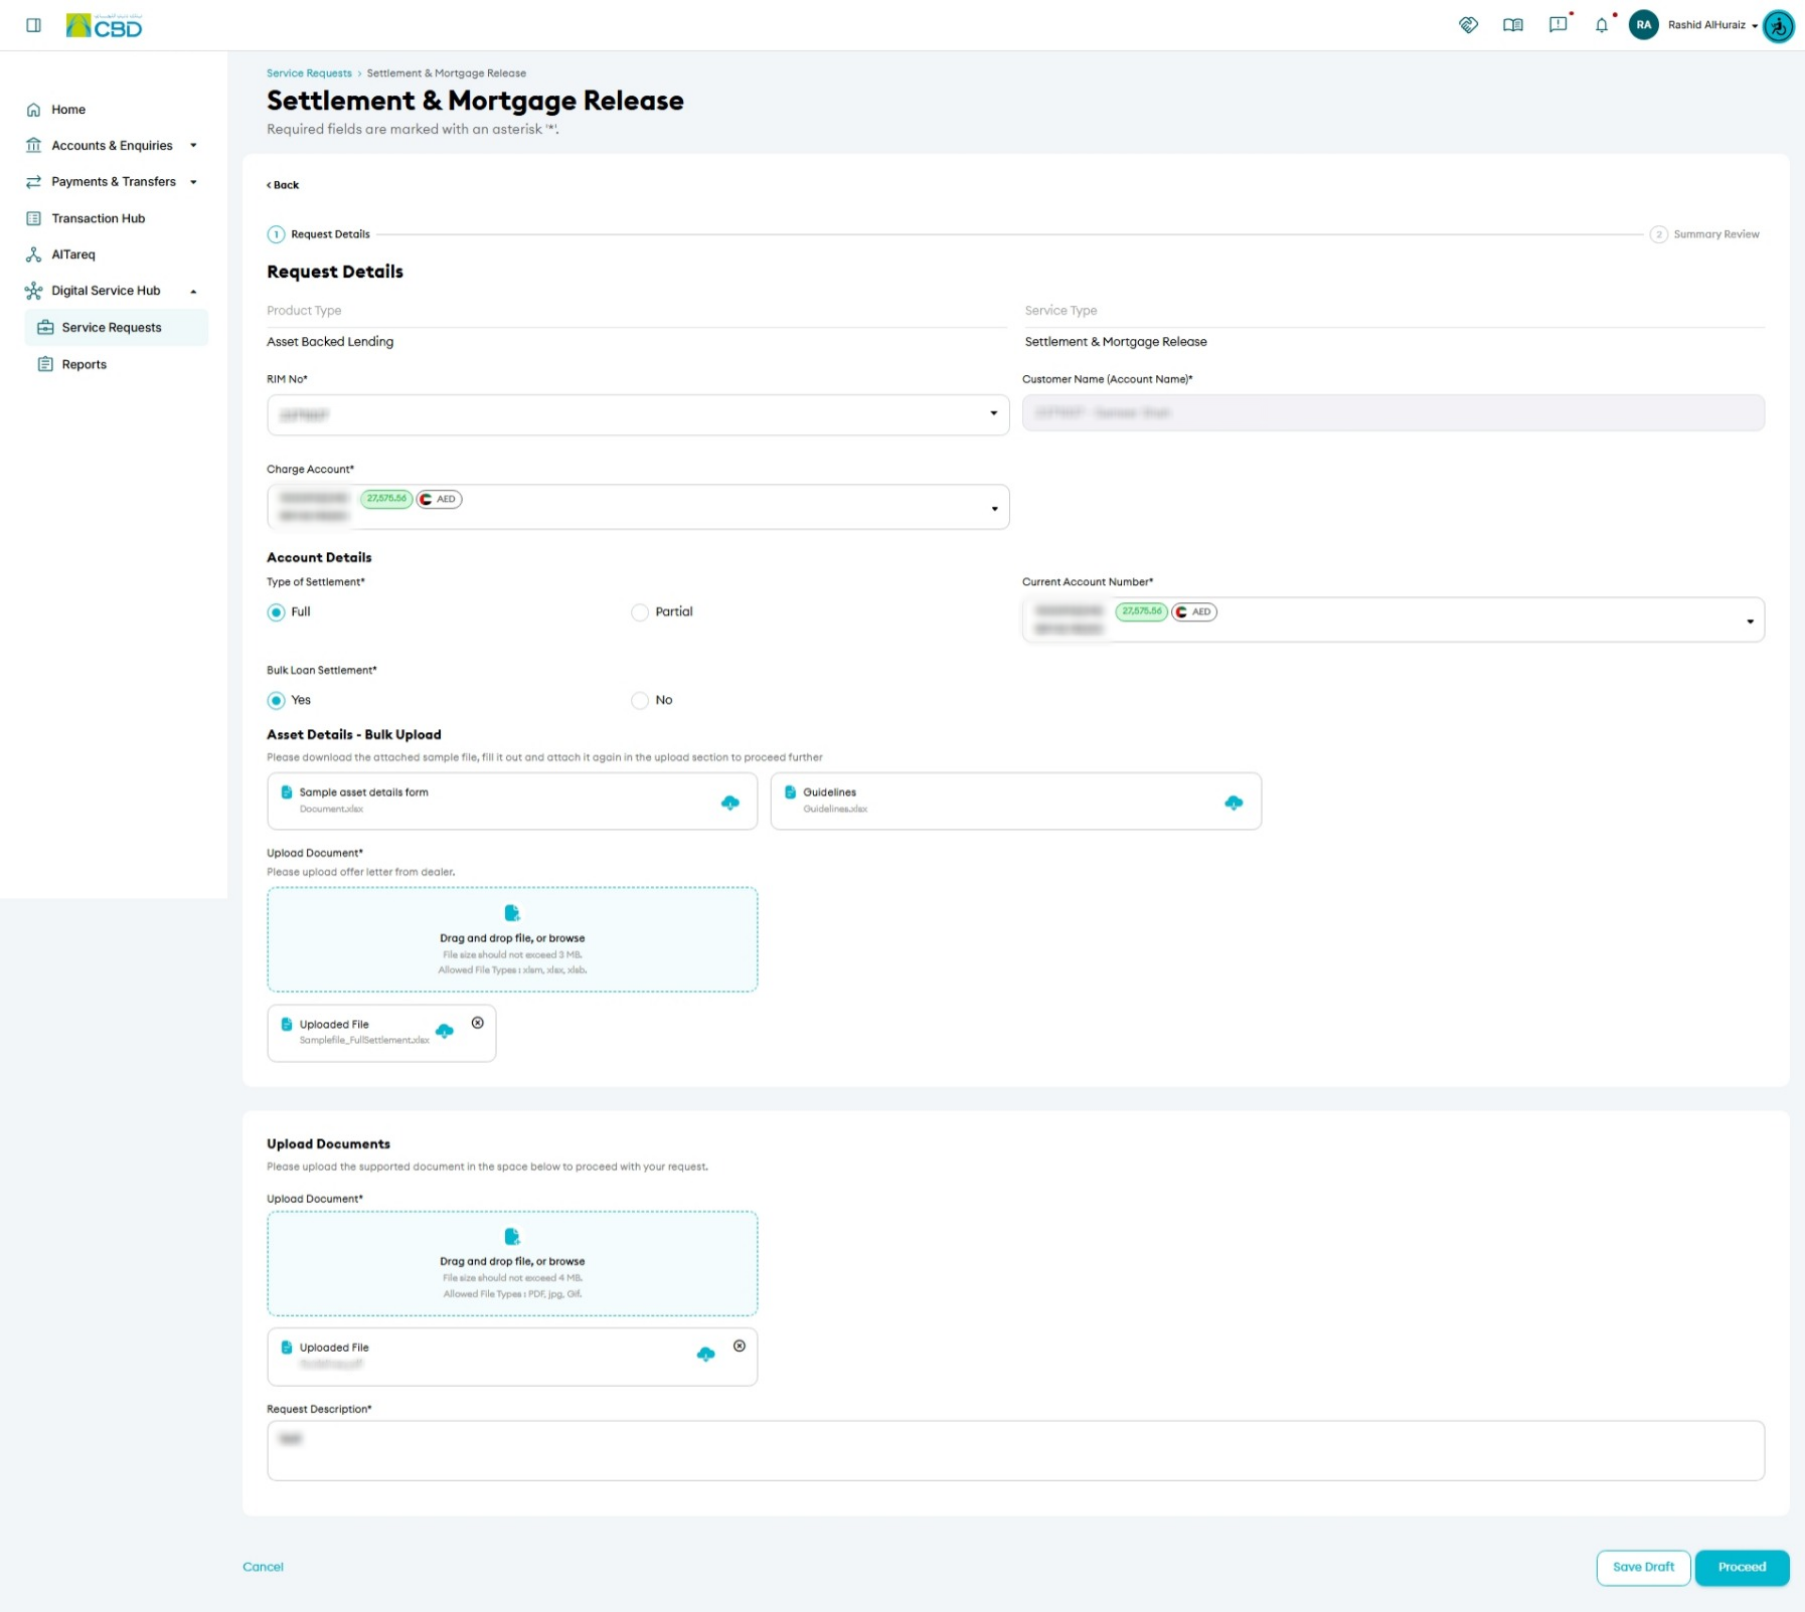
Enter all required information in the request form.
Customer Information
- RIM Number – Enter the relevant Relationship Information Management (RIM) number.
- Charge Account – Select the account from which any applicable charges will be deducted.
Settlement Information
- Type of Settlement– Select:
- Full Settlement, or
- Partial Settlement
- Current Account Number – Select or enter the account associated with the settlement request.
Bulk Loan Settlement
Select whether the request is for a bulk settlement of multiple facilities:
- Yes
- No
Asset Details and Bulk Upload
If bulk settlement is required:
- Download the available:
- Sample File
- PDF User Guide
- Complete the Excel file with the required information.
- Upload the completed file to the system.
Supporting Documents
Upload any supporting documents required for the request.
Note: Ensure all uploaded files are complete, accurate, and in the required format before proceeding.
- Click Proceed once all mandatory fields have been completed.
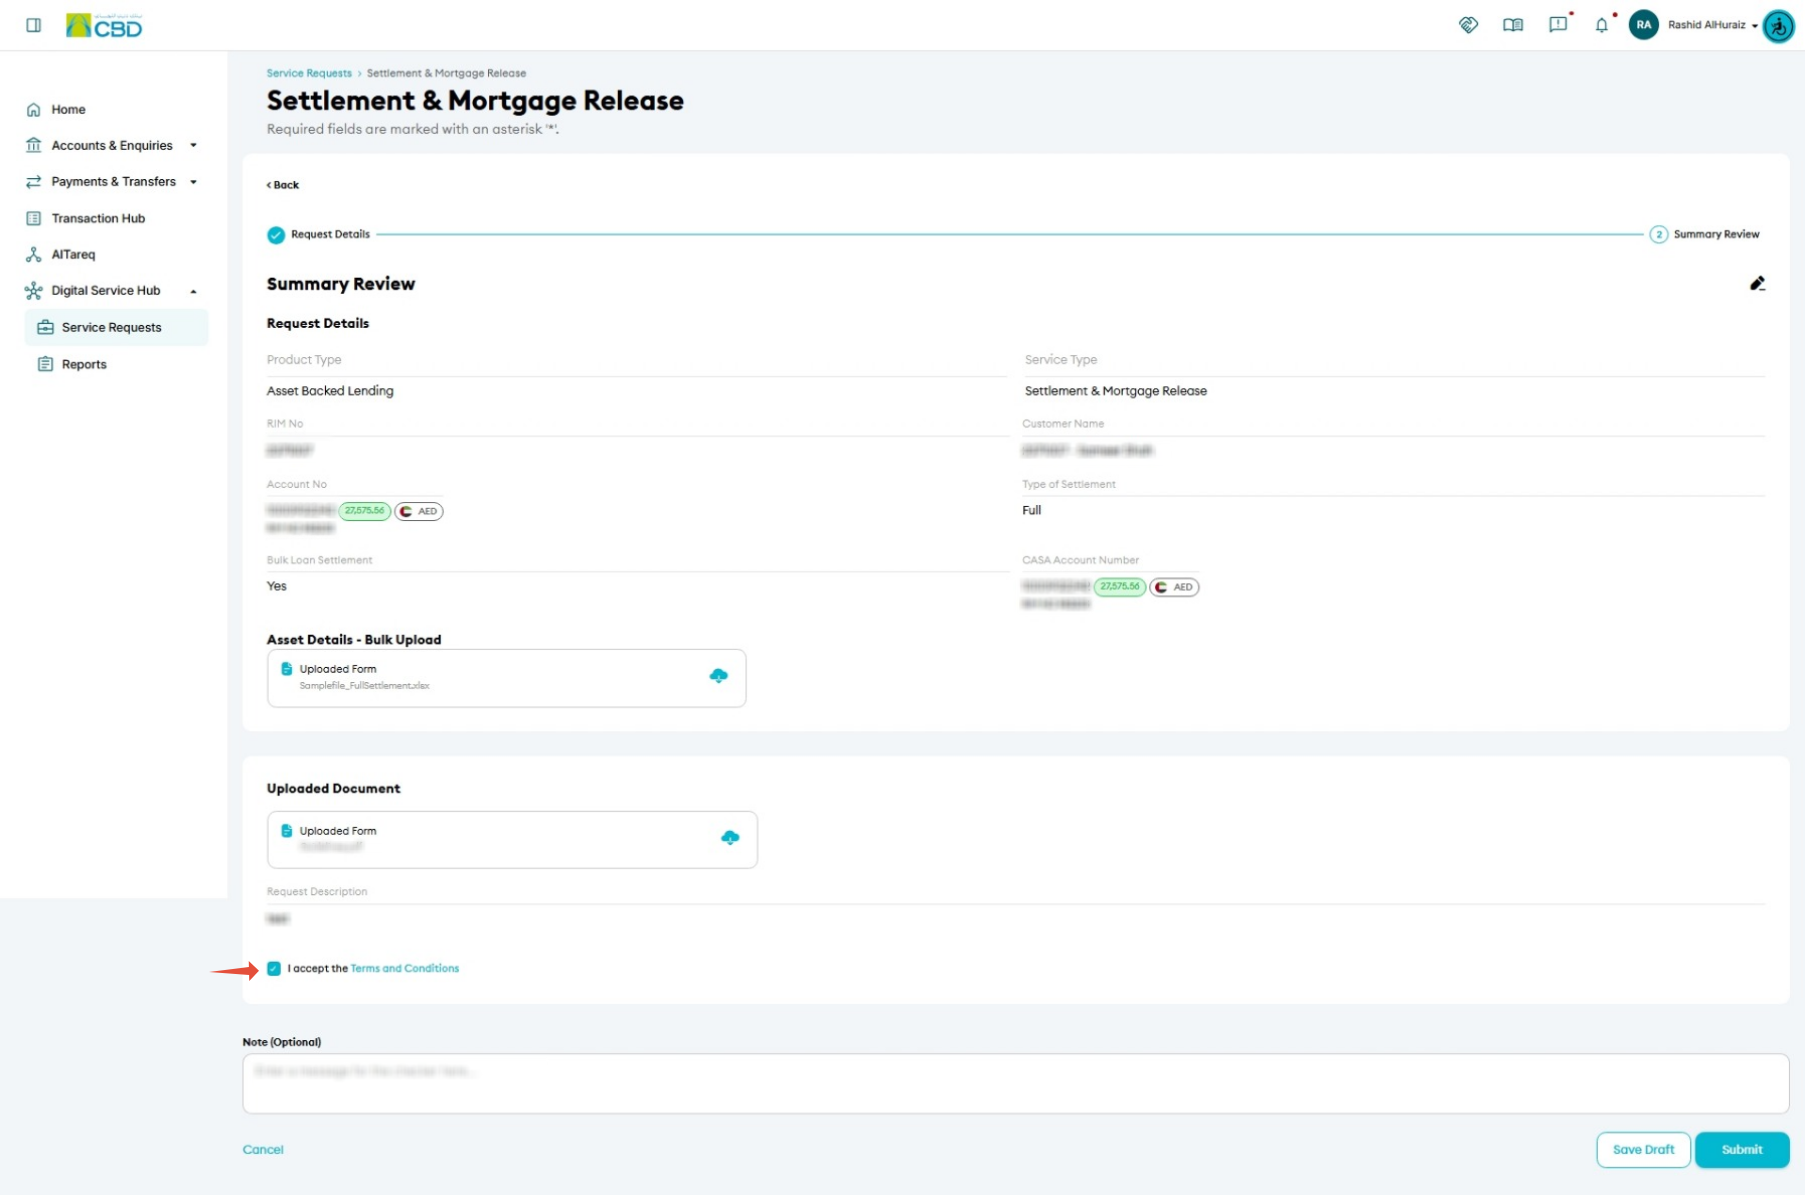
Step 4: Review and Submit
- Review all request information carefully.
- Verify:
- RIM Number
- Charge Account
- Settlement Type
- Account Details
- Uploaded Files
- Supporting Documents
- If required, click Terms and Conditions to review the applicable service terms.
- Accept the Terms and Conditions.
- Click Submit.
Important: Ensure all information is correct before submitting the request to avoid processing delays.
Step 5:
Authenticate the Request
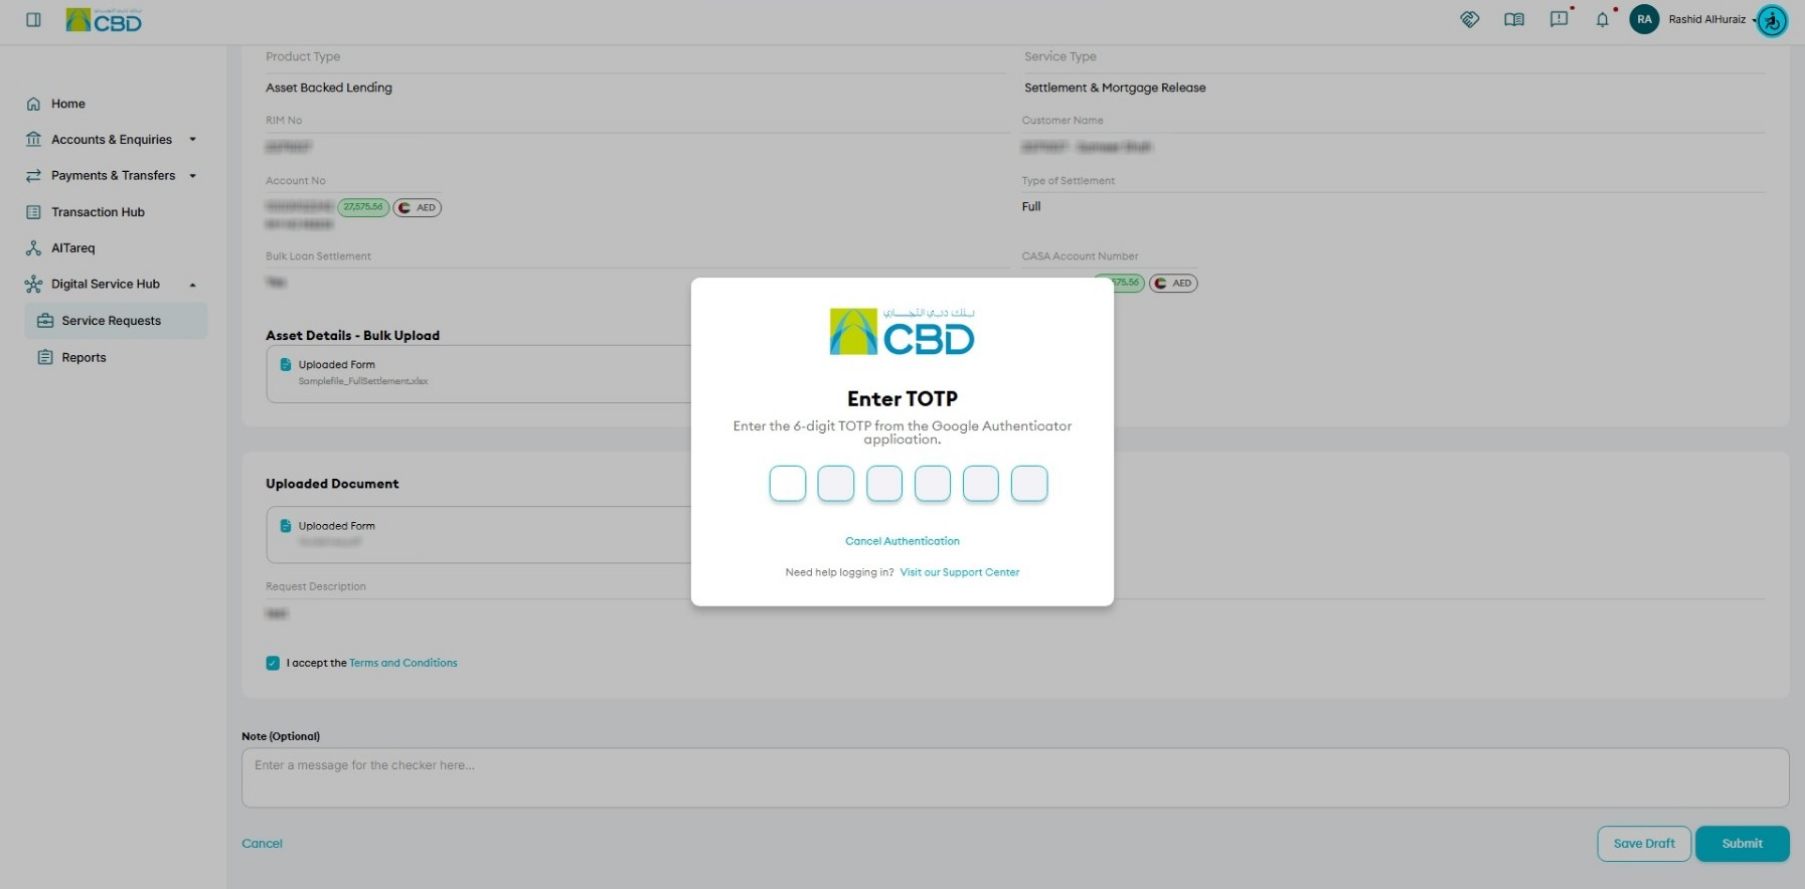
Complete authentication using one of the following methods:
CBD iBusiness Mobile App
- Approve the request through the CBD iBusiness Mobile App.
- Complete biometric authentication.
Google Authenticator
- Open the Google Authenticator application.
- Enter the generated One-Time Password (OTP).
Step 6: Confirmation
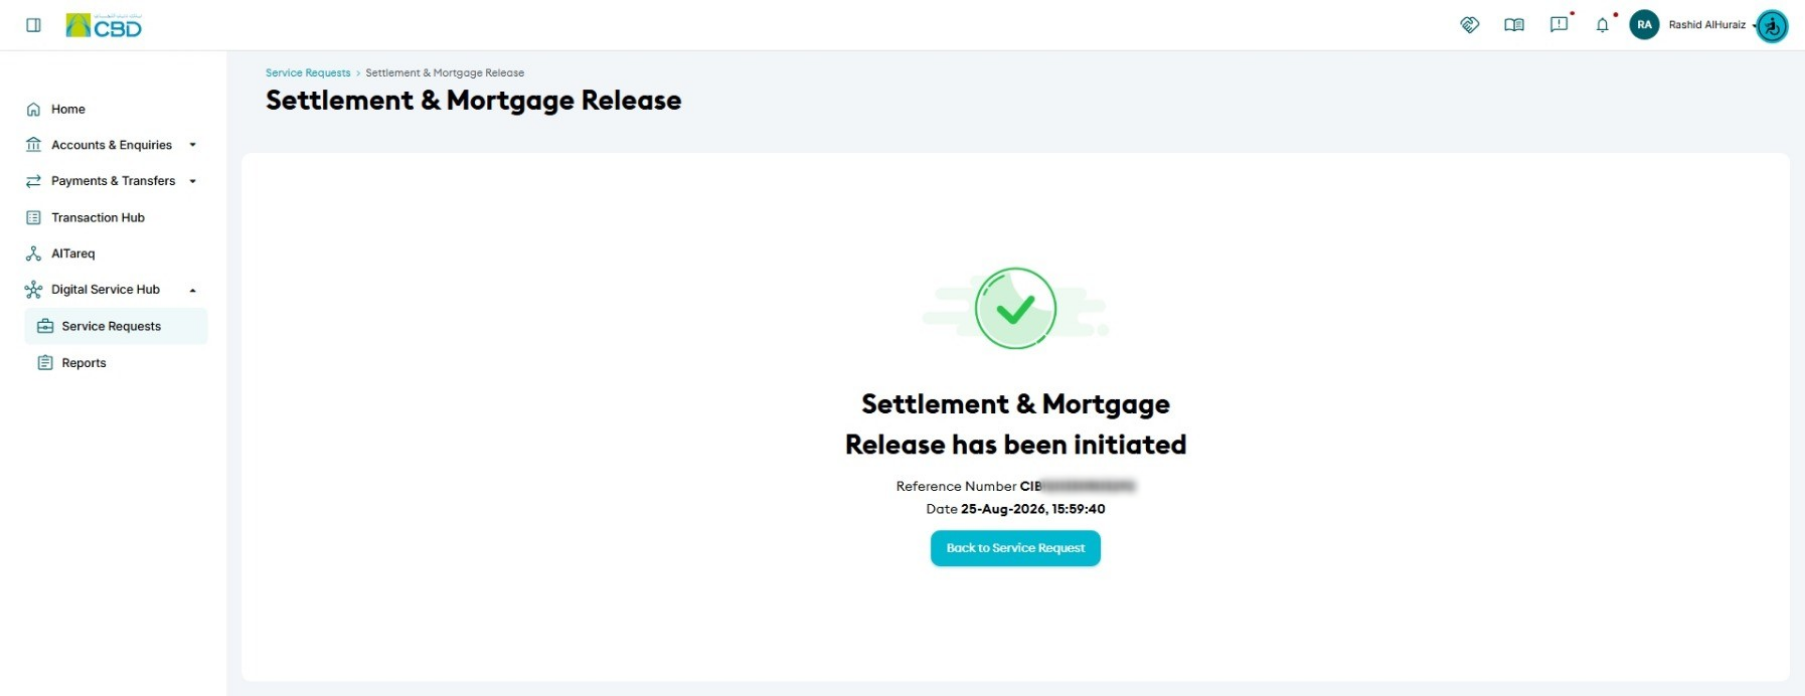
After successful submission:
- A confirmation screen will be displayed.
- A unique reference number will be generated.
- The reference number can be used to track the request status.
Support Notes / Best Practices
- Ensure the correct RIM Number and Current Account Number are selected.
- Select the appropriate settlement type (Full or Partial) before submission.
- For bulk settlements, always use the latest Sample File provided within iBusiness.
- Review all uploaded documents before proceeding.
- Read the accompanying PDF guide when preparing a bulk settlement file.
- Retain the generated reference number for future tracking and support enquiries.