
Overview
This guide provides step-by-step instructions for enabling iCollect Registration and Amendment within a Financial Configuration in the iBusiness Online.
Step 1: Access Financial Configurations
- Log in to iBusiness using your Corporate Admin credentials.
- Navigate to: Corporate Management ➜ Financial Configuration
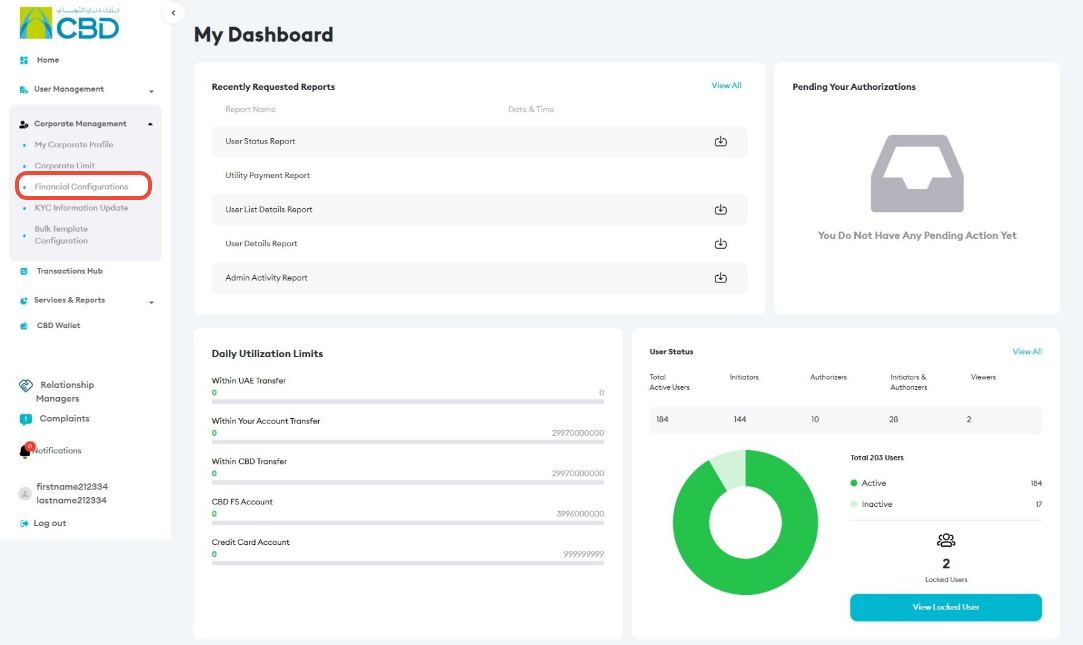
Step 2: Create or Edit a Financial Configuration
You can enable iCollect using either of the following options:
- Create a new Financial Configuration.
- Edit an existing Financial Configuration.
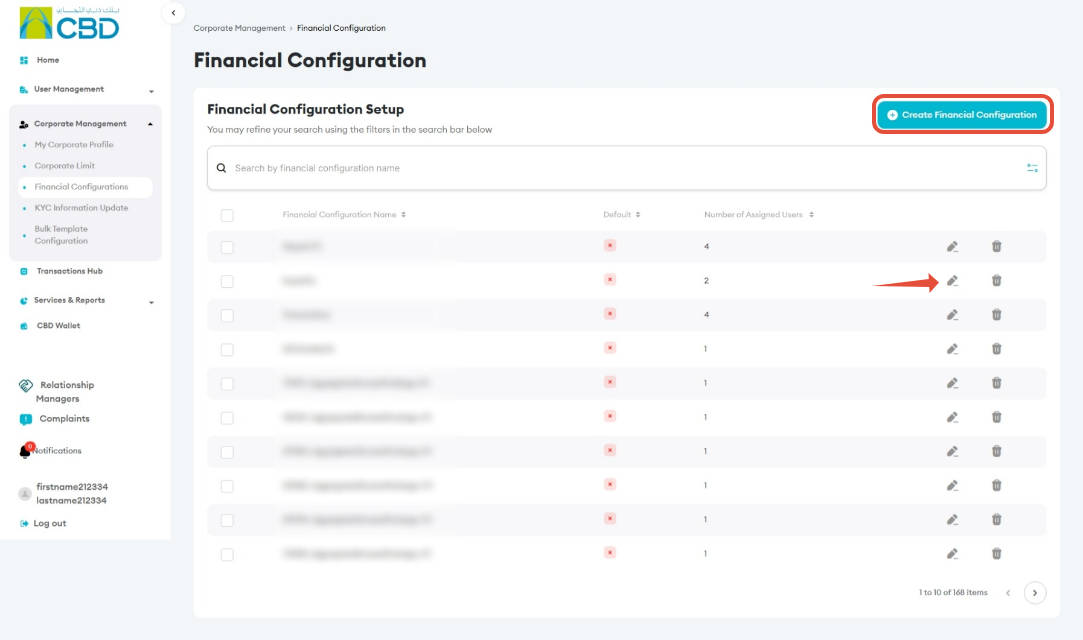
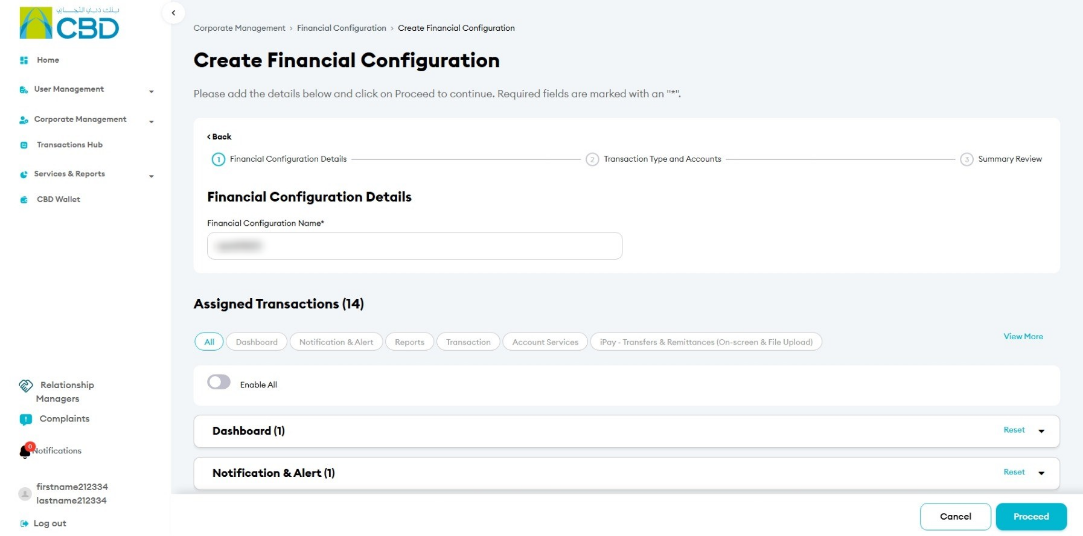
Step 3: Enable iCollect
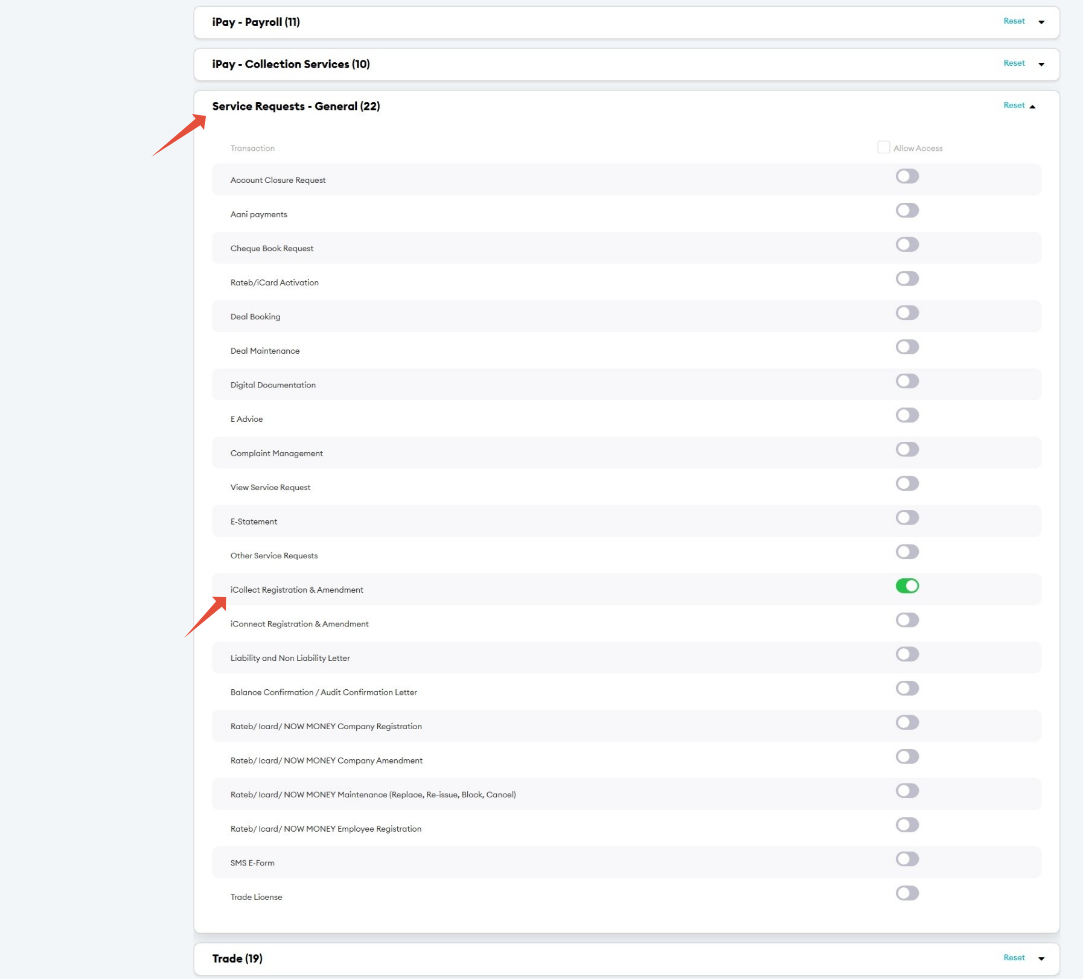
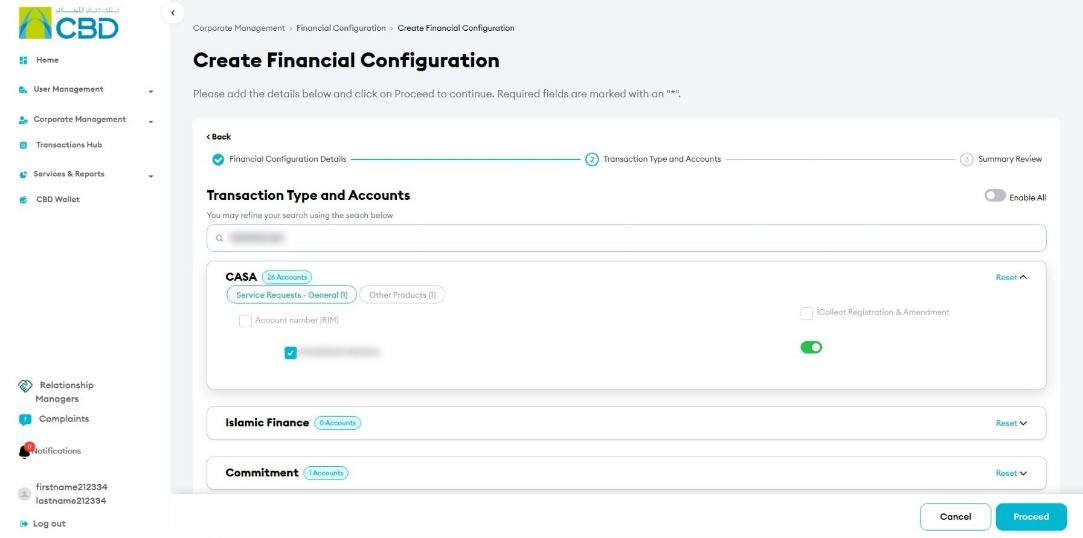
- Scroll down to the Service Requests – General section.
- Locate iCollect Registration and Amendment.
- Enable the service.
- Click Proceed.
Step 4: Select the Account
- Select the account that requires access to iCollect.
- If multiple accounts are displayed, use the Search bar to quickly locate the required account.
- Select the required account and proceed.
Step 5: Summary Review
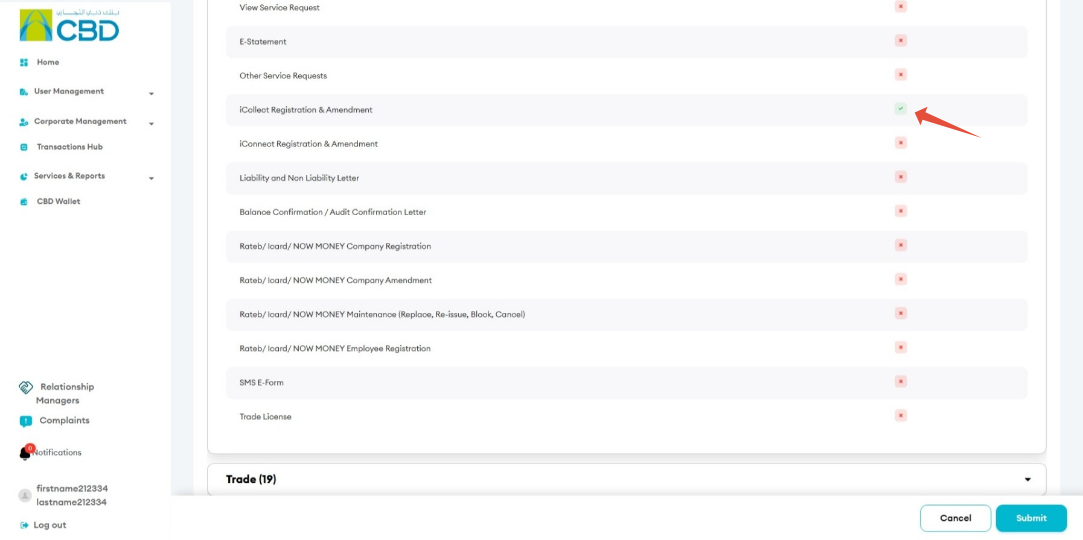
Review the configuration changes before submitting the request.
- Confirm that iCollect Registration and Amendment is enabled.
- Verify that the correct account has been selected.
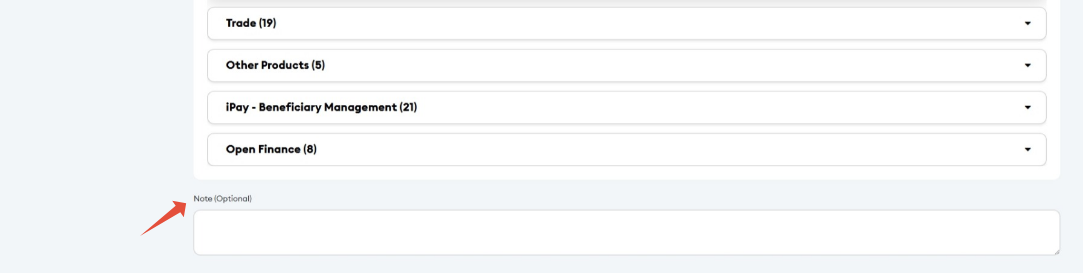
- Add a Note if required. This is optional.
- Click Submit.
Step 6: Authenticate the Request
Complete authentication using one of the following methods:
iBusiness App Authentication
- Approve the request through the registered iBusiness Mobile App.
- Complete biometric or device authentication.
Google Authenticator
- Enter the One-Time Password (OTP) generated by Google Authenticator.
After successful authentication, a confirmation message will be displayed with a reference number.
Step 7: Approval (If Maker–Checker Is Enabled)
If a Maker–Checker setup is configured:
- The request will be routed to a Checker/Approver.
- The Approver must review the Financial Configuration change in Transactions.
- The Approver can Approve or Reject the request.
- The iCollect configuration change will take effect after the required approval is completed.