
Overview
This guide explains how a Corporate Administrator can enable, disable, and manage SMS and Email Notifications for users in the iBusiness Web Portal.
Notification preferences can be configured for both:
- Financial Notifications (transaction-related alerts)
- Non-Financial Notifications (service and system-related alerts)
Administrators can configure notifications at the user and account level based on business requirements.
Step 1: Access Notification Setup
- Log in to iBusiness.
- Navigate to: User Management ➜ Notification Setup
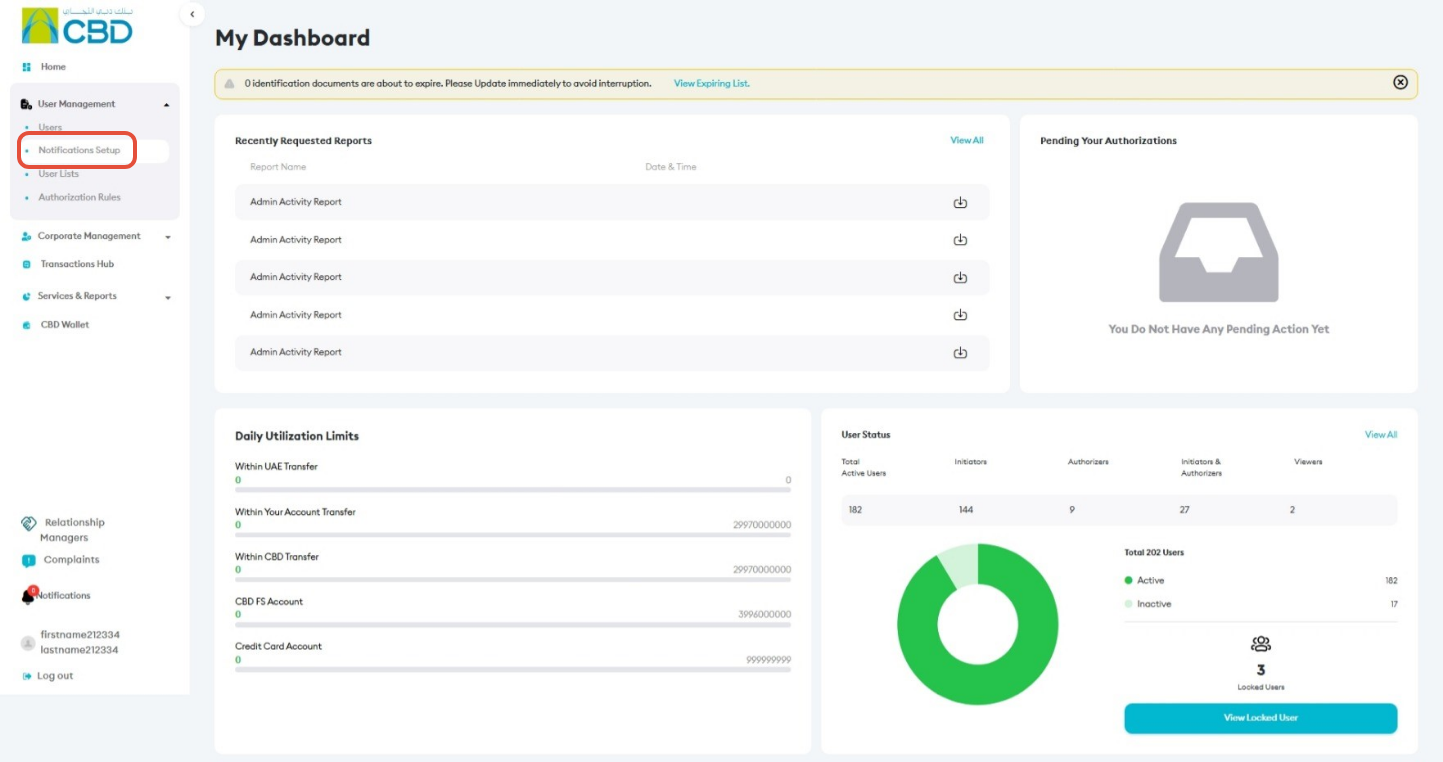
Step 2: Select a User
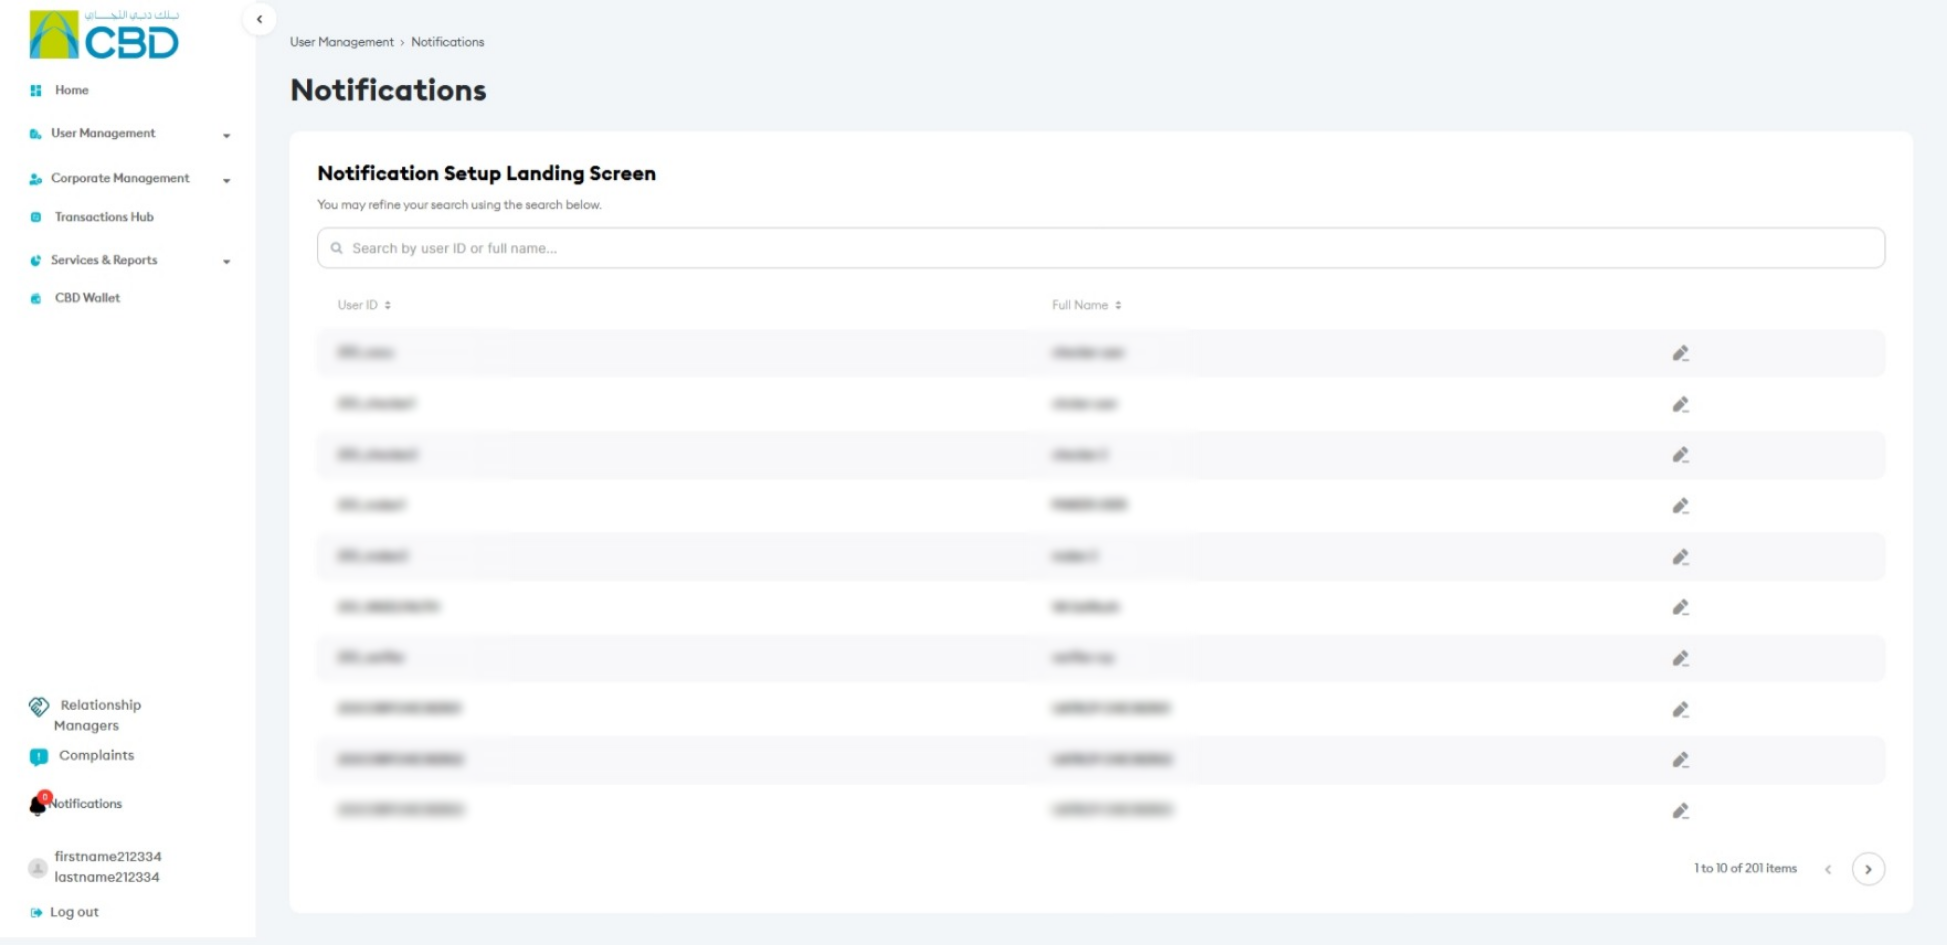
The system will display the list of available users.
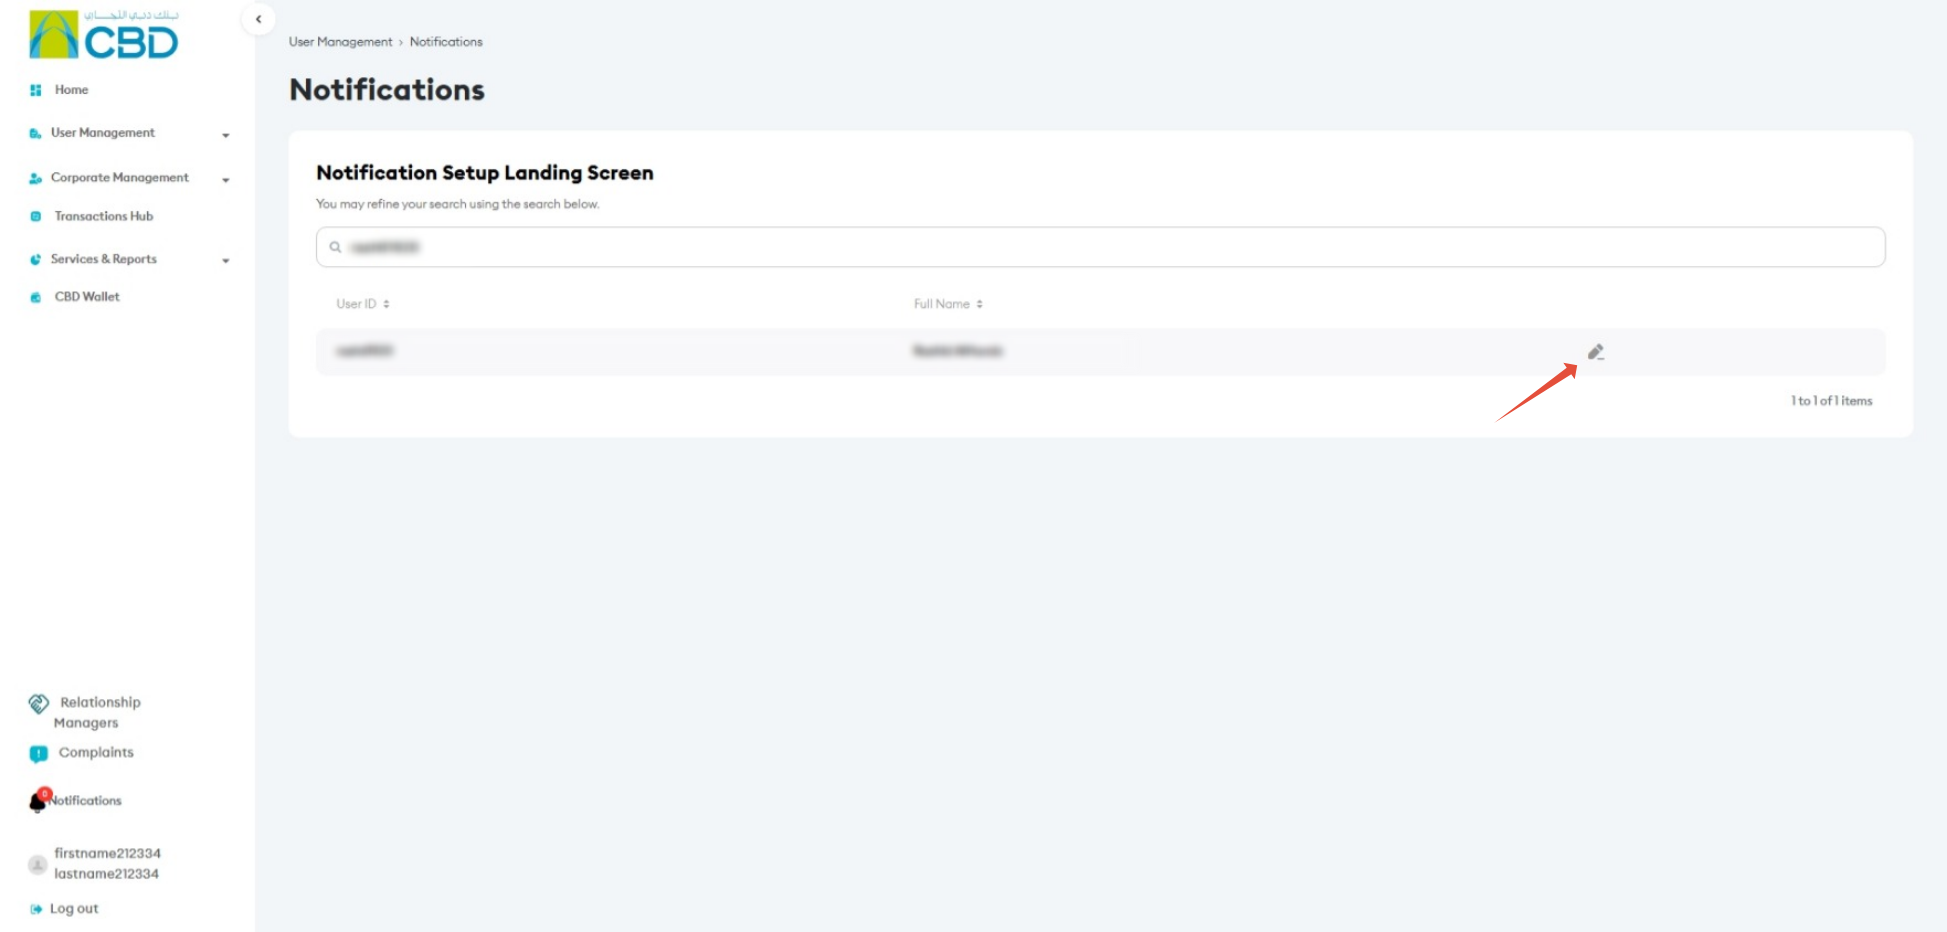
- Use the Search bar to locate the required user.
- Select the user whose notification settings you want to manage by clicking on the edit icon
 .
.
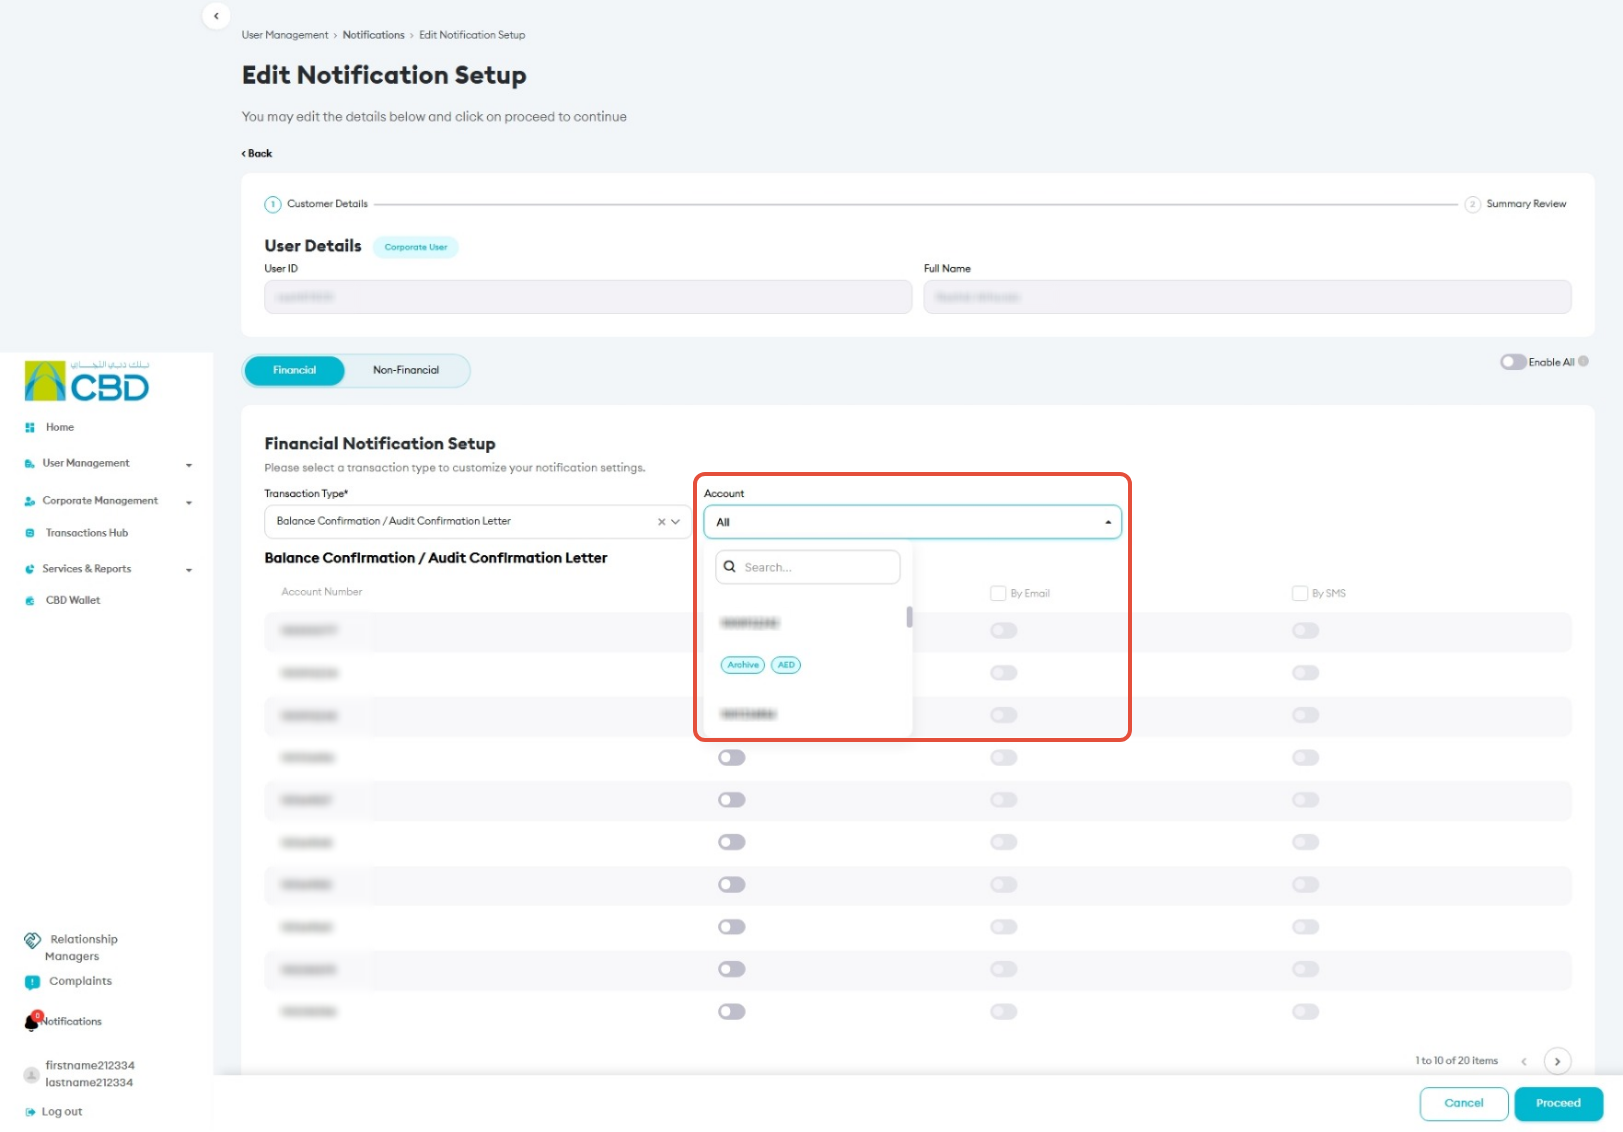
Step 3: Select the Account
- Select the required account from the account drop-down list.
- To manage notifications for all available accounts, leave the selection as All.
Step 4: Select the Notification Type
Choose the type of notifications you want to manage.
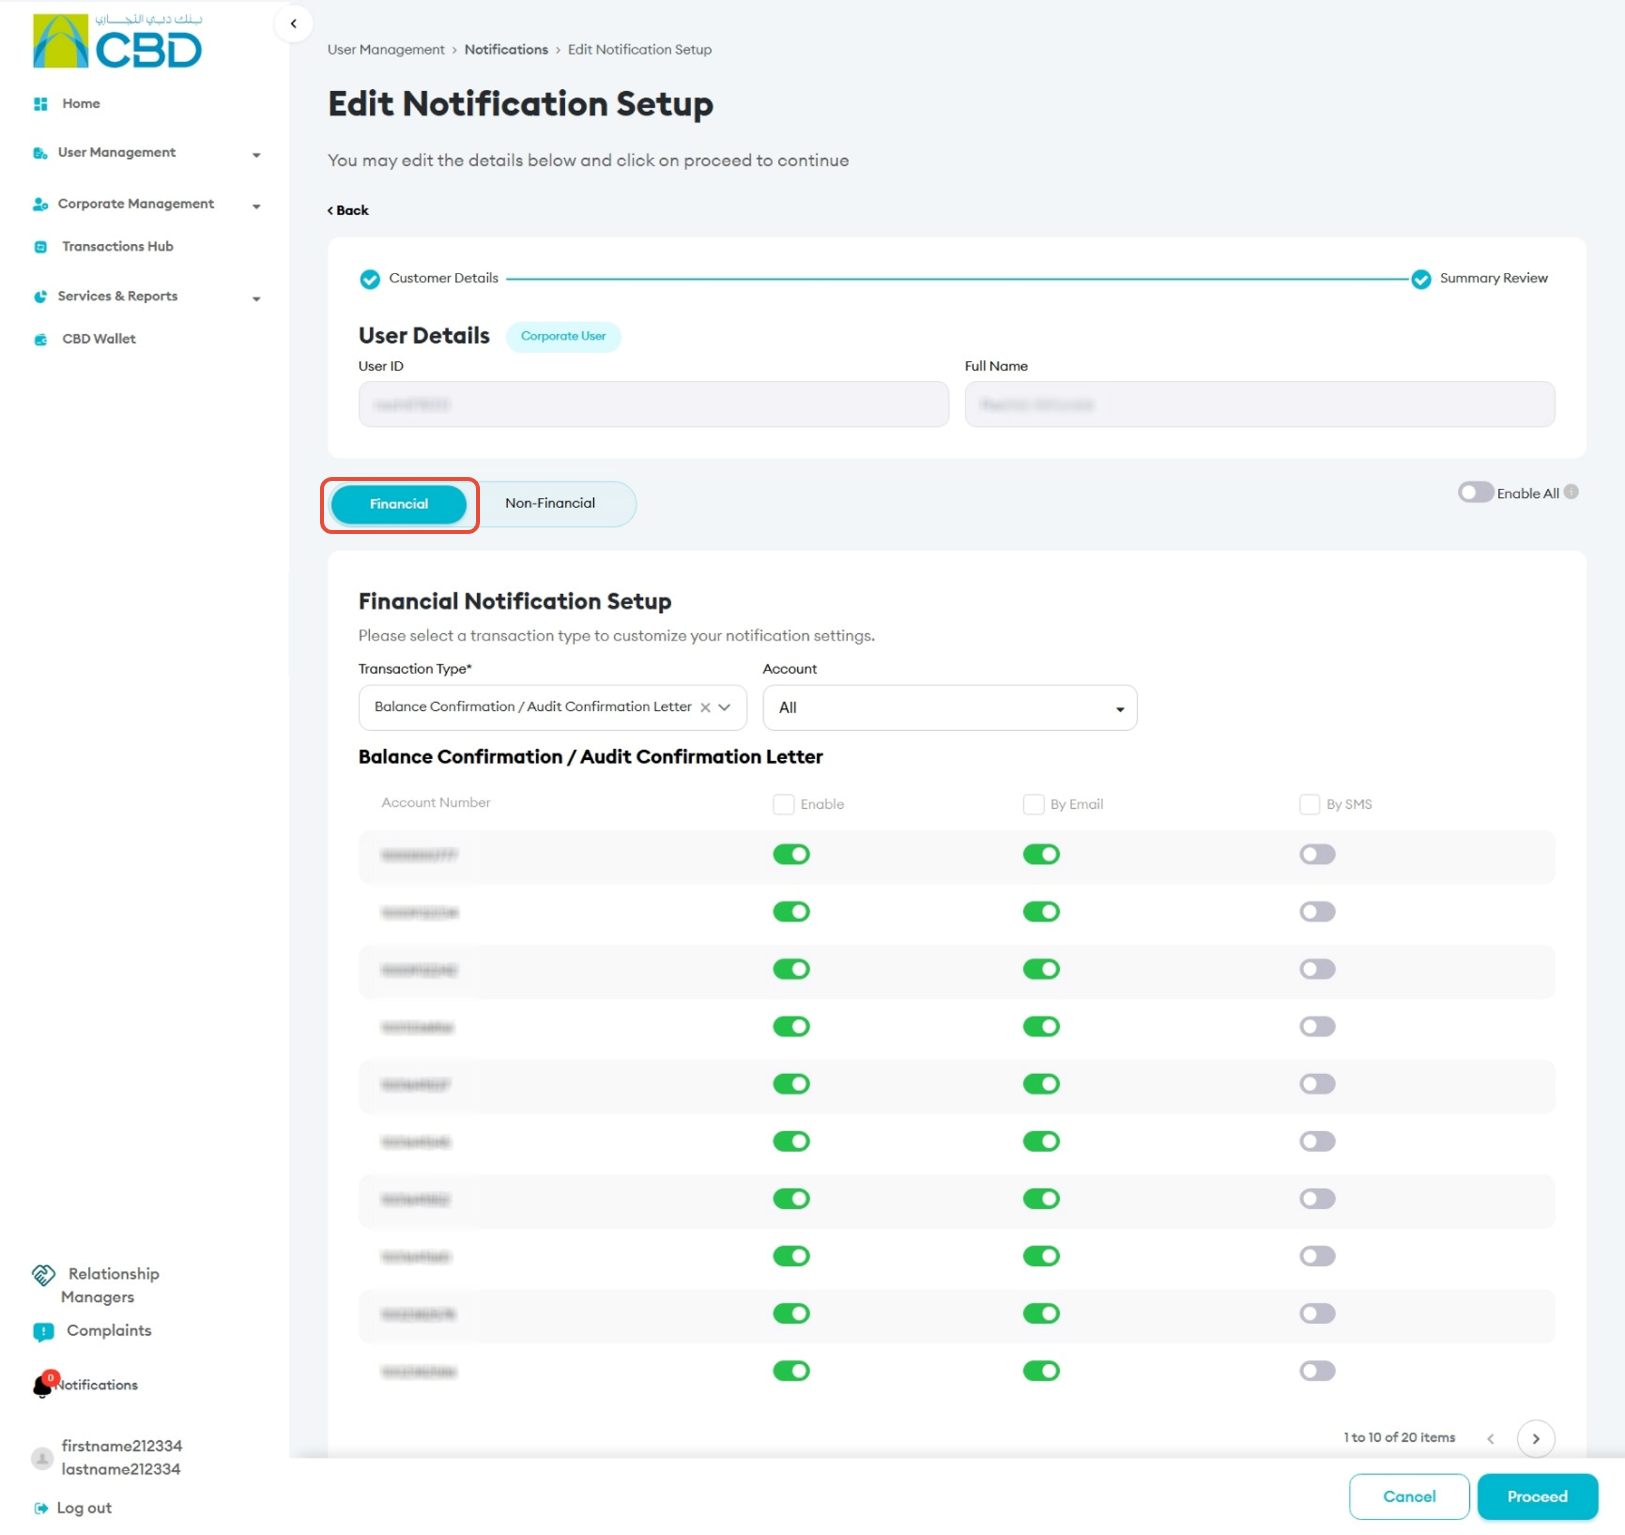
Financial Notifications
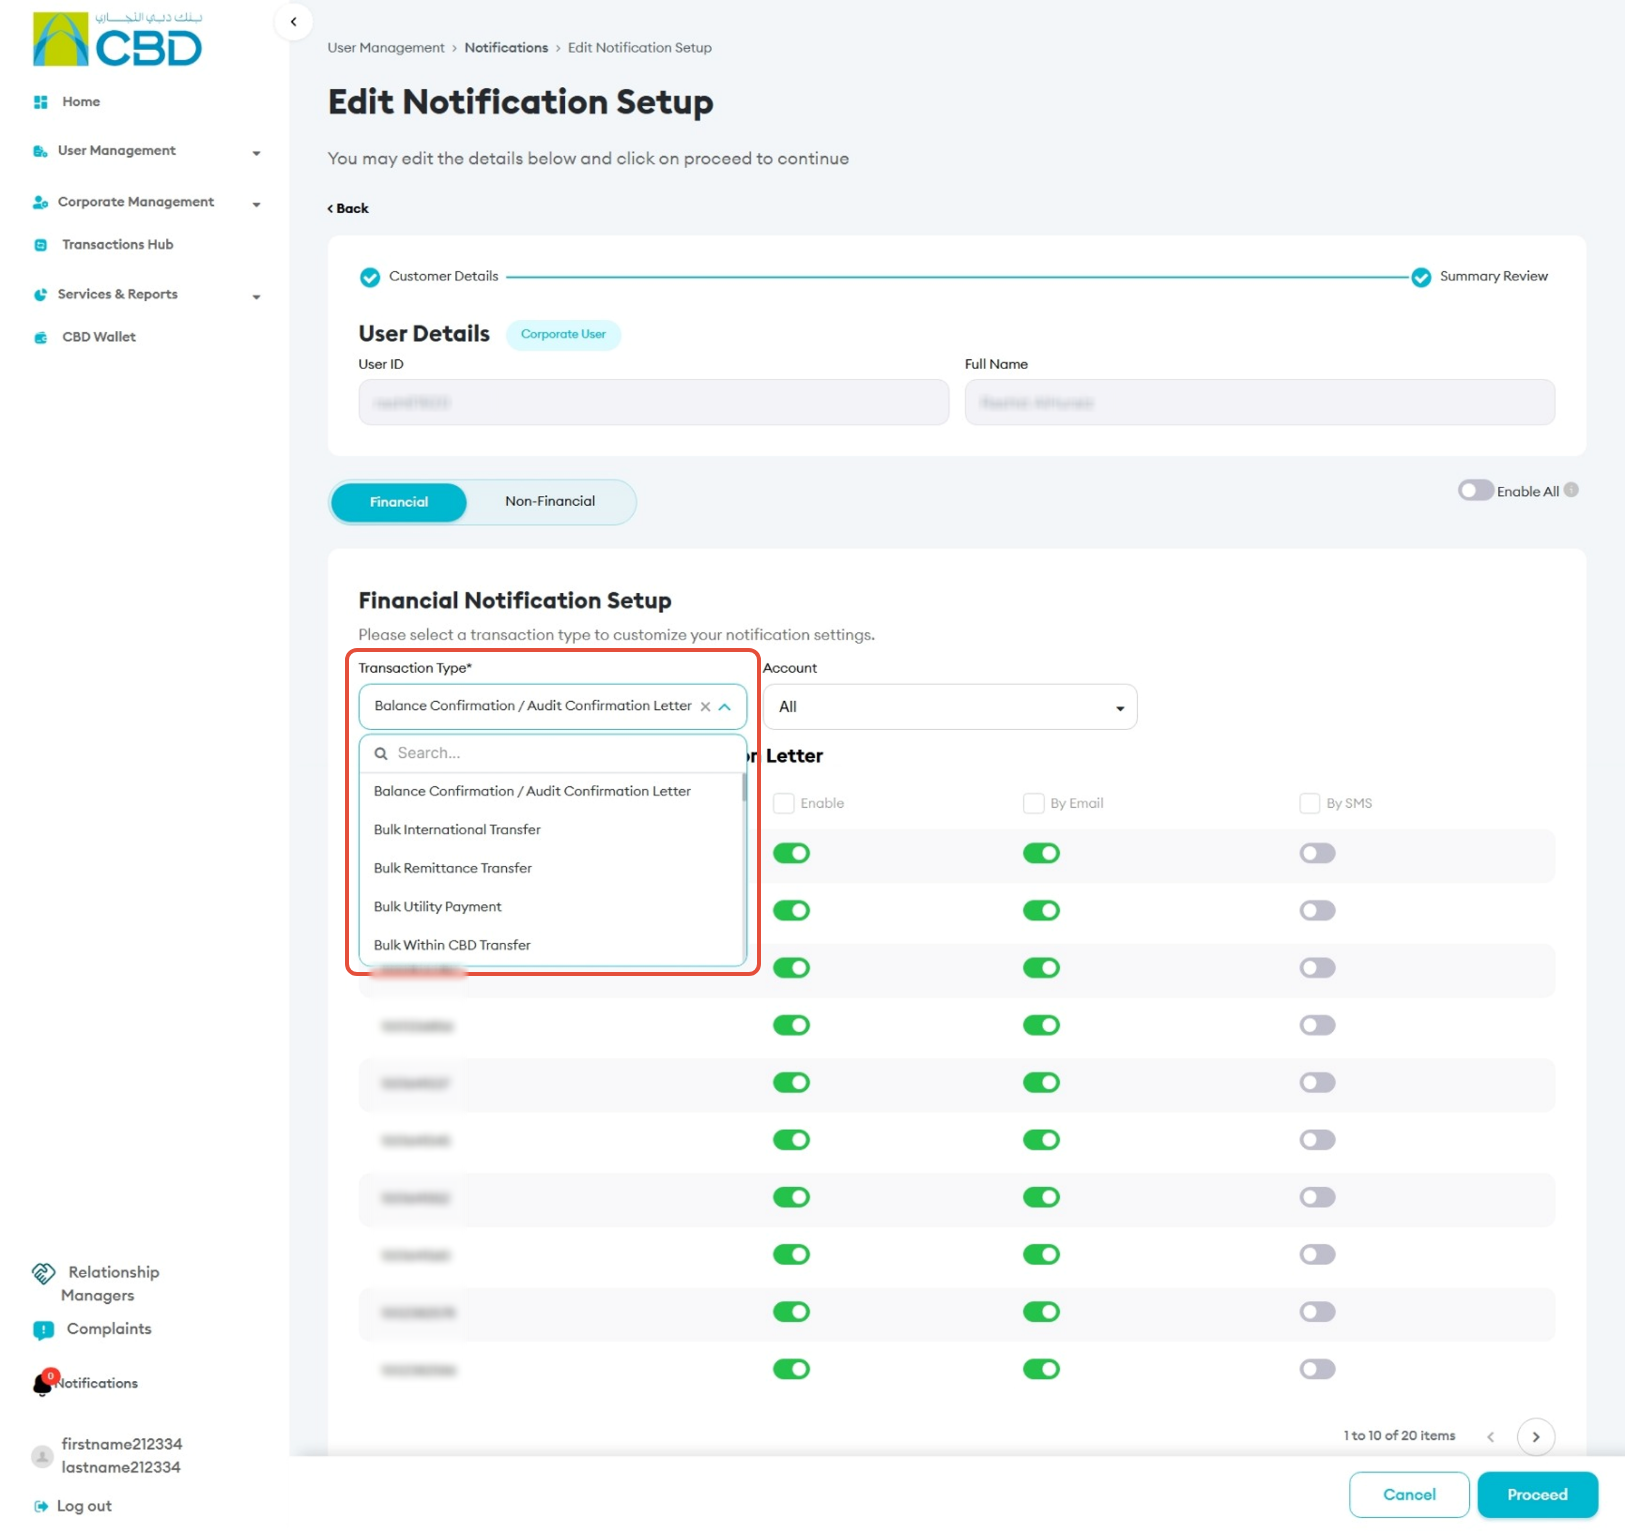
Select the Financial tab to configure notifications related to transactions and account activity.
- Click the Financial tab.
- Select the required transaction type from the drop-down list.
Non-Financial Notifications
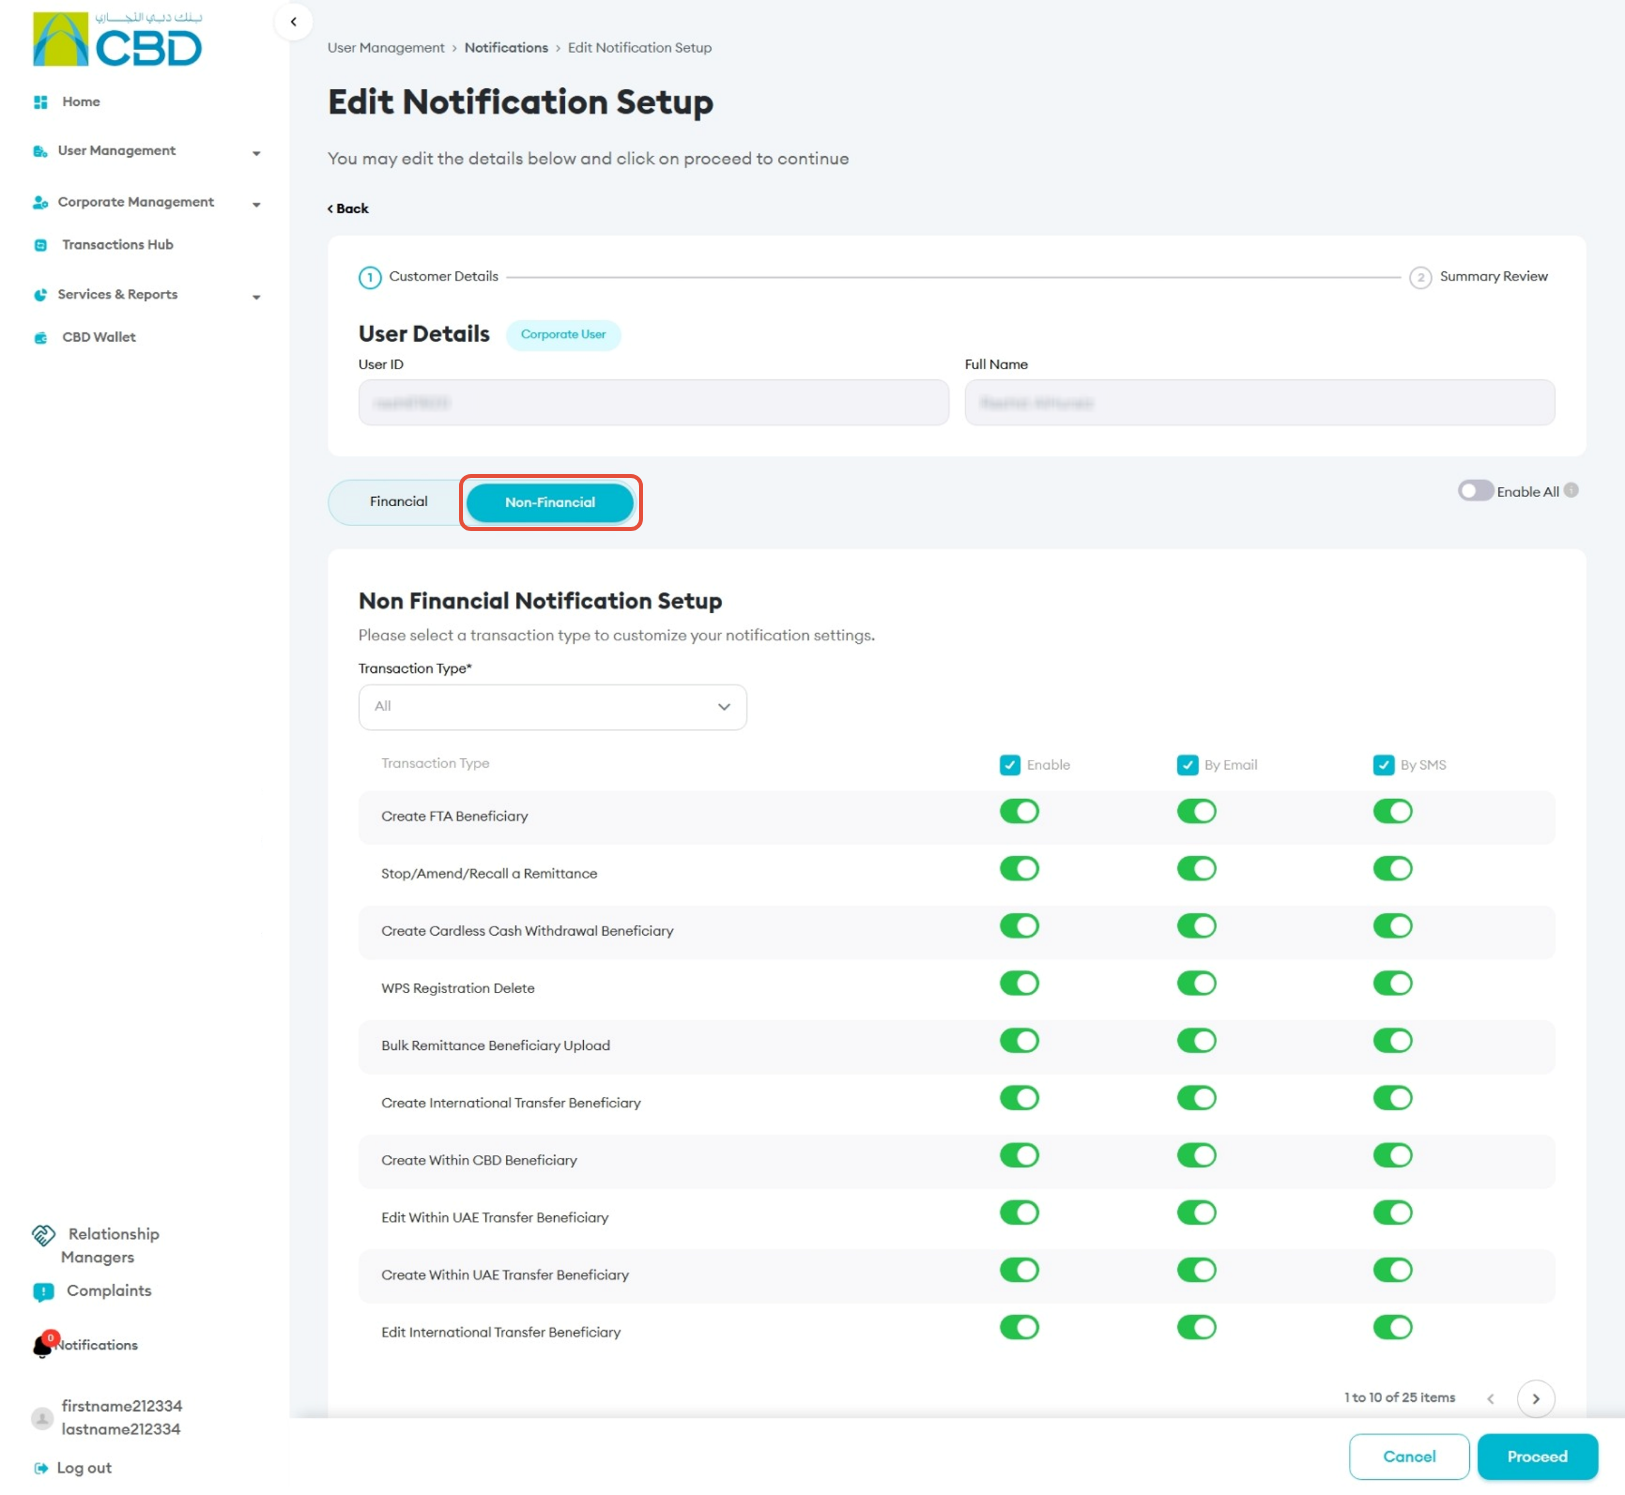
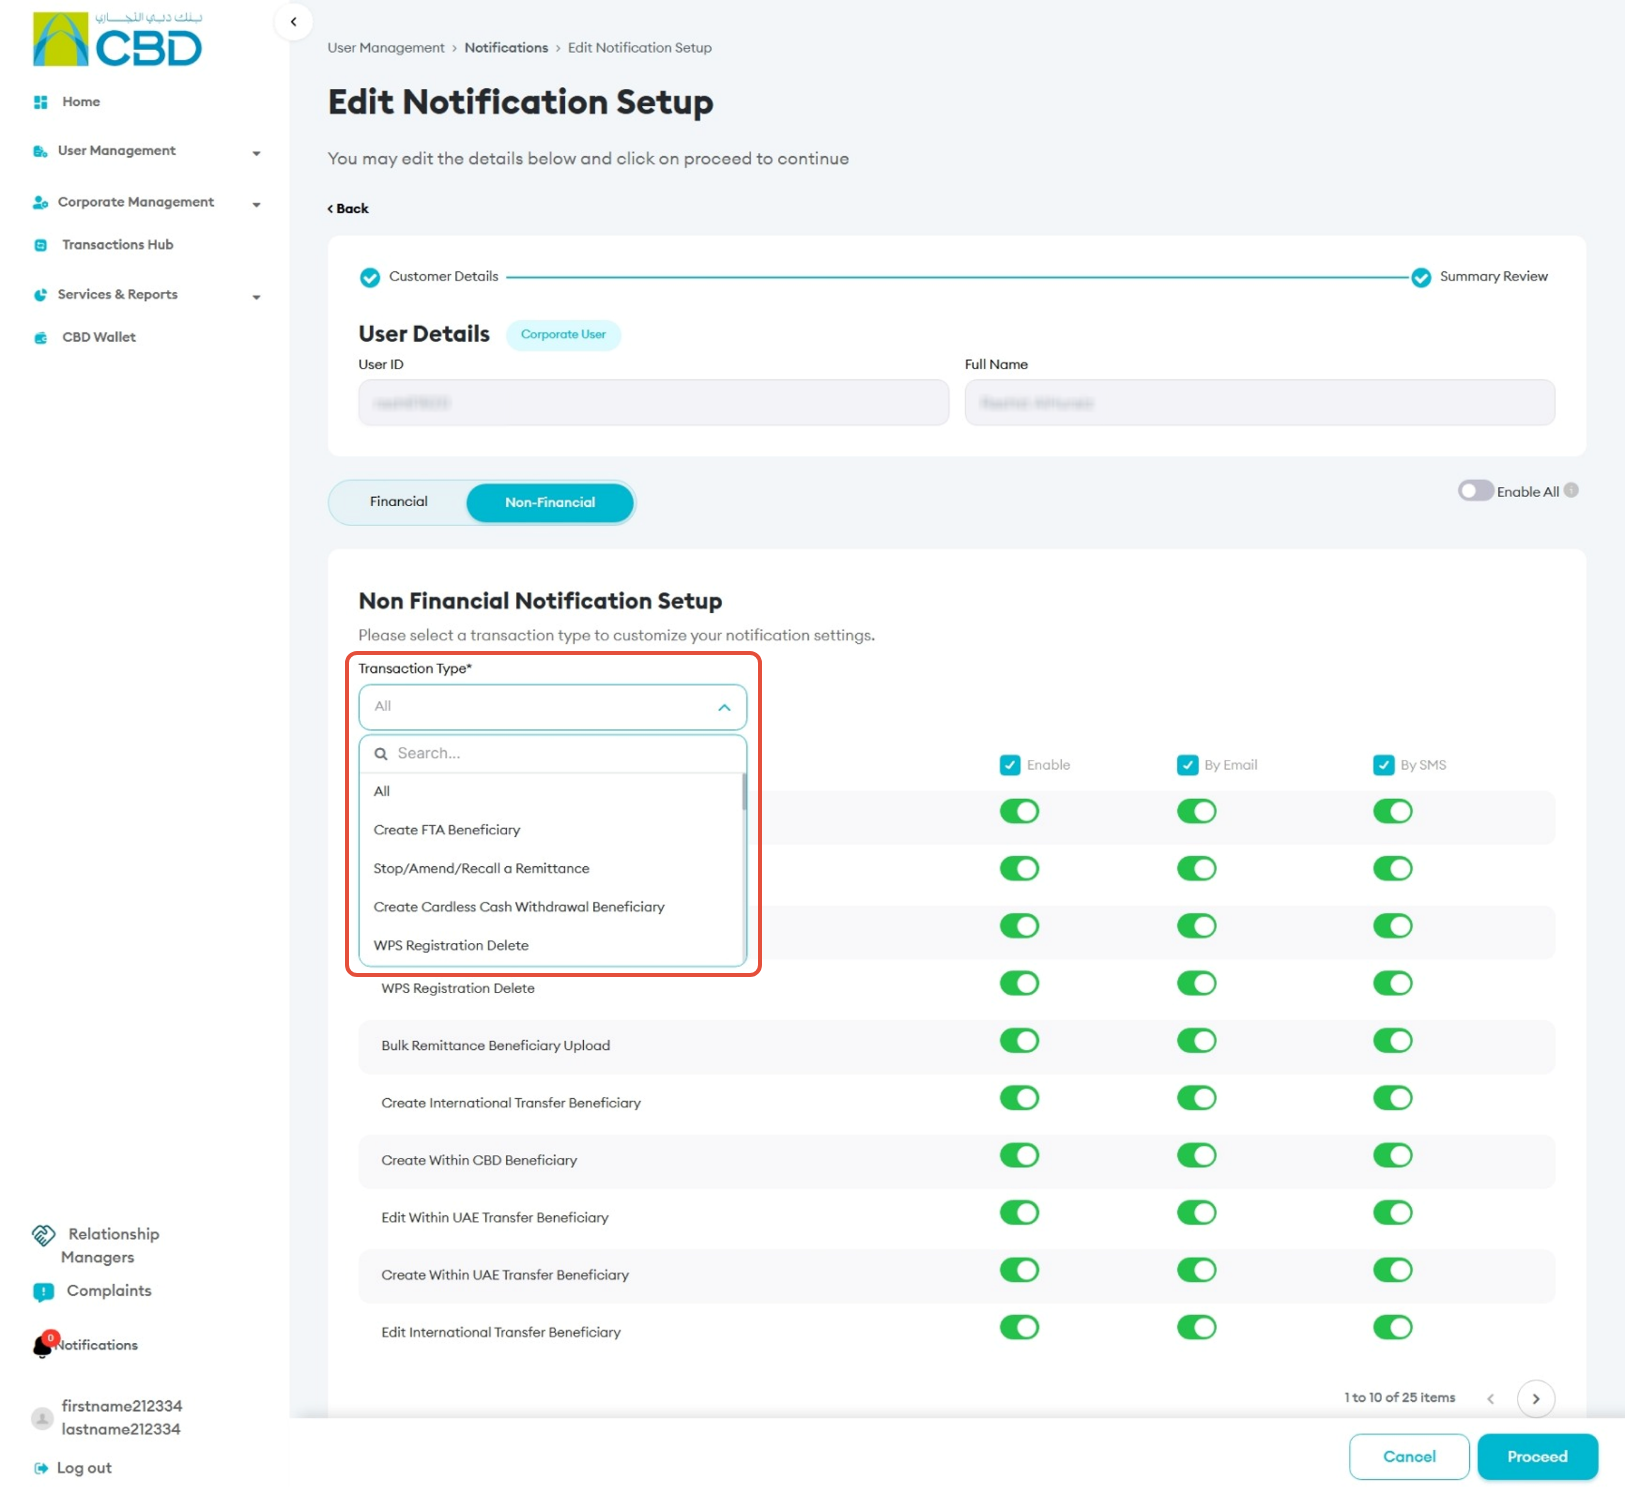
Select the Non-Financial tab to configure notifications related to services, user activities, and system events.
- Click the Non-Financial tab.
- Select the required transaction type from the drop-down list.
Step 5: Configure Notification Preferences
You can enable or disable notifications for each account individually.
Enable or Disable an Entire Row
To enable or disable all notification channels for a specific notification type:
- Click the checkbox at the beginning of the row.
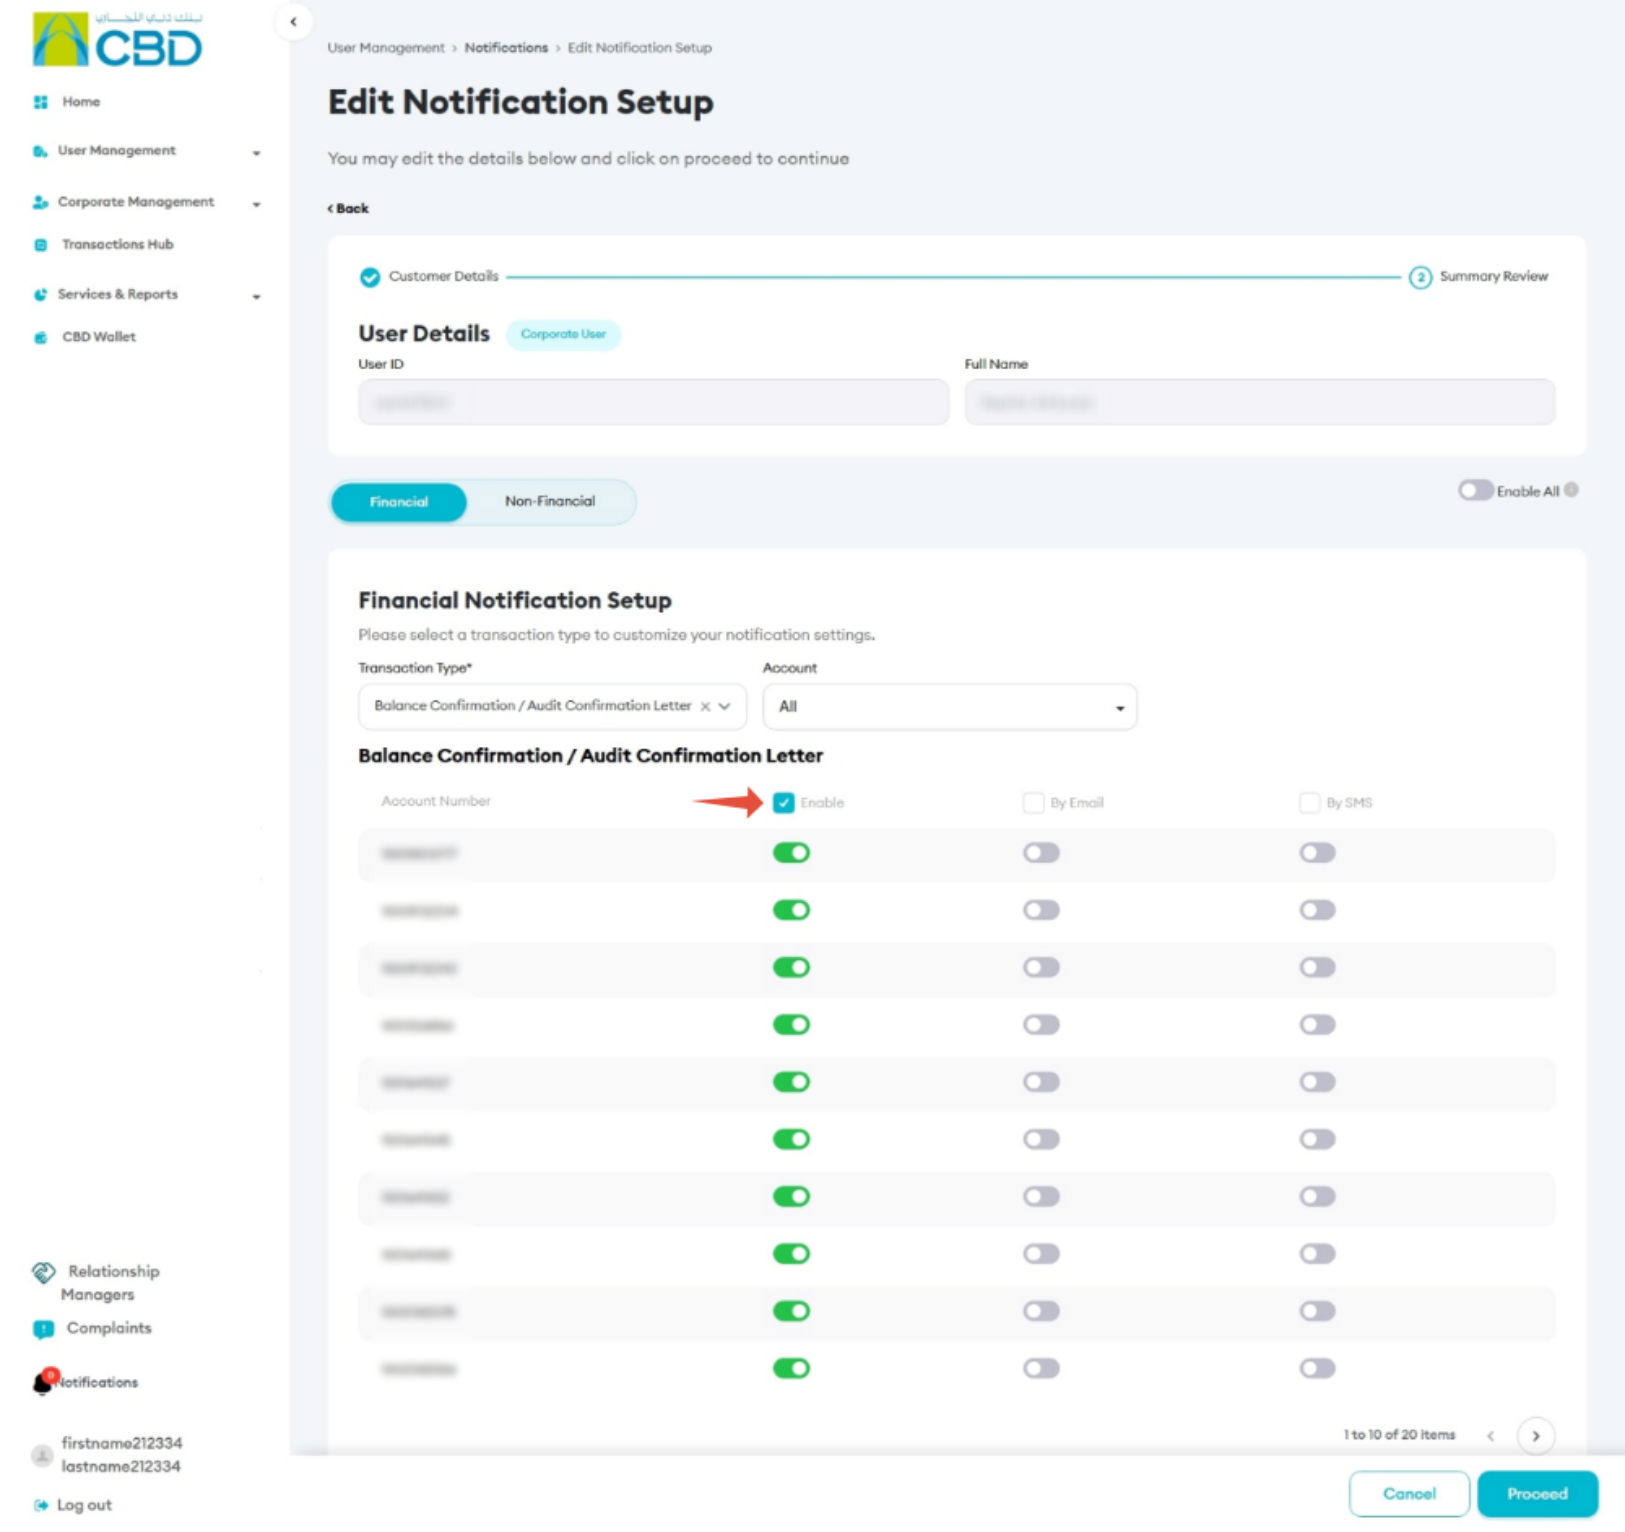
Enable All Notifications
To enable all available SMS and Email notifications at once:
- Click Enable All.
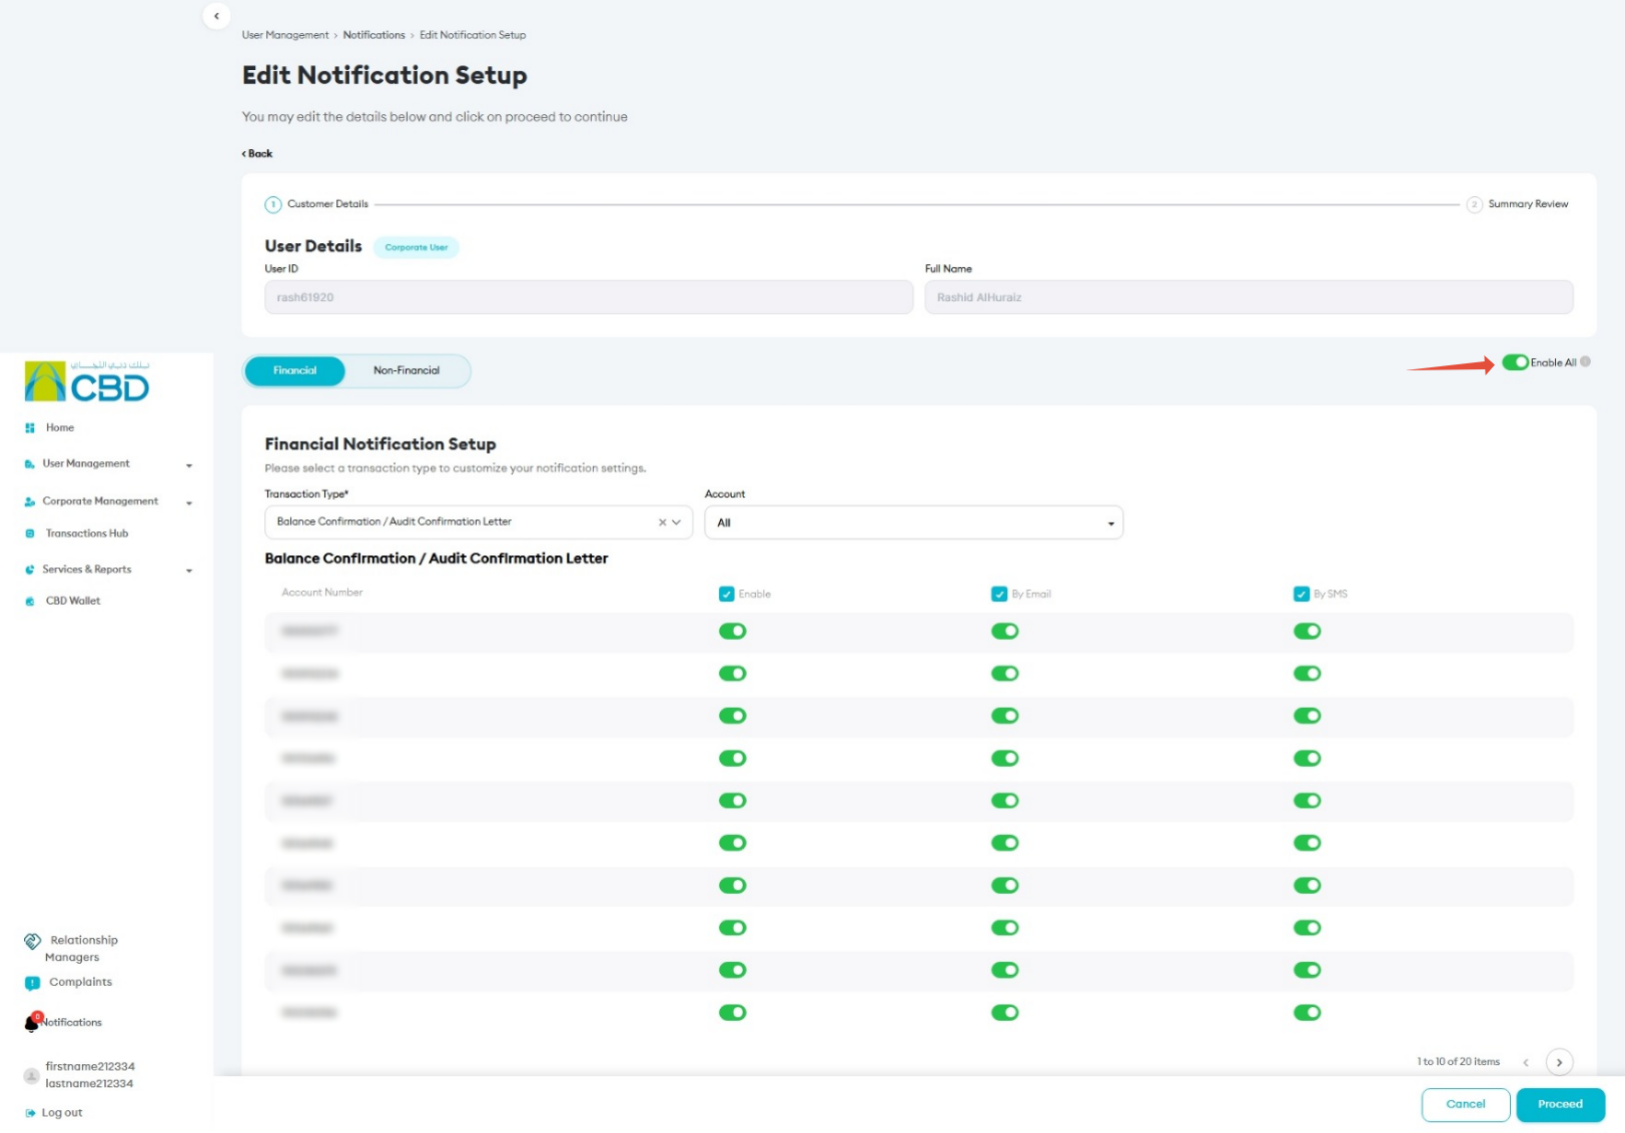
Configure Notifications Individually
Notification preferences can be configured differently for each account.
For example:
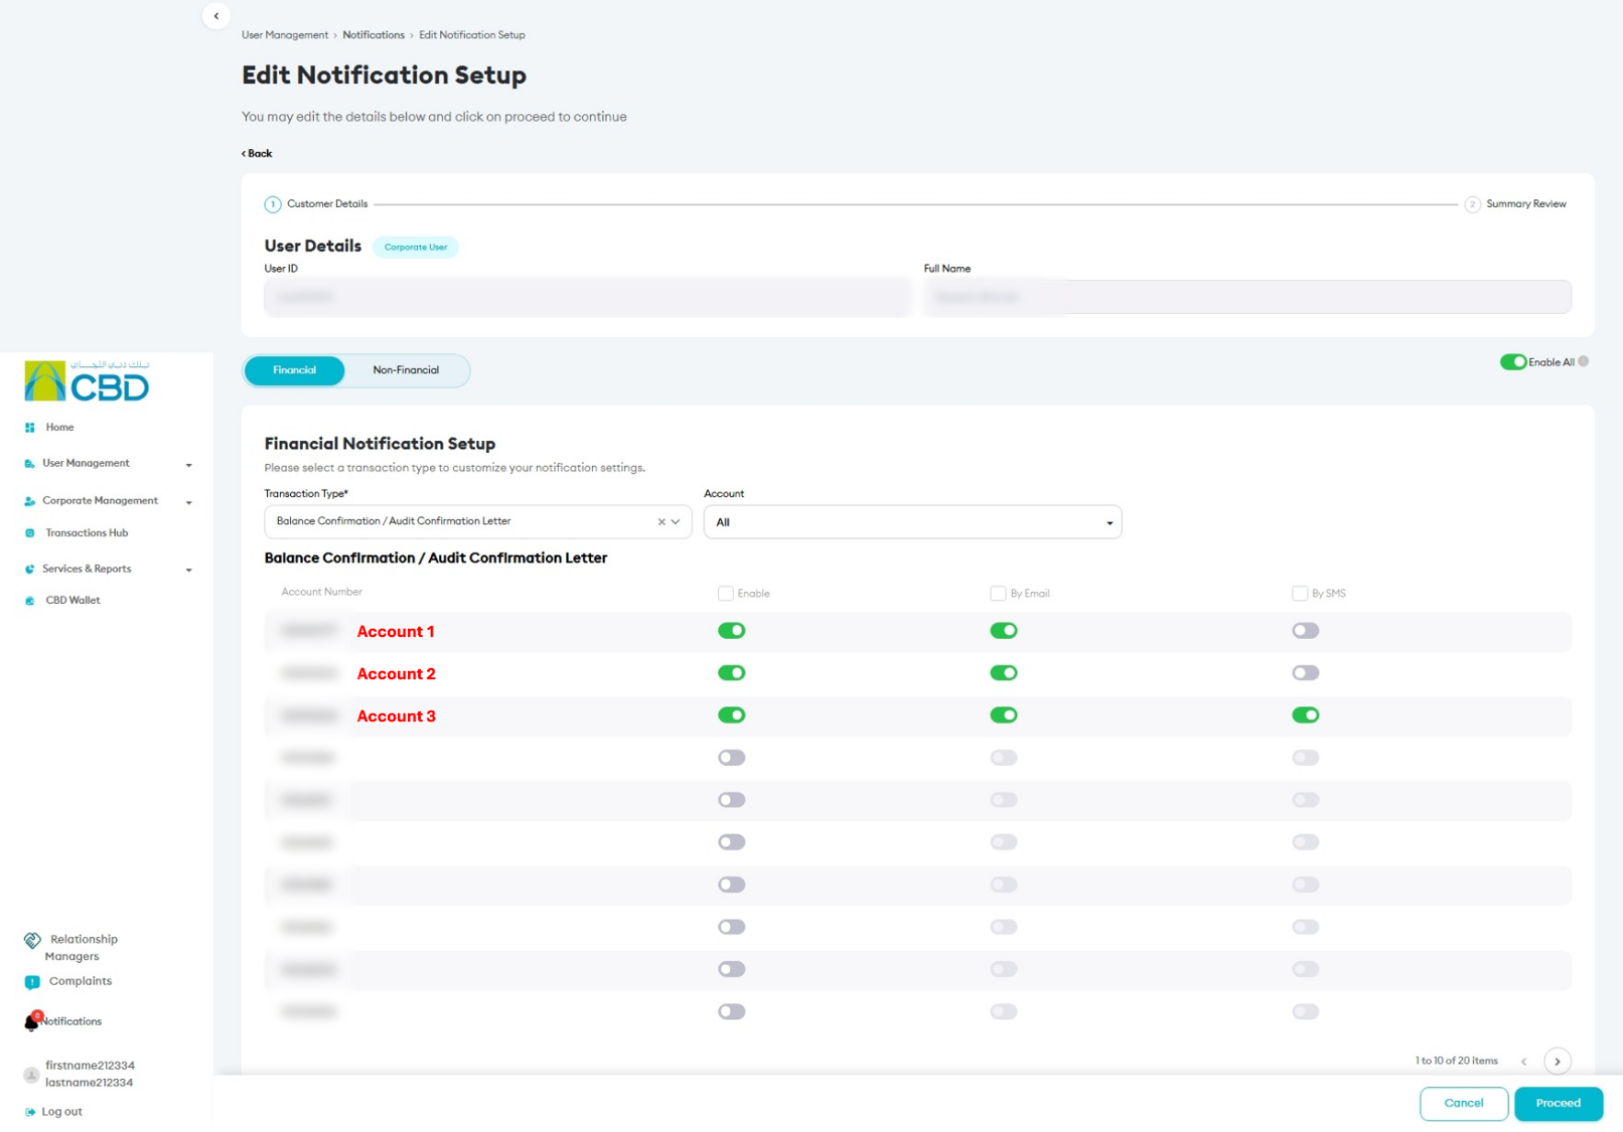
Account | SMS | |
Account 1 | Enabled | Disabled |
Account 2 | Enabled | Disabled |
Account 3 | Enabled | Enabled |
This allows administrators to customize notifications based on operational requirements.
After completing the required notification settings:
- Review the selected notification preferences.
- Click Proceed.
Step 6: Review and Submit
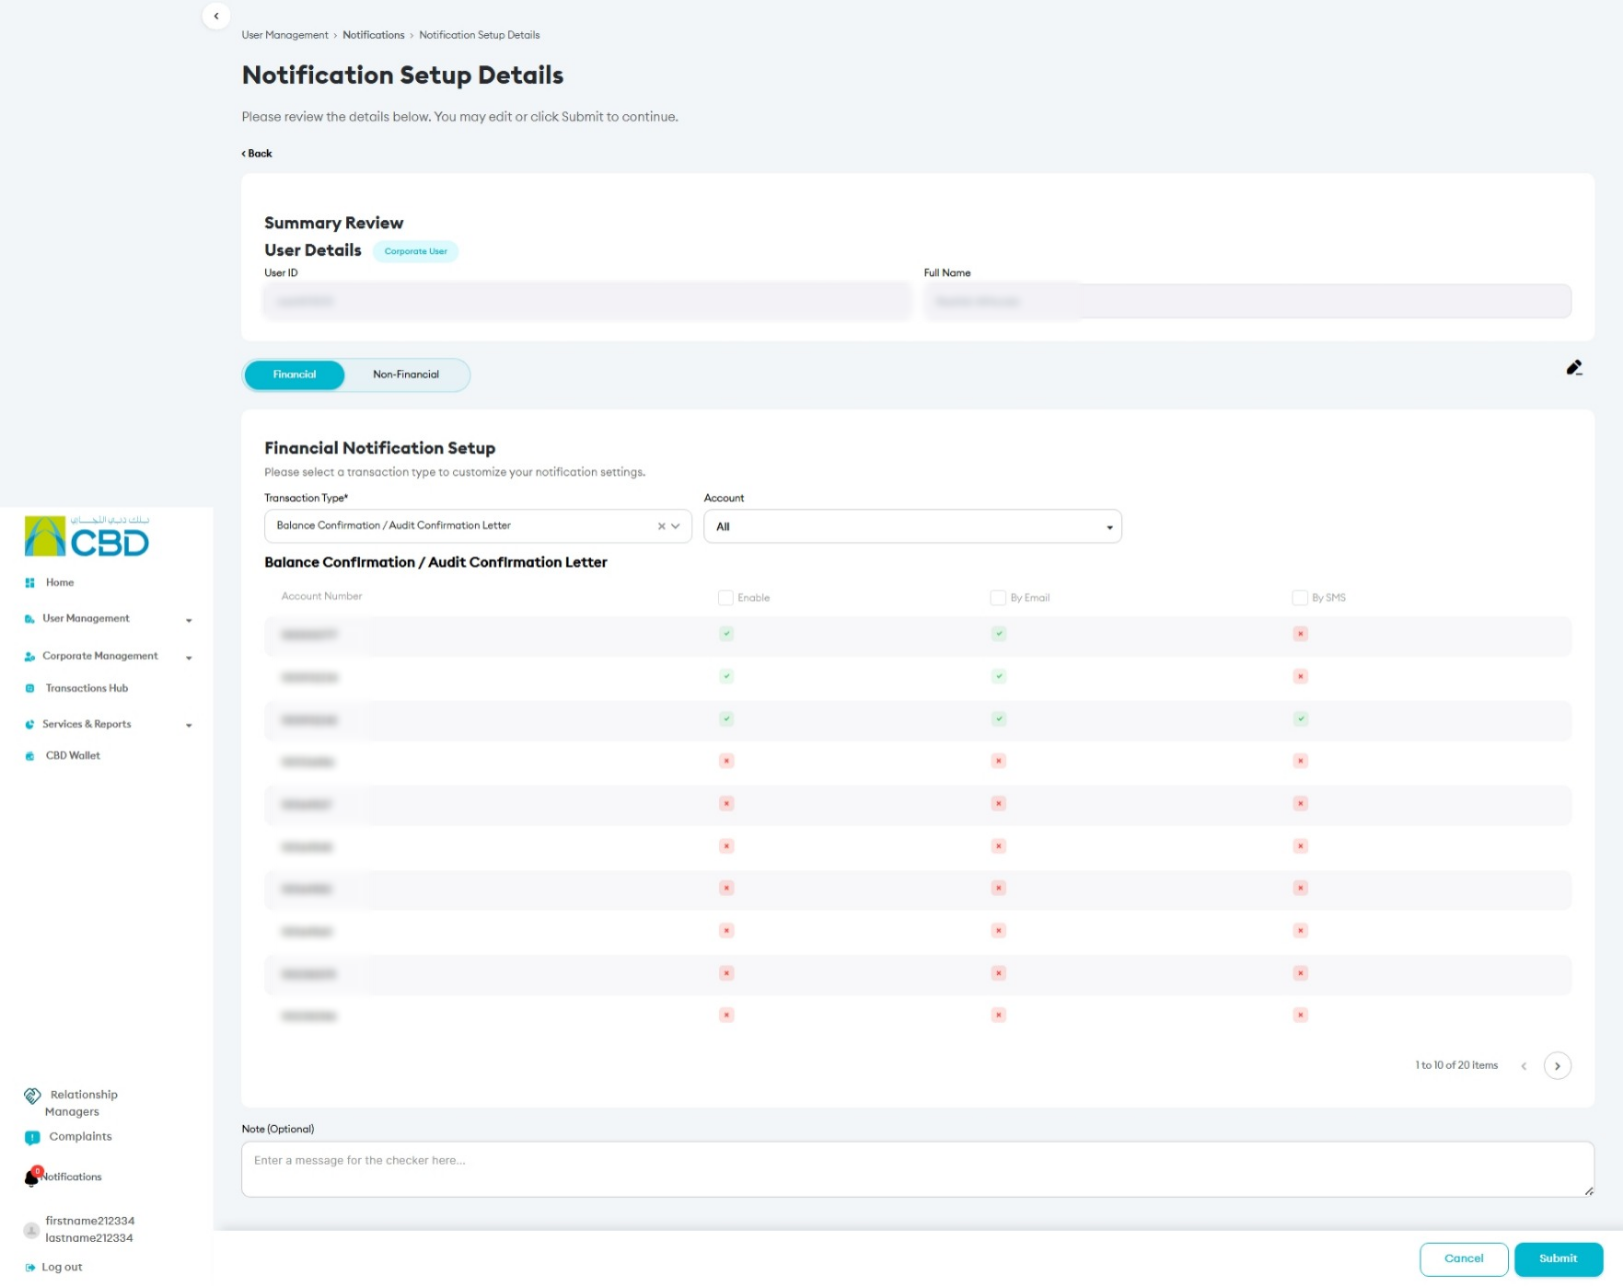
The Summary Review screen will display all notification settings selected.
- Review the details carefully.
- Confirm that the required notifications are enabled or disabled correctly.
On the review screen:
- Green indicates the notification is enabled.
- Red indicates the notification is disabled.
Click Submit to continue.
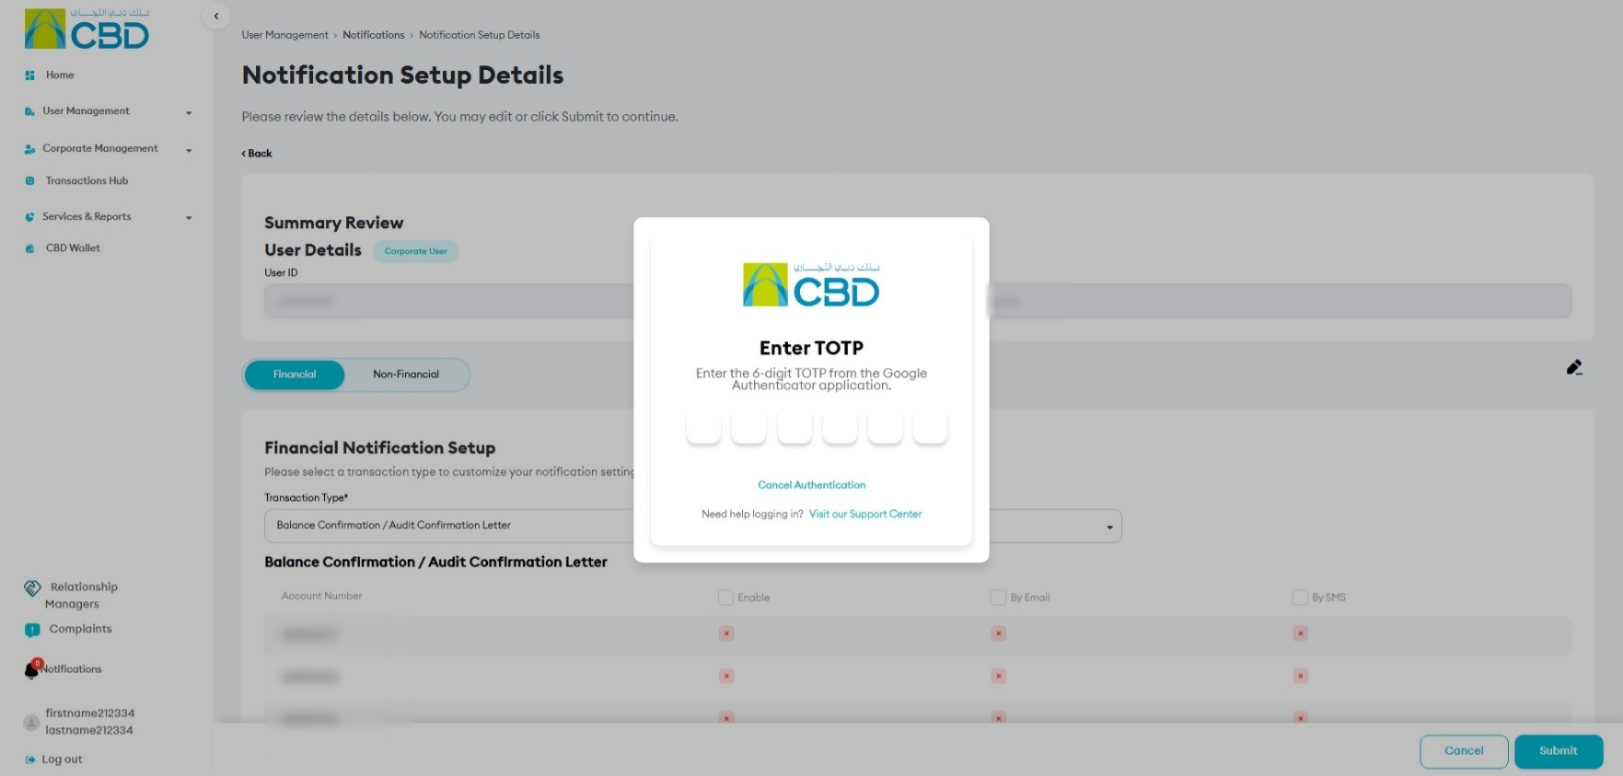
Step 7: Authenticate the Request
Complete authentication using one of the following methods:
iBusiness App Authentication
- Approve the request through the iBusiness Mobile App.
- Complete biometric authentication.
Google Authenticator
- Open the Google Authenticator application.
- Enter the generated One-Time Password (OTP).
Support Notes / Best Practices
- Ensure you have selected the correct user before modifying notification settings.
- Use All Accounts when the same notification settings should apply across all accounts.
- Review the Summary Review screen carefully before submission.
- Use Enable All only when all SMS and Email notifications are required.
- Configure Email and SMS notifications separately based on business and user requirements.
- Verify notification settings after approval to ensure they match the intended configuration.