Overview
A User List is a group of corporate users who perform similar roles or responsibilities within the organization.
Corporate Administrators can use the User Lists feature to:
- Create a User List
- Modify a User List
- Delete a User List
- Search for and view User List details
User Lists help simplify the management of groups of users by allowing administrators to organize users into a single list for easier administration.
Access User Lists
To manage User Lists:
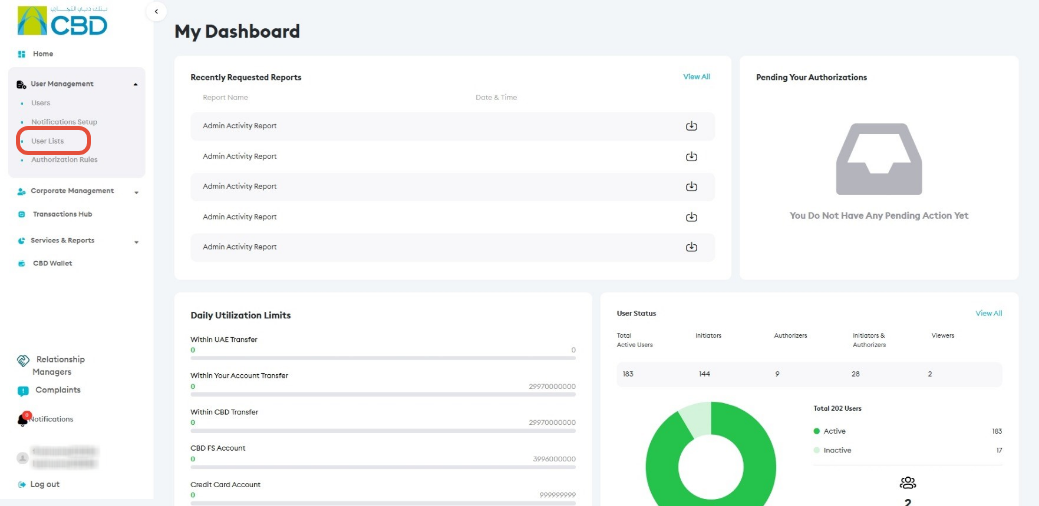
- Log in to iBusiness.
- Navigate to: User Management ➜ User Lists
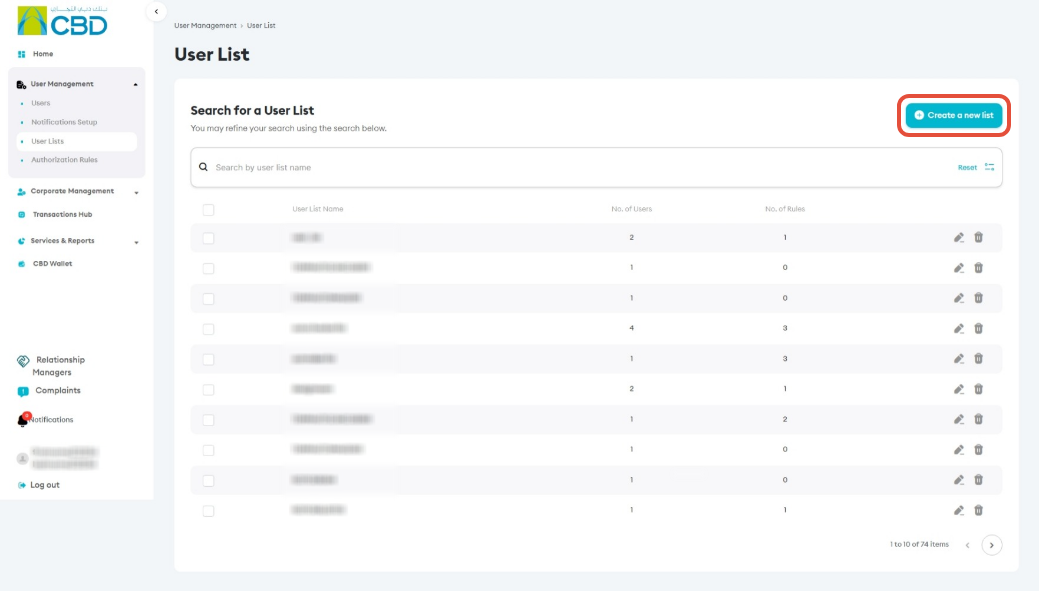
The system will display all available User Lists.
Create a User List
Step 1: Create a New List
- From the User Lists screen, click Create a New List.
Step 2: Enter User List Details
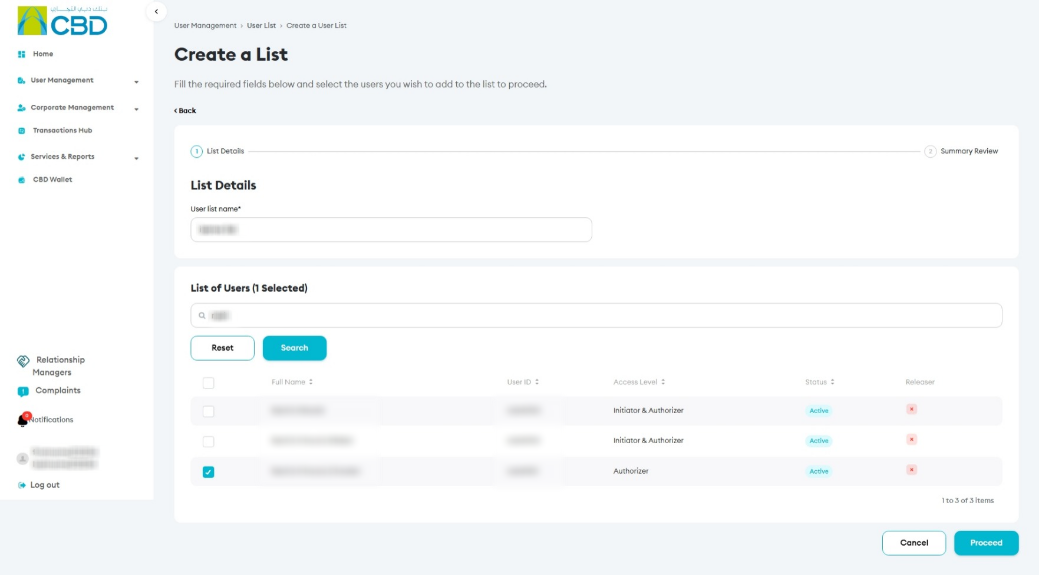
- Select the required User Type.
- Enter a User List Name.
- The system will display users based on the selected user type.
- If Corporate User is selected, all corporate users linked to the selected IRIM will be displayed.
- Select the checkbox next to each user you want to include in the list.
- Click Proceed.
Step 3: Review and Submit
- Review the User List details on the Summary screen.
- Verify that the correct users have been selected.
- Click Submit.
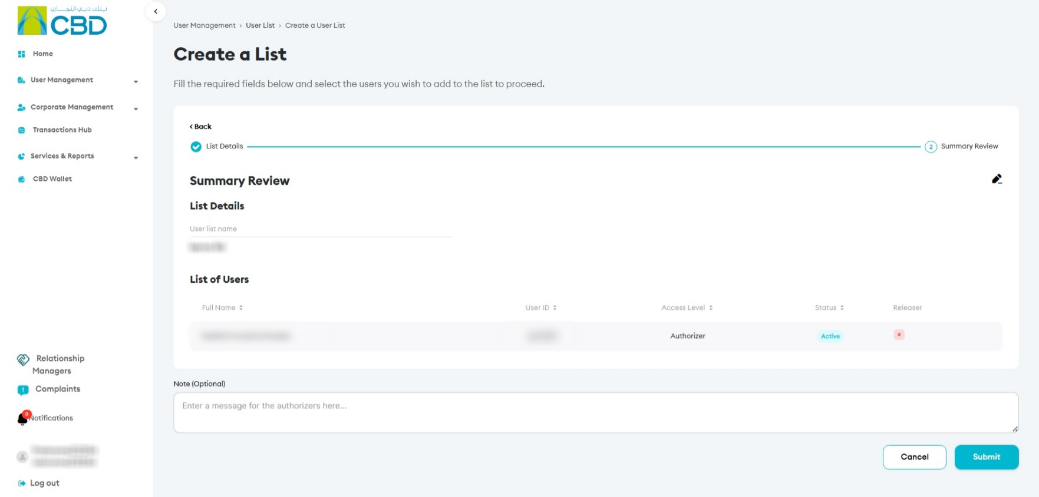
Step 4: Authenticate the Request
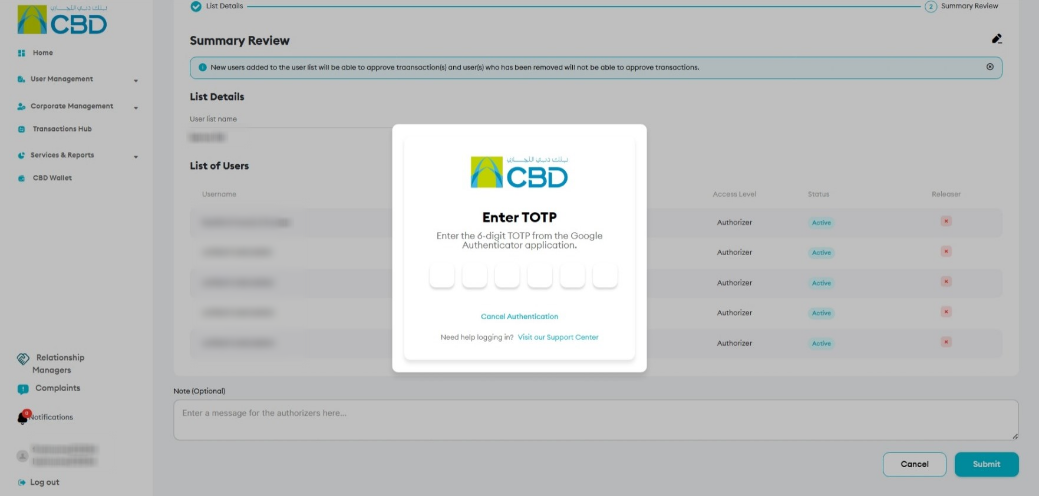
Complete authentication using one of the following methods:
iBusiness App Authentication
- Approve the request through the iBusiness Mobile App.
- Complete biometric or device verification.
Google Authenticator
- Open Google Authenticator.
- Enter the generated One-Time Password (OTP).
After successful authentication:
- A unique reference number will be generated.
- The request will be routed to the designated approver for authorization.
Modify a User List
Step 1: Locate the User List
- From the User Lists screen, use the search bar to locate the required User List.
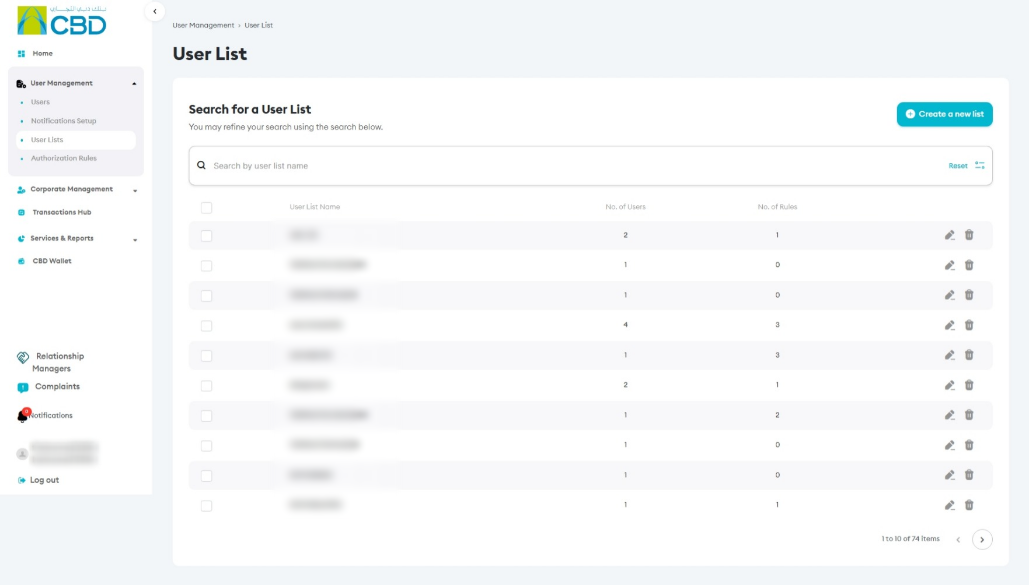
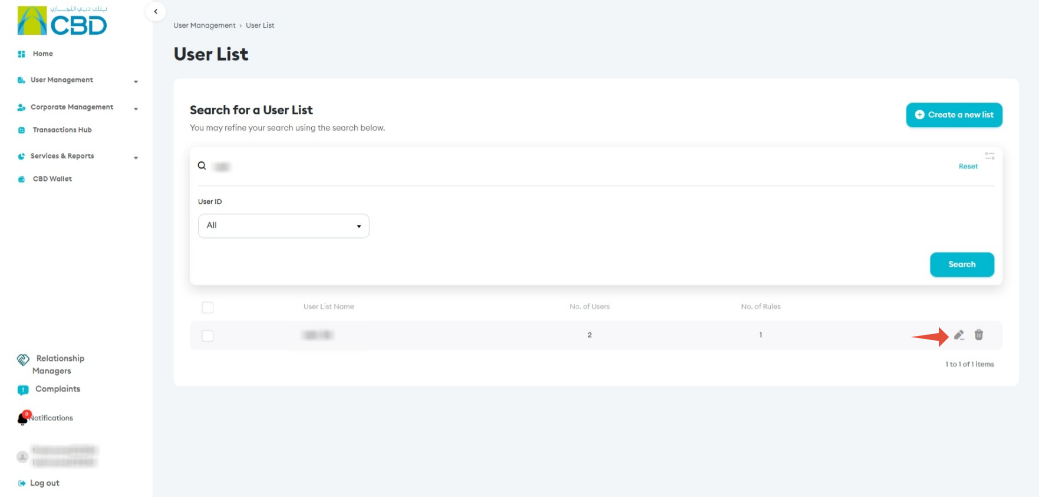
Step 2: Edit the User List
- Click the Edit (pencil) icon
 next to the User List.
 - Make the required changes, such as:
- Adding users
- Removing users
- Updating User Profile information
- Updating User Details
- Updating Access Details
- Click Proceed.
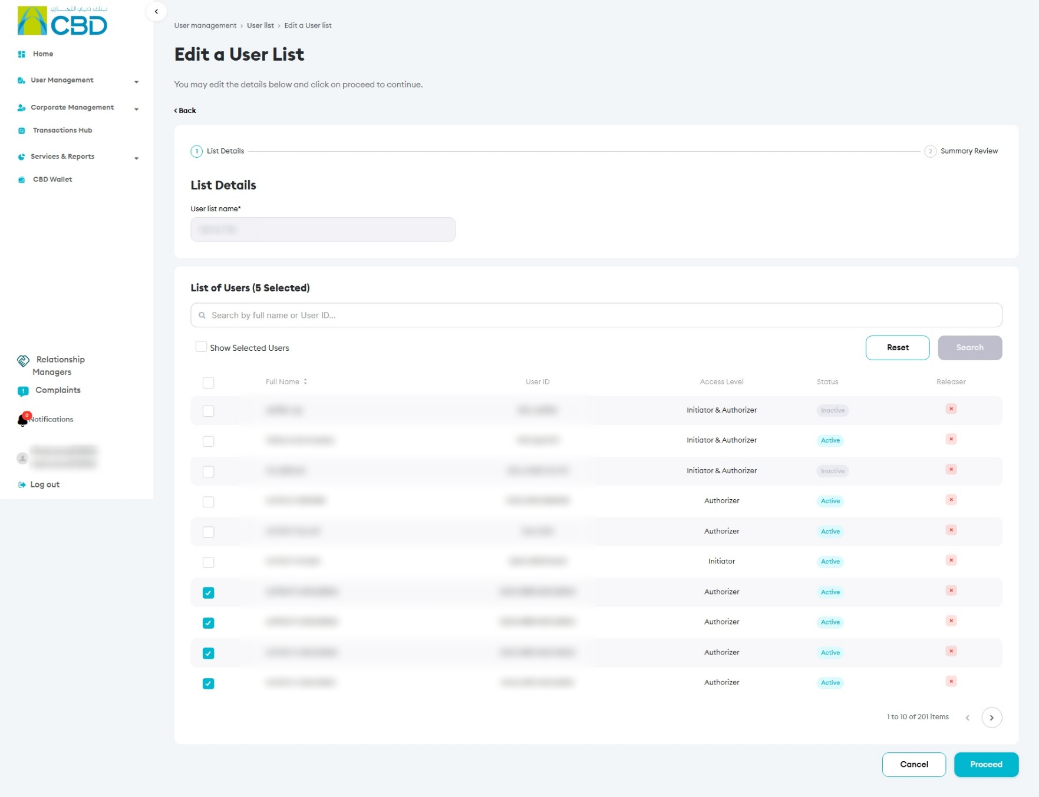
Step 3: Review and Submit Changes
- Review the updated User List details.
- Verify all changes.
- Click Submit.
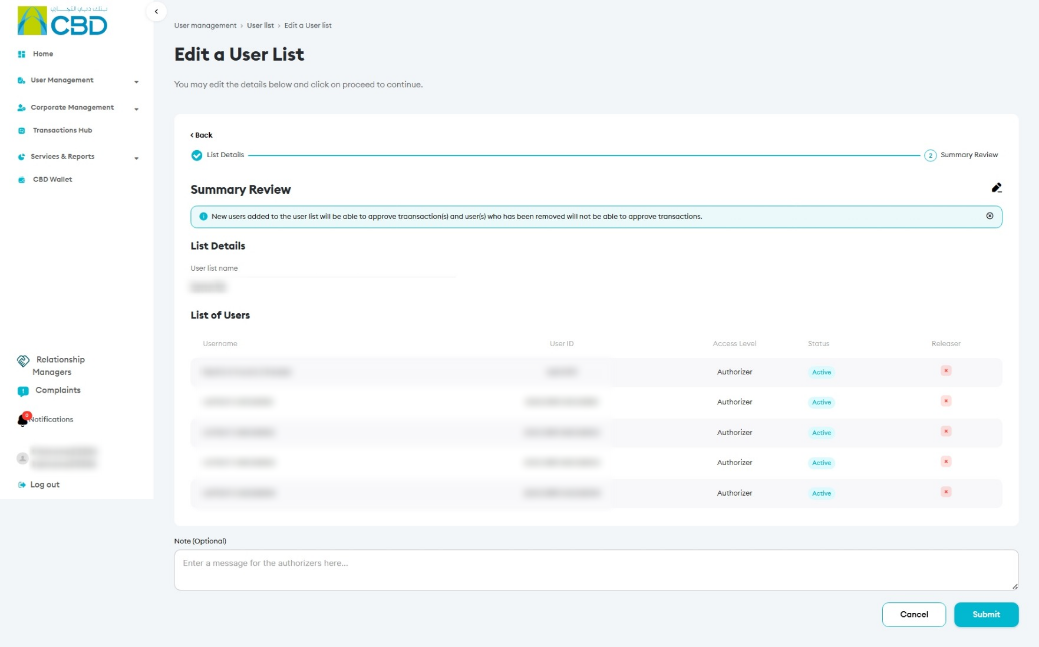
After authentication, a unique reference number will be generated and sent for approval.
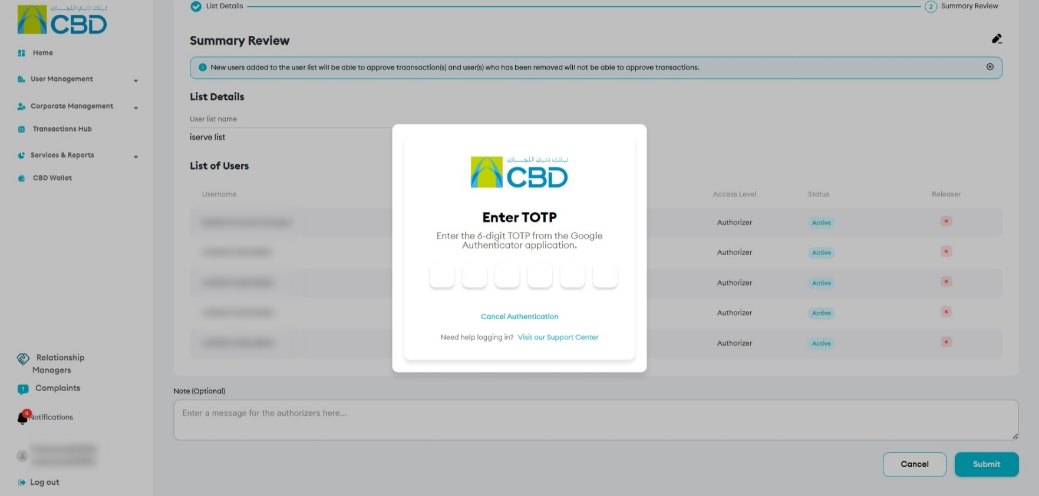
Delete the User List
- Click the Delete (trash) icon
 next to the User List.
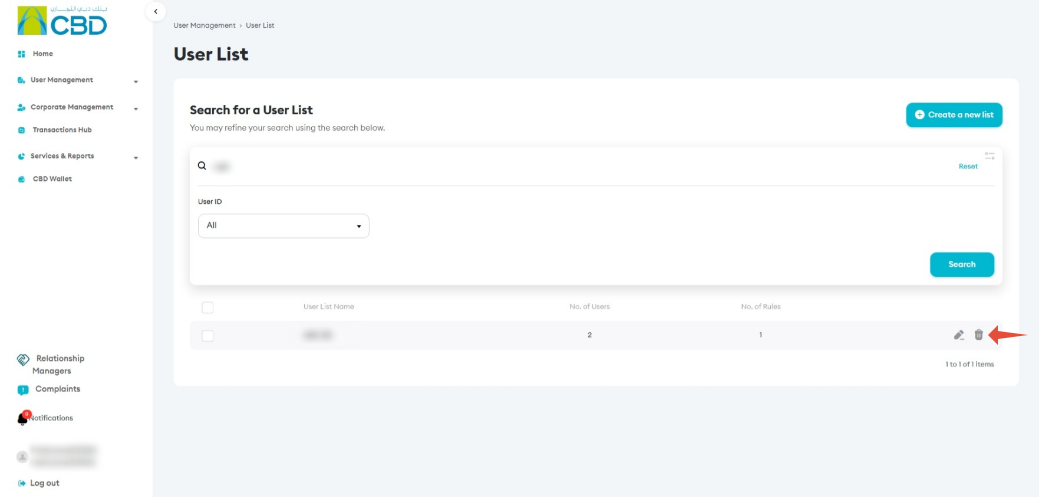
- Review the request.
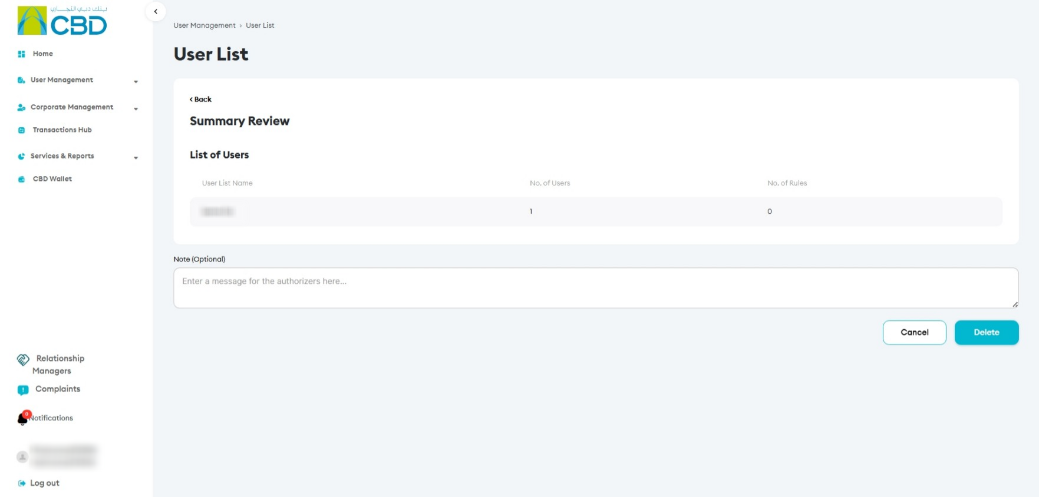
- Authenticate the request when prompted.
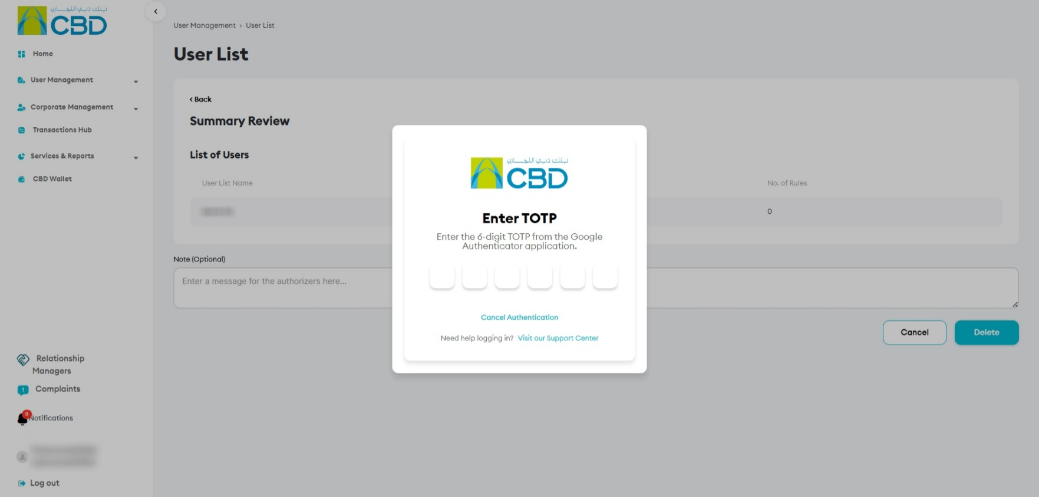
After successful authentication:
- A unique reference number will be generated.
- The request will be routed to the approver for authorization.
Search & View User List Details
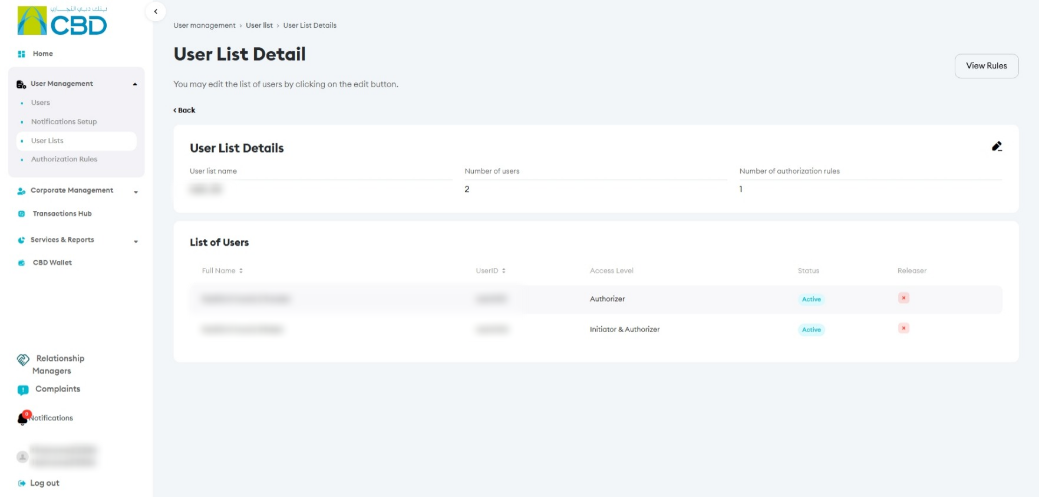
- The system will display existing user lists in the summary screen. Use the search bar to find the relevant list. Or select the user ID from the drop-down menu
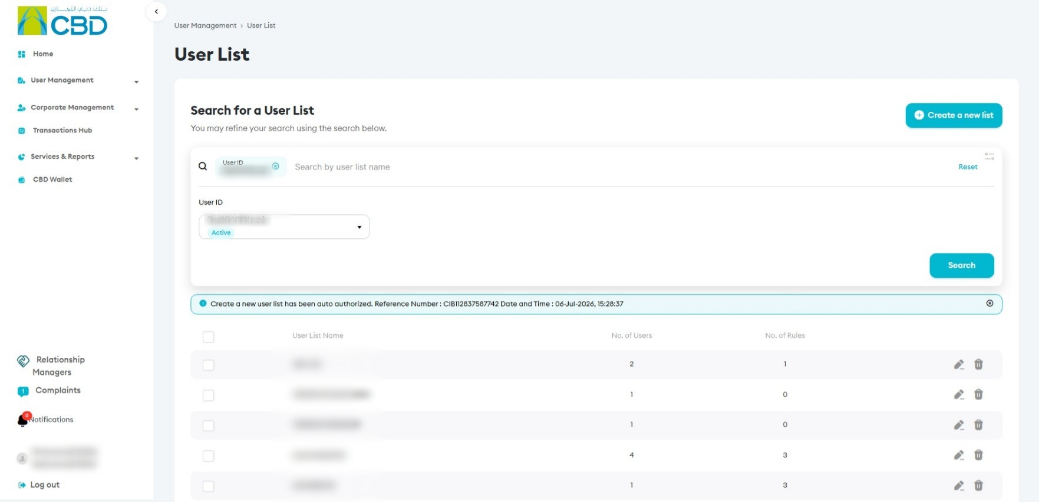
- Click on the User List Name to view its details.